- Order Catalog—Order Catalog data is shared among all of the facilities belonging to a single Facility Group, including all Order Types, Order Groups, and Order Definitions.
- Search repository—All order data returned from search operations is shared between all of the providers belonging to the facilities making up a single Facility Group within your institution.
- Providers and departments—Typically, providers belong to a single Facility Group. In some smaller deployments, your institution might not be sub-divided into multiple Facility Groups. In such cases, you can perform institution-level configuration for all of your providers through configuration of a single set of CPOE preferences. In such deployments where Facility Groups are not enabled, the Facility Group tab is replaced by the CPOE tab in the CPOE administrative user interface.
- Controlling access to who can submit orders by requiring PIN or password. For more information, see Determining the Authentication Method Used for Orders.
- Configuring display of the Order Entry screen that providers use to enter orders. For more information, see Configuring the Order Entry Screen.
- Determining rules that establish when to identify orders as duplicates. For more information, see Configuring Duplicate Detection Rules.
- Determining rules that establish how drug interaction alerts are displayed. For more information, see Configuring Alerts for Order Interactions.
Adding a Facility Group
You should always consult with your Commure Pro representative prior to adding facility groups to your configuration to ensure that your deployment environment meets all prerequisites. When you add a facility group from the administrative user interface, the process initiates an update from FDB (by default) and there might be prerequisites and additional configuration to ensure that your environment is ready. To add a facility group:- Click the Admin tab and then the Facility Group tab.
- Locate the Facility Group setting at the top of the screen and click the Add button.
- Enter both a name and abbreviation for your facility group and select all of its facilities.
- (optional) Make sure the Run FDB Update option remains selected by default.
- Click Save.
Assigning Order Definitions to Groups During Facility Creation
Customers now have the option to configure their system to automatically assign Order Definitions into the correct Order Groups upon creation of a new facility. Instead of assigning all Order Definitions from the (FDB) drug database to the more generic “Medication” Order Group, Order Definitions will instead be assigned to the correct Order Group that best matches the interface type from the back-end system.This configuration option is restricted to customers using MEDITECH as their back-end system.
Accessing the Facility Group Settings
All CPOE settings that are defined at the Facility Group level are global across all facilities comprising a particular Facility Group. These settings take effect as default settings, and apply to all users and departments belonging to a particular Facility Group. Some of these settings (such as access to Medication Reconciliation) can be configured at both the Facility Group and user levels, allowing you to override a Facility Group setting for one or more individual users belonging to the group. Typically, level 1 administrators have access to configure these settings, which affect users at all levels, including institution-level administrators, department administrators, and provider end-users. You can configure selected level 2 administrators to access these configuration settings also. For more information, see Controlling a User’s Administrative Access to CPOE.The CPOE application can be configured to display the site-wide settings differently for deployments that do not use multiple Facility Groups. Level 0 administrators can disable the Site Administration setting CPOE Facility Groups (Admin > Institution > Edit Settings > Site Administration > CPOE Facility Groups), which changes the label of the institution-wide settings tab from Facility Group to CPOE.
-
Click the Admin tab and then the Facility Group or CPOE tab.
In deployments where Facility Groups are not enabled, the Facility Group tab is replaced by the CPOE tab.
- If your institution uses multiple Facility Groups, select the Facility Group you want to configure from the Facility Group drop-down list.
- Click the CPOE Preferences link. The CPOE Preferences screen provides access to most of the administrative settings that enable level 1 (and selected level 2) administrators to configure the CPOE application. Each of the CPOE Preference settings is described below, in the context of the task that involves configuration of the individual setting(s).
Restricting Order Data to One or More Facilities
For multi-facility deployments, the CPOE application supports the restriction of some order data to one or more facilities within a facility group. This functionality, which is configurable on a per-Facility Group basis, lets administrators restrict Order Groups and Order Definitions to one or more facilities within a facility group.Before enabling and configuring facility restrictions, consult with your Commure Pro representative as this feature requires bridge configuration as a prerequisite. Note that while you can continue to make changes to restrictions in Commure Pro CPOE, the system will no longer pull restrictions from the back-end system once you enable this feature.
- Click the Admin tab and then the Facility Group or CPOE tab.
In deployments where Facility Groups are not enabled, the Facility Group tab is replaced by the CPOE tab.
- If your institution uses multiple Facility Groups, select the Facility Group you want to configure from the Facility Group drop-down list.
- Click the CPOE Preferences link, and then the Edit button.
-
Locate the setting Enable Facility Configuration (at the top of the screen) and click Yes.
Before enabling this setting, it is important to note that you cannot make changes to this configuration once facility-specific data has been read from your back-end system or added from the CPOE application.
-
(optional) Locate the setting Allow manual facility restriction for non-medications and order sets and choose either:
- Yes: Authorized administrators can manually configure facility restrictions for non-medication orders and Order Sets pulled from the back-end system.
- No: The bridge pulls any facility restrictions for non-medication orders and Order Sets from the back-end system and administrators are prevented from manually configuring these in Commure Pro CPOE.
-
Click Save.
Authorized administrators are given access to configuring facility restrictions in the following areas of the admin user interface:
- The CPOE Order Group Maintenance pane (Admin > Facility Group > Order Groups link), where an Add Facility Restriction link shows with the Restricted to Facilities property for all Order Groups, including both medication and non-medication Order Groups.
- The CPOE Order Set Maintenance pane (Admin > Facility Group > Order Sets), where a Restrict to Facility button displays among the other buttons available for configuring Order Sets. If you enabled the setting in Step 5, you are also given access to configure Order Definitions.
- The CPOE Order Definition Maintenance pane (Admin > Facility Group > Order Definitions link), where an Add Facility Restriction link shows with the Restricted to Facilities property for orders belonging to all Order Types except medication orders.
Restricting Order Entry to a Provider’s Authorized Facilities
You can configure CPOE, Medication Reconciliation, and ePrescribing so that providers are restricted to entering, reconciling, and electronically prescribing orders only at authorized facilities (as defined in MEDITECH back-end systems only). For a provider to be authorized at a particular facility, the current patient (for whom the provider is entering orders) must have at least one active visit in a facility where the provider is authorized to enter orders. You can see the complete list of facilities where a particular provider is authorized to enter orders on the Provider Maintenance pane (Admin > System Management > Providers > [select provider] > Facilities with Ordering Privileges). This list of facilities with ordering privileges is obtained from the back-end system (MEDITECH only) When this restriction is imposed for a specified Facility Group, providers are prevented from submitting orders for patients that have no active visits in any facility where the provider is authorized for order entry. Note that this restriction is enforced at all locations where providers are registered, so a provider’s ability to submit orders might be compromised at locations that previously allowed for submission of these orders. To restrict provider order entry to authorized facilities (among the current patient’s list of active visits):- Click the Admin tab and then the Facility Group or CPOE tab.
In deployments where Facility Groups are not enabled, the Facility Group tab is replaced by the CPOE tab.
- If your institution uses multiple Facility Groups, select the Facility Group you want to configure from the Facility Group drop-down list.
- Click the CPOE Preferences link, and then the Edit button.
- Locate and enable the setting Respect Provider Facility Ordering Privileges.
- Click Save.
- (optional) You can review a provider’s list of authorized facilities from the Provider Maintenance pane (Admin > System Management > Providers > [select provider] > Facilities with Ordering Privileges).
Determining the Authentication Method Used for Orders
You can require all users in a Facility Group to provide a password or Personal Identification Number (PIN) when submitting an order. When your system is configured to require authentication for CPOE, all users are prompted to enter their password or PIN the first time that they attempt to submit orders using the Sign/Submit button. During subsequent order submissions in the same session, the system continues to use a cached copy of the user’s password or PIN until the cache timeout period expires. This is true in both the CPOE and Mobile CPOE applications. If you configure the system to require password or PIN authentication for CPOE, you can also give providers the option of using the device’s fingerprint sensor in place of the password or PIN when signing orders in the Mobile CPOE application. Certain later model Apple and Android devices are equipped with fingerprint sensors; this is known as the Touch ID™ on Apple devices, and Fingerprint Authentication on Android devices. When these security features are enabled on a device, the user can touch their finger to the device sensor, which reads their fingerprint to confirm their identity. This feature can be used to unlock the device from sleep mode, or it can be used within an application such as Commure Pro. If enabled for the Commure Pro Mobile CPOE application, providers can use their device’s sensor to sign and submit their orders, instead of manually entering a password or PIN. To configure CPOE to require authentication for submitting orders:- Click the Admin tab and then the Facility Group or CPOE tab.
In deployments where Facility Groups are not enabled, the Facility Group tab is replaced by the CPOE tab.
- If your institution uses multiple Facility Groups, select the Facility Group you want to configure from the Facility Group drop-down list.
- Click the Edit button.
- Locate the setting eSignature Validation Method and select the type of authentication that you want to require. You can select from the values PIN, Password, or None. For more information, see eSignature Validation Method.
- (optional) If you specify the value PIN or Password for the validation method, use this setting Allow biometrics in place of validation method when submitting orders on a mobile device to determine whether biometric authentication (fingerprint or facial recognition) can be used in place of the PIN or password. Select either Yes or No to enable or disable biometric authentication for all Mobile CPOE users. For more information, see Allow biometrics in place of validation method when submitting orders on a mobile device.
-
(optional) If you specify the value PIN or Password for the validation method, use the setting Validation Cache Time (minutes) to enter the duration to cache the PIN or password in the system. When this time limit is exceeded, users are required to re-enter their PIN or password. If this value is set to 0, users will be required to enter their PIN or password each time that they submit an order.
Users are not required to enter their PIN or password during order re-submissions, when viewing or resolving alerts about medication interactions or duplicate medications.
- Click Save. The access control method that you selected is now used to authenticate users in the selected Facility Group before they can submit orders from the Order Entry screen.
Order Submission Access Settings
The following Facility Group preference is used to determine who can sign and submit orders from the Add Order screen. eSignature Validation Method This setting determines the type of authentication used to validate users when they submit an order. The available validation options are:- None: Specify this value if you do not plan to require providers to authenticate when they submit an order.
- Password: Specify this value if you plan to have providers authenticate by entering their Commure Pro password when they submit an order.
- PIN: Specify this value if you plan to have providers authenticate by entering their PIN when they submit an order. For instance, providers might authenticate using their MEDITECH® PIN. Allow biometrics in place of validation method when submitting orders on a mobile device This setting determines whether the user may use biometric authentication (fingerprint or facial recognition) on an Apple or Android device to sign and submit an order in the Mobile CPOE application, in place of a password or PIN. After selecting the Sign/Submit button, they are prompted to touch their finger to the sensor or show their face to the camera, their identity is confirmed, their last known password or PIN is automatically entered for them behind the scenes, and their orders are signed and submitted.
- No (the default): Select No if you do not want to allow biometric authentication when providers submit orders.
- Yes: Select Yes if you want to allow biometric authentication in place of password or PIN when providers submit orders. Note that this setting displays as inactive when the eSignature Validation Method setting specifies the value None.
There is a separate setting (Admin > Institution > Device Settings > All HH users to log in using Biometrics) to allow biometric authentication to be used when logging into the Commure Pro application. The two settings work independently; one does not affect the other. See the Administration Tools User’s Guide for more information.
Configuring the Order Entry Screen
There are several Facility Group preferences that govern the behavior of the Order Entry screen that providers use to enter orders. The following procedures enable you to control several properties of the Order Entry screen so that you can customize how this screen is used by all providers belonging to a particular Facility Group or throughout your entire institution.Configuring the Duration to Display Orders
You can configure the CPOE application to automatically shorten your order list based on specific criteria. This functionality provides a way for you to maintain control over the lists that display orders to the providers belonging to a particular Facility Group or throughout your institution. There are two scenarios in which you might decide to configure a display duration for order data:- Corresponding orders exist between CPOE and your facility’s back-end system In this scenario, your providers must be enabled to create new orders directly in the CPOE application. If you plan to create new Order Groups and Order Definitions in CPOE, you should implement an aging policy for new orders as corresponding orders are created from your back-end system to replace the new orders that are temporarily stored in the CPOE application. Note that these corresponding orders are not matching orders per se, but serve to directly represent these back-end orders in the CPOE application.
- Expiration of an order’s activity period Orders can be configured to display on the Active Order List for a configurable period of time. Setting an expiration time can be useful when an Order Definition is expected to remain relevant to providers for only a short period of time. For example, you might choose to set an expiration period for a provider consult.
Configuring an Expiration Time for Corresponding Orders
Some of the orders that you create in the CPOE application might be destined for your facility’s back-end system, which maintains the definitive version of each Order Group and Order Definition. Unless you are only using Commure Pro CPOE to create print-only orders, it is expected that all “local” orders (those created directly in the CPOE application) are regularly replaced by corresponding orders on the back-end system. These “official” order records then over-write the original, “local” orders the next time updates are made from the back-end system. To minimize confusion that might arise from the display of duplicate versions of an order after the corresponding back-end order is created, you can set an expire time for the “local” order that is created in CPOE. Note that this setting specifies an expiration time measuring the duration after the second order is created. This ensures that “local” orders are not deleted in the event that the back-end system fails to create a corresponding order. Two distinct configuration settings are provided so that you can independently configure the expiration times for medication and non-medication orders. To set an expiration time for CPOE orders with a corresponding back-end order:- Click the Admin tab and then the Facility Group or CPOE tab.
In deployments where Facility Groups are not enabled, the Facility Group tab is replaced by the CPOE tab.
- If your institution uses multiple Facility Groups, select the Facility Group you want to configure from the Facility Group drop-down list.
- Click the Edit button.
-
Locate the following setting(s) and specify a numerical value in the associated field(s):
- Timeframe to display Commure Pro Medication orders that have a corresponding backend order (minutes)
- Timeframe to display Commure Pro Non-Medication orders that have a corresponding backend order (minutes) These values represent the time (minutes) that an order should remain stored in the CPOE application once a corresponding order is created on your facility’s back-end system. The default value is 30 minutes for each of these settings.
- Click Save. The order becomes hidden after the specified duration.
Assigning Order End Dates Automatically in Relation to Order Start Dates
Administrators can configure their system so that all orders pulled from the back-end system are automatically assigned an end date if none has been defined in the back-end system. In such cases, this end date is defined in terms of the specific duration (in days) after the order start date that has been set in the back-end system. This configuration is available for configuration of both Order Groups and Order Definitions. When set for an Order Group, this configuration applies to all Order Definitions belonging to the Order Group that do not specify an end date, automatically assigning an end date that is to occur a specific number of days after the order start date. When set for an Order Definition, this end date is only assigned when the individual Order Definition does not specify an end date. When an Order Definition and its Order Group both use this setting, note that configuration of the Order Definition takes precedence over its Group setting. To configure order end dates to be set automatically in relation to their start date:-
Click the Admin tab and then the Facility Group or CPOE tab.
In deployments where Facility Groups are not enabled, the Facility Group tab is replaced by the CPOE tab.
- If your institution uses multiple Facility Groups, select the Facility Group you want to configure from the Facility Group drop-down list.
- Depending on the type of order category you want to configure, click either the Order Groups or the Order Definitions link. Either the CPOE Order Group Maintenance page or the CPOE Order Definition Maintenance page is displayed.
- Use the search criteria fields provided to locate the Order Group(s) or Order Definition(s) you want to edit.
- Select the Order Group(s) or Order Definition(s) that you want and click the Edit button that displays in the lower-right portion of the screen. The Edit CPOE Order Group or Edit CPOE Order Definition screen displays.
- Locate the setting Set future end date N days after start date and enter a numerical value into its associated text field. You must enter a value in the range 0-99 into this field. Note that the value ‘0’ indicates that the end date is to be assigned the same date as the order start date.
- Click Save. All back-end orders matching the specified Order Group or Order Definition are now automatically assigned an end date that occurs this number of days after their start date. In the case of configurations made both to an Order Definition and its Order Group, the Order Definition configuration takes precedence over the Order Group setting.
Order Duration and Expiration Settings
The following institution-level preferences are used to configure the default window period for displaying orders (belonging to all Order Types) from the back-end system. Note that the duration that orders from the past remain on the Add Orders list pertains to inactive orders, while the duration into the future that orders show on this list applies to both inactive and active orders. Default # of days back for all order types (inactive orders only) Specifies the duration that inactive orders from the back-end system remain on the Add Orders list. Default # of days forward for all order types Specifies how far into the future orders (both active and inactive) display on the Add Orders list. Set future end date N days after start date Specifies an end date that is defined in relation to duration (in days) after the order start date. This end date is automatically assigned to a specified Order Definition (if configured at Order Definition level) or to all Order Definitions belonging to an Order Group (if configured at Order Group level). The following Facility Group preferences are used to configure the duration that orders display in the Add Order screen.It is recommended that you configure this display value to specify a time value that takes your institution’s workflow into account. In many institutions, medication orders must pass through your institution’s pharmacy before these actual orders show up in the Commure Pro CPOE application.
All Commure Pro orders that are not configured to be hidden by this setting (or by the setting “Auto-hide from Active Order List”) remain on the Active Orders list unless (or until) these orders are matched with orders from the back-end system. Display of these orders is not affected by the ‘from’ and ‘thru’ filter settings on the Order List window.
All Commure Pro orders that are not configured to be hidden by this setting (or by the setting “Auto-hide from Active Order List”) remain on the Active Orders list unless (or until) these orders are matched with orders from the back-end system. Display of these orders is not affected by the ‘from’ and ‘thru’ filter settings on the Order List window.
Order Matching
The CPOE application can synchronize orders that interface with backend systems. In an interfaced environment, this prevents orders that have completed a round trip and have arrived back to Commure Pro from going undetected, causing the order to be duplicated in a Commure Pro order list.Customers looking to configure their system so that order matching in CPOE more precisely matches how MEDITECH handles updates to orders (FULL / LIMITED / COPY EDITS) are advised to consult with their Commure Care representative to configure the outbound interface to fully support these definitions.
- When an order returns from the back-end system with an identifier (the most recent of these, if multiple IDs are found) that corresponds to the original Commure Pro order, the back-end order replaces the Commure Pro order as part of all CPOE and Med Rec workflows, including existing orders for AMR, Transfer Medications and Discharge Hospital Medications that display to a provider as part of reconciliation.
- When there is more than one back end order that corresponds to the same Commure Pro order (for example a non-med series order, or a medication STAT and then recurring order), the first back end order to arrive in Commure Pro replaces the Commure Pro order, thereby removing it from an order list.
- When a Commure Pro order is discontinued and is then replaced by a back end order, the back end order displays with a strike through, even if the discontinued status has not completed a round trip.
- When a back end order is entered using a generic mnemonic that is not coded for interaction checking, the corresponding Commure Pro order definition will continue to be used for interaction checking after the back end order has completed a round trip.
The back end order must still be active.
Granting Providers Access to View the Order History Audit
The Order History Audit provides a detailed history of all activity pertaining to an individual order, identifying the doctor who entered the order, the doctor(s) who signed or co-signed the order, indication of order status changes or transmission activity over the outbound or inbound interfaces. Access to viewing the Order History Audit is granted to users per-facility group. When this feature is enabled, a View Order History link displays just below the Order Detail header for all users belonging to the specified facility group. Authorized administrators can grant users access to view the Order History Audit by enabling the setting Show the Order History Option in CPOE Order Detail Screens (Admin > Facility Group > CPOE Preferences > [select facility group]).Creating a Patient Metrics Form to Display Clinical Data
Using the Commure Pro Forms application, you can create a custom Patient Metrics form so that providers can reference clinical data during order entry. When you create this form and configure it, providers can access the form from the Add Order screen. Note that this form is configurable on a per-facility basis, rather than per-Facility Group. This configuration option provides more flexibility in how individual facilities choose to user this form to display patient data. For more information about creating the Patient Metrics form, consult a Commure Pro representative or see the Commure Pro Forms User’s Guide. For information about configuring the display of this form, see Displaying the Patient Metrics Form on the Add Order Screen below.Displaying the Patient Metrics Form on the Add Order Screen
If you create one or more custom forms that providers can use to access clinical data during order entry, you must enable this form to display on the Add Order screen. To assign a Clinical Data form to display on the Add Order screen:- Click the Admin tab and then the Location tab.
- Select the Facility you want to configure from the list of available facilities.
- Click the Edit button in the lower portion of the screen.
- Locate the Clinical Data Form setting and use the search icon to navigate to and select a form from the drop-down menu. You must create a Clinical Data Form before you can select one from the Edit Location Prefs window. For more information about creating a Patient Metrics form, consult a Commure Pro representative.
- Click Save. The Clinical Data form is assigned, and will enable providers to reference this data from the Add Order screen.
Patient Metrics Form Settings
The following Facility Group preference is used to configure the Patient Metrics form that you can use to display clinical data to your providers during the order entry process. Clinical Data Form This setting enables you to specify a Patient Metrics form that users in your institution can use as a resource to obtain clinical data during order entry. Clinical Data forms are configurable and can be used to display a variety of patient details, including a patient’s code status, isolation status, height, and weight. When you create and assign this form, providers can access the form from the drop-down menu that displays when they click the Patient Metrics icon on the title bar of the Order Entry screen. For more information, see Displaying the Patient Metrics Form on the Add Order Screen.Configuring First Dose Now Notifications
You can configure your facility group to prompt users with the option to administer certain medication orders immediately during order entry. Such notifications are intended to anticipate when immediate administration of a particular medication is warranted (based on calculations factoring in the current time and the upcoming dose schedule). When you enable these “first dose now” notifications for a facility group, users in this facility group are prompted with the option to administer the first dose at the time of order entry only for orders meeting both of these conditions:- The Start First Dose field on the Order Detail window must be set to one of the values:
- Not Specified
- Today
- On (set to today’s date)
- The duration indicated by the number of hours to first dose must exceed the duration from the current time of order entry (“now”) until the next scheduled dose. Note that the number of hours to first dose is obtained from the Num Hours to First Dose field on the Edit CPOE Med Frequency Definition window (Admin > Facility Group > Med Frequency Definition link), unless medication frequency definitions are pulled over the bridge from a back-end system such as MEDITECH.
- Click the Admin tab and then the Facility Group or CPOE tab.
In deployments where Facility Groups are not enabled, the Facility Group tab is replaced by the CPOE tab.
- If your institution uses multiple Facility Groups, select the Facility Group you want to configure from the Facility Group drop-down list.
- Click the Edit button.
- Locate and enable the setting Enable First Dose Now Notification.
- Click Save. Orders on the New Orders list meeting the first dose criteria prompt users belonging to the selected facility group with the option to administer the first dose at the time of order entry.
Configuring the Display of Formulary and Non-Formulary Drugs
The CPOE application is designed to highlight the distinction between formulary and non-formulary medications, so that your users can easily distinguish between the two when they search for medication orders. You can configure how CPOE responds when providers attempt to place orders that are not included on your facility’s formulary list.Configuring the Display of Non-Formulary Medications During Order Searches
You can configure how non-formulary medications display among the search results that are returned when providers search for medication orders. This behavior is configurable at the facility level, and you can independently configure how formulary and non-formulary orders display in on both the CPOE Order Search and Medication Reconciliation screens. To configure how non-formulary medication orders display during order searches:- Click the Admin tab and then the Location tab. The list of available facilities and units displays.
- Select the facility you want from the left pane. The configuration settings display for the selected facility.
- Click the Edit button at the bottom of the screen.
-
Locate and configure one or both of the following settings:
- General Medication Search: To configure how formulary and non-formulary orders display on the Add Orders screen that is used to perform search operations on medication orders in the CPOE application.
When you configure this setting to specify “Split on Formulary, hide Non-Formulary by default”, only the Formulary medication orders display. However, providers can opt to display the Non-Formulary results of any search operation by clicking the Show Non-Formulary link that displays among the search results. Providers can also toggle between hiding and showing Non-Formulary medications from the search results windows.
- Add Home Medication Search: To configure how formulary and non-formulary orders display on the Medication Reconciliation (Meds Rec) screen that is used to perform medication order search operations in the Meds Rec application. For more information about these configuration settings, see Location Settings.
- Click Save. Your configuration settings are saved for the selected facility.
Configuring the Response to Use of Non-Formulary Drugs
You can configure how CPOE responds when users select a non-formulary medication from the list of available medications that are returned from an Order Search operation. When users choose a medication that is not in your institution’s formulary, the CPOE application can be configured to alert the user or force the user to specify a reason for ordering a drug that is not on the formulary list. Before you configure this feature, you might want to modify the associated reference list that prompts providers to choose a reason when selecting a non-formulary drug. For more information, see Configuring Reasons for Selecting Non-Formulary Medications. To configure the response to use of non-formulary drugs:- Click the Admin tab and then the Facility Group or CPOE tab.
In deployments where Facility Groups are not enabled, the Facility Group tab is replaced by the CPOE tab.
- If your institution uses multiple Facility Groups, select the Facility Group you want to configure from the Facility Group drop-down list.
- Click the Edit button in the lower portion of the screen.
- Locate the When non-formulary drug is selected setting and select one of the following options:
- Do Nothing: If you want to enable users to select medications from either the formulary or non-formulary list at their discretion.
- Alert User: If you want a dialog box to display to notify providers when a selected medication is not on your institution’s formulary list. (Note that users are still permitted to order such medications.)
- Prompt for Reason: If you created a reference list that enables users to select a reason for choosing a medication from the non-formulary list. For more information, see Configuring Reasons for Selecting Non-Formulary Medications.
- Click Save. Your changes to the setting are enabled for all users belonging to the selected Facility Group.
Configuring Reasons for Selecting Non-Formulary Medications
You can enforce the selection of a reason for ordering non-formulary medications from the list of available medications. When you configure this functionality, users are prompted to select a reason to explain why they are selecting a medication that is not on your institution’s formulary. The reference list that you create should reflect all possible reasons that a user might want to provide when selecting a non-formulary medication. Before you create this list in the CPOE application you should consult with both providers and pharmacists in your institution to ensure that you create a comprehensive list that accounts for all possible reasons that providers may wish to provide for selecting non-formulary medications during the order entry process. To create or edit the list of reasons for selecting a non-formulary medication:-
Click the Admin tab and then the Facility Group or CPOE tab.
In deployments where Facility Groups are not enabled, the Facility Group tab is replaced by the CPOE tab.
- If your institution uses multiple Facility Groups, select the Facility Group you want to configure from the Facility Group drop-down list.
- From the list of available options on the left-hand side of the screen, click the Details link.
- Click the Reference Data Set button at the bottom of the screen. The Facility Group Reference Data Set window displays.
- From the list of reference lists, click the Non-Formulary Reason list. The template used to populate the reference list displays.
-
For each entry that you want to add to the list, click the New Entry button and enter the following data:
- Name: Specifies the reason that will display on the drop-down list provided to users when they select a non-formulary medication from the list.
- System Identifier: Specifies the unique identifier used to identify each of the reason overrides in the CPOE system. Once you save an entry, you should not change the value of this field unless you suspect it specifies an incorrect value.
- Context: (not used by the CPOE application)
- Sort Order: Use sequential numerical values to specify how to order these entries in the drop-down list displaying reason overrides to users.
- Aliases: (not used by the CPOE application)
- (Optional) If there are existing entries on the default reference list that you want to change, you can modify any of the data associated with these entries.
- Click Save when you define all entries that you want to add to the reference list.
- After you create this reference list, you must configure the display of this list using Facility Group preferences. For more information, see Configuring the Response to Use of Non-Formulary Drugs.
Formulary and Non-Formulary Display Settings
The following CPOE preferences are used to configure the display of formulary and non-formulary medications in the Add Order screen. Use Formulary Indicator for Separation of Search Results Determines how the display of drugs is handled on the Medication Search Results screen. When this setting is enabled, formulary drugs display on the left-hand side of the screen and non-formulary drugs display on the right-hand side of the screen. When this setting is disabled, drugs with associated order strings display on the left-hand side of the screen, and only drugs from the drug database display on the right-hand side of the screen. When non-formulary drug is selected Determines what action is taken when users select a non-formulary drug from the list of available options on the Medication Search Results screen. The available settings are:- Do Nothing: Specify this value if you want to allow users to select drugs from the non-formulary list without being prompted.
- Alert user: Specify this value if you want a confirmation dialog box to display to users indicating that the selected drug is not on the formulary list. Users can opt to return to the Medication Search Results screen or proceed with the order.
- Prompt for Reason: Specify this value if you want to require users to enter an explanation when selecting a non-formulary drug from the Medication Search Results screen. You can define these explanations using a reference list.
Configuring Free Text Orders
A Free Text Order is an Order Definition that enables providers to enter free text to describe an order. For example, you might create an Order Definition named “Miscellaneous Lab Orders” that includes a Field allowing providers to enter a Lab Order using descriptive text. Configuration of Free Text Orders is described along with the information for configuring Order Definitions. For more information, see Creating Free Text Order Definitions.Free Text Order Settings
The following Facility Group preferences are used to configure Free Text Orders.Configuration of Free Text Orders requires steps in addition to configuring the Facility Group settings described below. Before configuring Free Text Orders, consult a Commure Pro representative.
Configuring Order Search
You can define how order searches are conducted by configuring what is included in the order search results. You can include or exclude medications that aren’t on your Facility’s formulary list from the search results. If you choose to include non-formulary, you can choose to distinguish between these and formulary in two distinct lists, or you can configure these to be included together in a single list. For more information, see the reference information for the setting General Medication Search below.Order Search Settings
The following Facility Group preference is used to configure order search behavior General Medication Search Determines the behavior of the Add Orders user interface that is used to perform search operations on medication orders. Providers can search for medications by medication name, trade name, or therapeutic class, and you can configure how the screen displays the search results according to which orders are on formulary and which are not. The configuration options are: Split on Formulary The Order Search screen distinguishes between all of the selected facility’s formulary and non-formulary medications. Split on Formulary, hide Non-Formulary by default The Order Search screen distinguishes between formulary and non-formulary but hides non-formulary medications unless explicitly configured to be shown. Omit Non-Formulary Excludes all non-formulary medication orders from the search results. Do not distinguish Does not discriminate between formulary and non-formulary medications when returning medication orders from order search on the Add Orders user interface.Configuring the Medication Stop Date in the Total # Doses/Days Field
You can configure how the stop date displays (either as calendar day or without specific stop date/time information) when providers specify the Total # of Days to administer a medication during order entry. To configure how the stop date displays to providers when choosing Days and entering a value in the Total # of (Days) field:- Click the Admin tab and then the Facility Group or CPOE tab.
In deployments where Facility Groups are not enabled, the Facility Group tab is replaced by the CPOE tab.
- If your institution uses multiple Facility Groups, select the Facility Group you want to configure from the Facility Group drop-down list.
- Click the Edit button in the lower portion of the screen.
- Locate the Define # of Days As setting and configure this setting to specify either:
- Calendar Day: If you want the stop date to display with an end time of 23:59.
- 24 Hours: If you do not want to display specific stop date/time information under the # of Days field.
- Click Save.
Defining Validity Rules for Text that Clinicians Enter During Order Entry
You can configure a list to restrict the characters that your clinicians can enter into text fields during order entry. This setting applies to clinicians entering orders both on the portal and on mobile devices. An administration preference enables you to define a precise list that specifies each of these allowed characters. Clinicians will then be able to enter all characters from this list into text fields during order entry, but will be prevented from entering any other (UTF-8) characters that are not included on this list. When clinicians attempt to submit orders that have associated text fields with invalid characters, they will be informed about the use of illegal characters and will be prompted to update these fields before they can submit their order(s). To restrict the list of (UTF-8) characters that clinicians can enter into text fields during order entry:- Click the Admin tab and then the Institution tab. The Institution Settings screen displays.
- Choose Orders from the Edit Settings preference.
- Locate the setting Regex to specify valid characters and make your changes to the default list of text characters that are allowed during order entry. This list is defined using Java regular expressions; do not make changes to this list unless you fully understand the syntax used to form regular expressions.
- Click Save. Your changes are saved to the list of characters allowed during order entry. When clinicians submit orders that have fields containing (UTF-8) characters other than those defined on this list, they will be prompted to update the text field(s) containing these invalid characters before they are able to submit their orders.
Configuring External Links to Medication Order Details
The Order Details window for medications can be configured to include links to external websites for users to access while entering or modifying medication orders. To add a new Med Order Details Link:-
Click the Admin tab and then the Facility Group or CPOE tab.
In deployments where Facility Groups are not enabled, the Facility Group tab is replaced by the CPOE tab.
- If your institution uses multiple Facility Groups, select the Facility Group you want to configure from the Facility Group drop-down list.
- From the list of available options on the left-hand side of the screen, click the Med Order Details Links link. The Med Order Details Links screen displays.
- Click the Add Med Order Details Links button at the bottom of the screen.
-
In the Add Med Order Details Links window, enter the following details about the link you are creating, and then click Save.
- Label field (required): Enter the link text that displays in the Order Detail screen.
- URL field (required): Enter the URL to access when the link is clicked in the Order Details screen. By default, this link will be available in the Order Details window for all medications. For example, if the URL is www.drugs.com, then this creates a link to www.drugs.com for every medication that is opened in Order Details. You can further customize the link by appending the URL with the following Medication Name attribute: /###MedName###. When the URL includes a Medication Name attribute, then the link in the Order Details screen will be appended with that medication’s name from its CPOE Order Definition. This creates a customized URL for each medication based on what is open in the Order Details screen. For example, if the URL is www.drugs.com/###MedName###, then this creates a customized link for each medication where ###MedName### is the name of the medication that is open in Order Details (based on the medication’s name in its CPOE Order Definition).If Aspirin is open in Order Details, clicking the link would open www.drugs.com/aspirin, whereas clicking the link in Order Details while Coumadin is open would open www.drugs.com/coumadin.
This requires that the destination URL includes a location that matches the Medication Name attribute. This works best for drug reference sites where the medication name is common.
- Tooltip field: Add the tooltip text you want to display when a cursor hovers over the link in the Order Details screen.
- Usage Type drop-down (Inpatient/Outpatient): Select the visit type for which this link should display. For example, if Inpatient is selected, then the link only displays in the Order Details window when ordering a medication for a patient with an inpatient visit.
To edit an existing Med Order Details Link
-
Click the Admin tab and then the Facility Group or CPOE tab.
In deployments where Facility Groups are not enabled, the Facility Group tab is replaced by the CPOE tab.
- If your institution uses multiple Facility Groups, select the Facility Group you want to configure from the Facility Group drop-down list.
- From the list of available options on the left-hand side of the screen, click the Med Order Details Links link. The Med Order Details Links screen displays.
-
Find the link that you want to edit using one of the following methods:
- To display all results, click the Search button.
- To filter the search results, enter search criteria and then click Search.
- To display all results, click the Search button.
- Label text field- Enter the name of the link you are looking for.
- Include Inactive checkbox- Select this checkbox if you want to include inactive links in the results
- Select the order detail link that you want to edit, and then click the Edit button in the right pane.
- Make the desired changes to link properties and then click Save.
- Label field (required): Enter the link text that displays in the Order Detail screen.
- URL field (required): Enter the URL to access when the link is clicked in the Order Details screen. By default, this link will be available in the Order Details window for all medications. For example, if the URL is www.drugs.com, then this creates a link to www.drugs.com for every medication that is opened in Order Details. You can further customize the link by appending the URL with the following Medication Name attribute: /###MedName###. When the URL includes a Medication Name attribute, then the link in the Order Details screen will be appended with that medication’s name from its CPOE Order Definition. This creates a customized URL for each medication based on what is open in the Order Details screen. For example, if the URL is www.drugs.com/###MedName###, then this creates a customized link for each medication where ###MedName### is the name of the medication that is open in Order Details (based on the medication’s name in its CPOE Order Definition).If Aspirin is open in Order Details, clicking the link would open www.drugs.com/aspirin, whereas clicking the link in Order Details while Coumadin is open would open www.drugs.com/coumadin.
This requires that the destination URL includes a location that matches the Medication Name attribute. This works best for drug reference sites where the medication name is common.
- Tooltip field: Add the tooltip text you want to display when a cursor hovers over the link in the Order Details screen.
- Usage Type drop-down (Inpatient/Outpatient): Select the visit type for which this link should display. For example, if Inpatient is selected, then the link only displays in the Order Details window when ordering a medication for a patient with an inpatient visit.
Configuring Duplicate Detection Rules
Part of Facility Group configuration at the administrative level involves configuring the rules that determine how to alert your providers when they enter orders that are identified as possible duplicates. In the sections that follow, information is provided about the rules that the CPOE application uses to detect duplicates, in addition to procedural information that provides instructions for configuring these alerts.About Detection of Duplicate Orders
In the CPOE application, duplication of orders is minimized by enforcing rules designed to detect instances of repeated orders, often within a specified interval or time frame. These rules are determined by settings that can be configured either in the CPOE application or, in some cases, your back-end system. As the following table illustrates, the criteria for defining a repeated order as a duplicate order are often specific to Order Type. With some Order Types (medication and diet orders), the time frame within which orders are repeated is not important in determining whether these repeat orders should qualify as duplicates. Therefore, duplicate checking of medication and diet orders is performed against all active orders, regardless of when the order was placed. In the case of the Order Types lab, radiology, and other, accurate detection of duplicates requires the use of a defined time frame after which identical orders are not considered to be duplicates. A time frame is used with these Order Types because providers might enter the same order periodically, but should not enter the same order within too short a period of time. For example, there is typically no need for providers to enter two chest x-rays for the same patient within a 24-hour period. Note that the time frame setting used to define a duplication interval is frequently provided as a read-only setting in CPOE (“Duplicate Timeframe (hrs)”), as it is often obtained from a back-end system. You can define the time frame for Order Definitions that are created manually in the CPOE application.| Order Type | Duplication Criteria | Uses Time Frame |
|---|---|---|
| Medication orders | Duplication checking is performed against active medication orders. To determine whether a medication order is a duplicate, the system checks for any similar active medication order that shares the same therapeutic class. For drugs to be considered duplicates, they must share the same therapeutic class; it is not necessary for the drugs to be identical. For example, ibuprofen and acetaminophen could be considered duplicate drugs, since they are both anti-inflammatory drugs. | No time frame is used in determining duplication between medication orders. Note that providers are alerted when attempting to place duplicate orders within the same ordering session. |
| Diet orders | Duplication checking is performed as users enter new Diet orders. The checks occur between the new order and all existing orders of the same Order Definition that are in active status.Duplicate checking is also performed between all new Diet orders, to ensure that duplicate orders are not entered in the same session. | No time frame is used in determining duplication between Diet orders. |
| Lab, Radiology, Nursing, and Other orders | If users enter a Lab, Radiology, Nursing or Other order without specifying a service time, the order is considered a duplicate if it shares the same service start date and the Duplicate Timeframe setting specifies a value that is less than 24 hours.Two of the same Lab, Radiology, Nursing or Other orders are considered to be duplicates if both orders are entered with a service start date and time within the duration specified by the Duplicate Timeframe setting, which can be set at the Order Group or Order Definition level. In the case of Lab orders, if the time of the order is identical (accurate to the minute) to another order, the Lab order is considered a duplicate order, and the second order is not processed as a distinct order. | Yes. When the setting ‘Duplicate Timeframe’ specifies a value for any of these Order Types, this duration is used as the window for determining whether an order is a duplicate of an existing order. Note that this timeframe is defined in units of hours (such as 24-hour window) so orders entered on two consecutive days can trigger the duplicate orders alert as long as order entry of the two occurs within this window. |
Requiring a Reason for Duplicate Detection Overrides
After you define the duplication criteria for the different types of orders in your Facility Group, you can enforce the selection of a reason for overriding detection of a possible duplicate order. When you configure this functionality, users are prompted to select a reason to explain why they are entering an order that has been identified as a duplicate by duplication detection rules. Before you can configure this feature, you should first create a reference list to define all of the options that you want to make available to your users. These options should reflect all possible justifications for proceeding with order entry despite warnings of possible duplication. Before you create this list in the CPOE application you should consult with groups of providers in your institution to ensure that you create a comprehensive list that accounts for all possible reasons that providers may wish to provide during the order entry process. To create a list of reasons for duplicate detection overrides:- Click the Admin tab and then the Facility Group or CPOE tab.
In deployments where Facility Groups are not enabled, the Facility Group tab is replaced by the CPOE tab.
- If your institution uses multiple Facility Groups, select the Facility Group you want to configure from the Facility Group drop-down list.
- Click the Details link, and then the Reference Data Set button. The Facility Group Reference Data Set page is displayed.
- From the list of reference lists, click the CPOE Reason to override duplicate interactions list. The template used to populate the reference list displays.
-
For each entry that you want to add to the list, click the New Entry button and enter the following data:
- Name: Specifies the reason that will display on the drop-down list provided to users when they enter a duplicate order.
- System Identifier: Specifies the unique identifier used to identify each of the reason overrides in the CPOE application. Once you save an entry, you should not change the value of this field unless you suspect it specifies an incorrect value.
- Context: (not used by the CPOE application)
- Sort Order: Use sequential numerical values to specify how to order these entries in the drop-down list displaying reason overrides to users.
- Click Save when you define all entries that you want to add to the reference list.
- After you create this reference list, use the duplicate detection rules (accessed through the Location tab) to determine when to display these reasons to providers. For more information, see Configuring Alerts for Detection of Duplicate Non-Medication Orders.
Defining a Duplicate Time Frame for Orders Created in CPOE
Because most if not all of the orders in your system are defined in a back-end system and imported into the CPOE application, it is often unnecessary to define the window for duplicate orders, since this setting is included in the import process. When orders define a duplicate window in your facility’s back-end system, this setting displays in the CPOE application as a read-only parameter. Some types of orders do not specify this setting, since their duplication criteria does not require that a time frame be defined to recognize repeat orders as duplicates. For those Order Types that do use a time frame, if there is no time frame specified, no duplicate checking will be performed. When you create new Order Definitions directly in the CPOE application, however, you must define this time frame for the following Groups and Definitions, if you want to perform duplicate checking when orders belonging to these groups are created:- All Order Groups and Order Definitions belonging to the Lab Order Type
- All Order Groups and Order Definitions belonging to the Radiology Order Type
- All Order Groups and Order Definitions belonging to the Nursing Order Type
- All Order Groups and Order Definitions belonging to the Other Order Type
When you set the time frame for an Order Group, you do not need to set the time frame at the Order Definition level, unless you want to override the setting that applies to the Order Group to which the Definition belongs.
- Click the Admin tab and then the Facility Group or CPOE tab.
In deployments where Facility Groups are not enabled, the Facility Group tab is replaced by the CPOE tab.
- If your institution uses multiple Facility Groups, select the Facility Group you want to configure from the Facility Group drop-down list.
- Depending on the type of order category you want to configure, click either the Order Groups or the Order Definitions link. Either the CPOE Order Group Maintenance page or the CPOE Order Definition Maintenance page is displayed.
- Use the search criteria fields provided to locate the Order Group(s) or Order Definition(s) you want to edit.
- Select the Order Group(s) or Order Definition(s) that you want and click the Edit button that displays in the lower-right portion of the screen. The Edit CPOE Order Group or Edit CPOE Order Definition screen displays.
-
Locate the setting Duplicate Timeframe (hrs) and enter a numerical value into its associated text field. You must enter a value in the range 1-99 into this field.
If no text field displays next to the Duplicate Timeframe (hrs) setting, it is likely that the order you want to edit was created on a back-end system. In such cases, the Duplicate Timeframe setting is read-only in the CPOE application and must be modified on the source system.
- Click Save. Your changes are saved, and the specified time frame setting will be used to determine the duration to use when enforcing duplication detection for all orders belonging to the specified Order Group or Order Definition.
Configuring Alerts for Order Interactions
You can configure how alerts display to physicians in your facility when they enter orders that trigger a specific response, such as detection of duplicate orders. There are six types of interactions that typically generate alerts for providers:- Duplicate orders detected between a new and an existing non-medication order
- Duplicate orders detected between two new non-medication orders
- Duplicate orders detected between a new and an existing medication order
- Duplicate orders detected between two new medication orders
- Drug - Allergy interaction warnings
- Interaction Severity warnings between two medication orders (‘drug - drug’ warnings)
- Drug - Dose interaction warnings
- Drug - Disease interaction warnings You can configure these alerts by interaction type, so that the alerts generated by each type of interaction behave according to a particular rule. These rules are applied across an entire Facility Group, unless you choose to have specific order interactions override the rules that you set for a particular Facility Group. For more information, see Configuring Interaction Alert Overrides.
Order Interaction Alert Rules
The rules that you can set for each type of order interaction are:- Pop-up and Require Reason The alert displays in a pop-up window that prompts users to select a reason if they decide to override the alert message. You can configure override reasons using reference lists.
- Inline Text The interaction message and override reason display on the New Orders list, under the orders that triggered the interaction.
- Inline Icon A “Non-critical alert” icon displays on the New Orders list, under the orders that triggered the interaction. When providers hover over this icon, a descriptive message about the interaction displays in the center column of the New Orders list. When a drug triggers multiple interactions, these interactions all display on a single icon.
- Hidden An alert is triggered when this type of order interaction is encountered, but it does not display to the user. You can set a specific order interaction type to be hidden (as opposed to disabling it altogether), but override one or more specific interactions belonging to this type to use a different rule to display its alerts.
- Disabled No alert displays when this type of order interaction is encountered. You cannot set interaction overrides for specific interactions belonging to this interaction type.
Accessing the Order Interaction Alert Settings
As with the Facility Group preferences described earlier, the interaction alert settings are applied to all users belonging to a particular Facility Group in your institution. Note that smaller deployments might consist of a single default Facility Group. In such a deployment scenario, you can set the preferences of users throughout your entire institution by configuring the preferences for this default Facility Group. Typically, only level 1 administrators have access to configure these settings, which affect users at all levels, including institution-level administrators, department administrators, and provider end-users. For more information about granting administrative access to level 2 administrators, see Controlling a User’s Administrative Access to CPOE. To access the order interaction alert settings:- Click the Admin tab and then the Facility Group or CPOE tab.
In deployments where Facility Groups are not enabled, the Facility Group tab is replaced by the CPOE tab.
- If your institution uses multiple Facility Groups, select the Facility Group you want to configure from the Facility Group drop-down list.
- Click the CPOE Utilities link.
- Click the Edit button at the bottom of the CPOE Utilities pane. The Edit Facility Group Utility Settings window displays the Interaction Checking tab, which lists all of the Order Interaction Alert settings. For more information about configuring these settings, see Configuring Alerts for Duplicate Orders and Configuring Alerts for Drug Interactions.
Configuring Alerts for Duplicate Orders
The alerts that notify providers when they enter duplicate orders are set per-Facility Group. The rules controlling the display of these alerts are applied to orders that are distinguished by the following general categories:- Duplicate non-medication orders
- Duplicate medication orders that are detected between new and existing orders
- Duplicates that are found among new medication orders This distinction enables you to handle all medication orders in a unique way. For example, you might configure your system so that when duplicates are detected among medication orders, a pop-up message notifies your providers of the duplicate order and prompts them to choose a reason for proceeding with the order. For detection of duplicates among all other order types, you might decide to notify your providers of the duplicate order as an in-line message that displays on the Add Order screen.
Configuring Alerts for Detection of Duplicate Non-Medication Orders
When configuring the alerts that notify your providers of a duplicate order, note that one rule applies to all orders entered by your providers except medication orders. You can configure this rule independently for each Facility Group in your institution. However, note that this rule is applied to all of a facility’s non-medication orders without exception; you cannot configure specific non-medication order duplicates to override a Facility Group setting as you can with medication orders. Two distinct configuration options let you configure the alerts that display when duplicate non-medications are detected within a defined time frame. One of these alerts (“Non-Medication Duplicate Display (between new and existing orders”) displays when a new order is detected within the defined time frame of an existing order. The other (“Non-Medication Duplicate Display (between new orders”) displays when one new order is detected within the defined time frame of another new order. To configure the alerts that indicate entry of a duplicate non-medication order:- Click the Admin tab and then the Facility Group or CPOE tab.
In deployments where Facility Groups are not enabled, the Facility Group tab is replaced by the CPOE tab.
- If your institution uses multiple Facility Groups, select the Facility Group you want to configure from the Facility Group drop-down list.
- Click the CPOE Utilities link.
- Click the Edit button at the bottom of the CPOE Utilities pane.
- On the Edit Facility Group Utility Settings window, click the Interaction Checking tab.
- Locate the Non-Medication Duplicate Display settings and use the drop-down menu to select how you want to configure your duplication alerts. For more information, see Order Interaction Alert Rules.
- Click Save. Your setting will be applied to all non-medication orders in the selected facility.
- Repeat steps 2 - 5 for each Facility Group in your institution.
Configuring Alerts for Detection of Duplicate Medication Orders
Like with non-medication orders, you can configure the duplicate medication order alerts independently for each Facility Group in your institution. This rule is applied to all alerts across a Facility Group that are generated in response to detection of duplicate medication orders. Note that you can define separate rules based on where the duplication occurs. One rule lets you define the response when duplication is detected among new orders. Another rule lets you define the response when duplication is detected between a new and an existing medication order. You can also define rules so that specific duplicate medication orders override the rules that you set for a particular Facility Group. For more information, see Configuring Interaction Alert Overrides. To configure the alerts that indicate entry of a duplicate medication order:- Click the Admin tab and then the Facility Group or CPOE tab.
In deployments where Facility Groups are not enabled, the Facility Group tab is replaced by the CPOE tab.
- If your institution uses multiple Facility Groups, select the Facility Group you want to configure from the Facility Group drop-down list.
- Click the CPOE Utilities link.
- Click the Edit button at the bottom of the CPOE Utilities pane.
- On the Edit Facility Group Utility Settings window, click the Interaction Checking tab.
- Locate the two Medication Duplicate Display settings and use the drop-down menus to select the rules that you want to apply to your duplication alerts. Note that two distinct settings are provided for configuring these alerts, based on where the duplication is found to occur. For more information, see Order Interaction Alert Rules.
- Click Save. The rule you selected will be applied to all medication orders in the selected Facility Group.
- Repeat steps 2 - 5 for each Facility Group in your institution.
Duplicate Display Alert Settings
The following Facility Group Utility preferences are used to configure how alert messages are displayed to inform providers when they enter an order that is detected as a duplicate order. Non-Medication Duplicate Display Determines how alerts are to be displayed to inform providers of a duplicate non-medication order. For more information about the types of alerts that you can configure, see Configuring Alerts for Order Interactions. Medication Duplicate Display Determines how alerts are to be displayed to inform providers of a duplicate medication order. For more information about the types of alerts that you can configure, see Configuring Alerts for Order Interactions.Configuring Alerts for Drug Interactions
Configuration of drug interaction alerts includes defining behavior for two types of drug interactions:- Drug-drug interactions
- Drug-allergy interactions You can configure the alerts for both of these types of interactions independently for each Facility Group in your institution. The alert rules that you set for these two interaction types are applied across all medication orders in a particular Facility Group. However, note that you can define rules so that alerts for specific interactions override the alert rules that you set for a particular Facility Group. For more information, see Configuring Interaction Alert Overrides.
Configuring Alerts for Drug-Drug Interactions
Configuration of drug-drug interaction alerts involves configuration of four distinct alert levels, which represent the four severity levels that apply to drug-drug interactions. These severity levels are defined by the drug database used by your facility or institution.- Contraindicated Drug Combination: Indicates that a contraindication exists between the medication entered by the provider and another medication that has been prescribed for the selected patient.
- Severe Interaction: Indicates that an interaction with a high severity level exists between the medication entered by the provider and another medication that has been prescribed for the selected patient.
- Moderate Interaction: Indicates that an interaction with a moderate severity level exists between the medication entered by the provider and another medication that has been prescribed for the selected patient.
- Undetermined Severity - Alternative Therapy Interaction: Indicates that an interaction of unknown severity level exists between the medication entered by the provider and another medication that has been prescribed for the selected patient. You can configure each of these drug-drug interaction severity levels so that each level is assigned to one of the specific rules governing the display of interaction alerts. For more information, see Configuring Alerts for Order Interactions.
- Click the Admin tab and then the Facility Group or CPOE tab.
In deployments where Facility Groups are not enabled, the Facility Group tab is replaced by the CPOE tab.
- If your institution uses multiple Facility Groups, select the Facility Group you want to configure from the Facility Group drop-down list.
- Click the CPOE Utilities link.
- Click the Edit button at the bottom of the CPOE Utilities pane.
- On the Edit Facility Group Utility Settings window, click the Interaction Checking tab.
- Locate the Interaction Severity Display setting and use the drop-down menu to select the rule that you want to apply to your drug - drug interaction alerts.
- Click Save. The rule you selected will be applied to all medication orders in the selected Facility Group.
- Repeat steps 2 - 5 for each Facility Group in your institution.
Configuring Alerts for Drug-Allergy Interactions
You can configure drug-allergy interaction alerts independently for each Facility Group in your institution. Unlike with drug-drug interactions, a single rule is applied to all alerts across a Facility Group that are generated in response to a drug-allergy interaction. You can configure how all drug-allergy interaction alerts display to providers within each of your Facility Groups by selecting one of the rules that determine the display of interaction alerts. For more information, see Configuring Alerts for Order Interactions. Although this rule is applied to all medication orders across a Facility Group, note that you can define rules so that specific drug-allergy interactions override the rules that you set for a particular Facility Group. For more information, see Configuring Interaction Alert Overrides. To configure the alerts that indicate a “drug - allergy” interaction warning:- Click the Admin tab and then the Facility Group or CPOE tab.
In deployments where Facility Groups are not enabled, the Facility Group tab is replaced by the CPOE tab.
- If your institution uses multiple Facility Groups, select the Facility Group you want to configure from the Facility Group drop-down list.
- Click the CPOE Utilities link.
- Click the Edit button at the bottom of the CPOE Utilities pane.
- On the Edit Facility Group Utility Settings window, click the Interaction Checking tab.
- Locate the Drug-Allergy Display setting and use the drop-down menu to select the rule that you want to apply to all drug-allergy interaction alerts.
- Click Save. The rule you selected will be applied to all medication orders in the selected Facility Group.
- Repeat steps 2 - 5 for each Facility Group in your institution.
Configuring Alerts for Dose Checking Interactions
Dose checking in CPOE is essential for patient safety and enforcing dose checking is important for meeting established standards (such as “Leapfrog” standards) which are used to evaluate and measure the safety and quality of the Commure Care CPOE product. Using dose checking is an essential safeguard to use in conjunction with the Commure Care weight-based dosing (WBD) solution, since calculations that are used during pediatric dosing are more prone to dosing errors.For Dose Checking alerts to work with medications that have a frequency of daily, you must map the definition of “daily” from CPOE to its equivalent frequency as defined in FDB (first databank). For more information about accessing, configuring, and mapping frequency definitions, see Adding Medication Frequency Values for Use by Pharmacy.
- Click the Admin tab and then the Facility Group or CPOE tab.
In deployments where Facility Groups are not enabled, the Facility Group tab is replaced by the CPOE tab.
- If your institution uses multiple Facility Groups, select the Facility Group you want to configure from the Facility Group drop-down list.
- Click the CPOE Utilities link.
- Click the Edit button at the bottom of the CPOE Utilities pane.
- On the Edit Facility Group Utility Settings window, click the Interaction Checking tab.
- Locate and configure the Dose Checking setting by selecting one of the following:
- Enabled (Always) — Dose checking will be enforced for the selected drug in either override mode or non-override mode, depending on the configuration setting of the related Require Dose Checking Override? setting.
- Enabled (Specific Order Defs only) — Dose checking is enforced based on a specific Order Definition property (Require Dose Checking Override) that, when enabled, will re quire providers to select a reason before they can click Done during order entry of the medication when dose alerts are present. The list of reasons available to providers is defined using the reference list CPOE Reason to override dose checking. For more information about configuring reference lists, see “Managing Reference Lists and System Settings” in the Configuring Core Features, Charge Capture, and Clinical Results administrator help.
- Disabled — Dose checking is not enforced and the option to enable dose checking for specific Order Defs only is removed.
- Click Save.
Configuring Alerts for Drug-Disease Interactions
Drug-disease checking is equally important in enforcing safeguards in scenarios where a health care provider is prescribing medications that a patient should not take in the presence of a specific disease. For example, patients with hemophilia should not be prescribed high-dose aspirin medications. You can configure how all drug-disease interaction alerts display to providers within each of your Facility Groups by selecting one of the rules that determine the display of interaction alerts. For more information, see Configuring Alerts for Order Interactions. Although this rule is applied to all medication orders across a Facility Group, note that you can define rules so that specific drug-disease interactions override the rules that you set for a particular Facility Group. For more information, see Configuring Interaction Alert Overrides. To configure the alerts that indicate a “drug - disease” interaction warning:- Click the Admin tab and then the Facility Group or CPOE tab.
In deployments where Facility Groups are not enabled, the Facility Group tab is replaced by the CPOE tab.
- If your institution uses multiple Facility Groups, select the Facility Group you want to configure from the Facility Group drop-down list.
- Click the CPOE Utilities link.
- Click the Edit button at the bottom of the CPOE Utilities pane.
- On the Edit Facility Group Utility Settings window, click the Interaction Checking tab.
- Locate the Drug-Disease Display setting and use the drop-down menu to select the rule that you want to apply to all drug-disease interaction alerts.
- Click Save. The rule you selected will be applied to all medication orders in the selected Facility Group.
- Repeat steps 2 - 5 for each Facility Group in your institution.
Drug Interaction Alert Settings
The following Facility Group preferences are used to configure how alert messages are displayed to inform providers when they enter an order that triggers a particular medication interaction. Drug-Allergy Display Determines how alerts are to be displayed to inform providers of a drug-allergy interaction. For more information about the types of alerts that you can configure, see Configuring Alerts for Order Interactions. Interaction Severity Display Determines how alerts are to be displayed for each of the levels used to indicate the severity of a particular interaction. For more interaction about the severity levels, see Configuring Alerts for Drug-Drug Interactions. For more information about the types of alerts that you can configure, see Configuring Alerts for Order Interactions. Drug-Disease Display Determines how alerts are to be displayed to inform providers of a drug-disease interaction. For more information about the types of alerts that you can configure, see Configuring Alerts for Order InteractionsCustomizing Medication Alerts Using FDB AlertSpace
Customers using First Databank’s AlertSpace product to manage their medication alerts can configure CPOE to fully integrate their alert customizations with their decision support system so that these custom alerts are enforced in all CPOE and Medication Reconciliation workflows. For more information about configuring CPOE to work with customized FDB AlertSpace data, consult your Commure representative.Configuring Interaction Alert Overrides
You might discover that there are alerts for specific interactions that you want to configure differently from all other interactions of a particular type within a Facility Group. For example, your drug database might define a particular interaction using a severity level that differs from the severity level that your organization has decided to use for this interaction in one of your Facility Groups. You can accomplish this through the use of interaction overrides. Interaction overrides enable you to configure how interaction alerts behave on a “per-interaction” basis. You can define interaction overrides for the following two types of drug interaction checks that are performed during order entry:- Drug-Drug
- Medication Duplicates Like the rules for interaction alerts themselves, interaction overrides are defined and applied independently for each Facility Group. Note that you cannot configure interaction overrides for any duplicate orders other than medication orders.
Accessing the Interaction Alert Override Settings
As with Facility Group and interaction alert settings, alert override settings are applied to all users belonging to a particular Facility Group. Only level 1 administrators have access to configure these settings, which affect users at all levels, including institution-level administrators, department administrators, and provider end-users. To access the interaction override settings:- Click the Admin tab and then the Facility Group or CPOE tab.
In deployments where Facility Groups are not enabled, the Facility Group tab is replaced by the CPOE tab.
- If your institution uses multiple Facility Groups, select the Facility Group you want to configure from the Facility Group drop-down list.
- Click the CPOE Utilities link, and then the Interaction Checking tab.
- Click the Edit button at the bottom of the CPOE Utilities pane. The Edit Facility Group Utility Settings window displays the list of Order Interaction Alert settings.
- Click the Interaction Overrides button. The Interaction Display Overrides window displays. From this window you can search for and create interaction alert overrides. For more information, see Defining Interaction Alert Overrides.
Defining Interaction Alert Overrides
Interaction alert overrides enable you to define rules that apply to a specific drug - drug or duplicate medication interaction that you want to exempt from the alert interaction rules established at the Facility Group level. To define an interaction override for a specific type of drug interaction:- Click the Admin tab and then the Facility Group or CPOE tab.
In deployments where Facility Groups are not enabled, the Facility Group tab is replaced by the CPOE tab.
- If your institution uses multiple Facility Groups, select the Facility Group you want to configure from the Facility Group drop-down list.
- Click the CPOE Utilities link.
- Click the Interaction Checking tab.
- Click the Edit button at the bottom of the CPOE Utilities pane.
- The Edit Facility Group Utility Settings window displays the list of Order Interaction Alert settings.
- Click the Interaction Overrides button. The Interaction Display Overrides window is displayed.
-
(optional) From the Interaction Check Type drop-down, you can filter overrides by:
- Drug-Drug: To display interaction display overrides for interactions between a new medication order and an existing medication order.
- Duplication-Medication (new & existing orders): To display interaction display overrides for interactions that new medication orders have with any existing medications.
- Duplication-Medication (new orders): To display interaction display overrides for interactions between two new medication orders.
- Click the Add Override button at the bottom of the window.
- Use the search field associated with the Existing Medication Orders list to locate the first drug for which you want to use to define the interaction alert override. This is normally the drug that will have already been prescribed to a patient. Use the search field associated with the New Medication Orders list to locate the second drug, if you are defining an alert override for a drug-drug interaction.
- Click the Run Check button. The table to the right displays the interaction type, the severity level, and information to indicate whether the interaction currently has any overrides defined.
- Click the Edit button in the far-right column and edit the following settings:

- Display Class: Use the drop-down menu to select the alert rule that you want this particular interaction to follow. This rule will be applied when this specific interaction is encountered within the selected facility.
- Override Display Reason: Enter the reason (as free text) that you are defining this interaction as an override.
- Click Save, and then Close. The interaction override is saved. The next time that a provider from this Facility Group enters an order that triggers this interaction, the alert will behave according to this rule, rather than the rule that you have established for all other interactions of this type within the specified Facility Group.
Interaction Alert Override Settings
The following institution-level preferences are used to configure interaction alert overrides. An interaction alert override defines alert behavior for a particular interaction. Use of overrides enables you to configure alerts at the level of individual interactions, so that you are not limited by the Facility Group rules that you establish for an interaction type. Interaction Overrides This button (accessed from Admin > Facility Group > CPOE Utilities > Interaction Checking tab) launches the interface for configuring interaction alert overrides. From the Interaction Display Overrides window, you can add and edit overrides, by defining the interactions and the types of alerts that you want specific interactions to display. Interaction Check Type Indicates the type of interaction to which the override applies. For example, when this setting specifies the value “Drug-Drug”, this value can serve to remind you that the current alert override rule you are configuring applies to a particular combination of medication orders that you want to exempt from the Interaction Severity Display rules that apply to medication orders generally. Severity Indicates the severity level (contraindicated, severe, moderate, undetermined) of the specified interaction. Interaction Description Provides detailed information about the current interaction. This information includes the complete description of each Order Description or Order String involved in the specified interaction. Display Class Specifies the options for displaying the alert overrides. These options are identical to the display options available to interaction alerts. For more information, see Configuring Alerts for Order Interactions. Override Display Reason Enables you to enter free text to indicate a reason for defining the specific alert override..Using Custom Rules for Clinical Decision Support
Customers can work in collaboration with Commure to define, maintain, and import a repository of custom rules for enforcing Clinical Decision Support (CDS) alerts. As with the “standard” alerts (those that identify duplicates, allergies, or contraindicated orders), custom CDS rules are enforced throughout a clinician’s workflow, including during order entry, when entering orders from within a note, and during medication reconciliation. Custom rules are different from the standard interaction alerts in that they are defined more precisely to be applicable to a specific clinical scenario, disease, or condition, and are also written and requested by customers. The criteria for enforcing custom rules is also typically more specific and can involve several data points that are defined as part of a specific rule.Controlling an Administrator’s Access to Custom CDS Rules
Level 1 and 0 administrators can access custom CDS rules and lab sets. Administrators (with level 1 access or higher) can selectively define additional administrator access to CDS custom rules at the individual user level. The configuration settings used to control access are provided on the User tab, which (access permitting) displays among the tabs included under the Admin tab. To grant an administrative user access to both the CDS Rules and CDS Rules Lab Set Config screens:- Click the Admin tab, followed by the User tab. The list of available users displays.
- Select the user and click the Edit button.
- On the Personal Preferences screen, select CPOE from the Edit Settings drop-down menu.
- To grant the user access to both CDS Rules screens, enable the Can Edit CDS Rules and Lab Sets setting. (Setting this option to No removes access to these screens from the list of System Management options.)
- Click Save.
Defining Custom Rules
Administrators are advised to work closely with Commure services and support teams throughout the entire CDS configuration process, starting with the initial planning and continuing through to the testing and rule verification that must occur as part of any plan to implement custom CDS rules within a facility or institution. In the sections that follow, guidance for management of CDS rules starts with the process of importing these rules, which are assumed to have already been created and organized into a repository.Importing Custom Rules
Although administrators have the option to continue pulling in updates from this repository, it is recommended that customers adequately prepare their rule repository prior to the first import to minimize the number of subsequent updates that need to occur. Also, note that custom CDS rule names are read-only once imported, so it is important to ensure that all names are accurate and complete prior to importing your custom rules. To import custom rules from a CDS rule repository:- Click the Admin tab and then the System Management tab.
- Click the CDS Rules link.
- Click the Import/Update Rules button and click OK to confirm the import of custom CDS rules. A confirmation message informs you when the import is complete.
- Click OK. The import of custom CDS rules is complete. These rules are inactive by default during import. To activate a rule so that it is enforced, click the Edit button associated with the rule and set the status to ACTIVE.
You can continue to update these rules with changes made in the repository.
Configuring Lab Sets for the Buddy Lab Rule
The Buddy Lab custom CDS rule makes use of lab data that is organized into lab set groupings. Each lab set is comprised of various lab results and medications that are all applicable to a particular clinical scenario, such as a renal panel. Lab sets are defined by a specific grouping of medications and LOINC codes (Logical Observation Identifiers Names and Codes) which together form a LOINC group. Typically, LOINC groups are defined by and are specific to an institution and how it chooses to organize its lab data. Prior to implementing and enforcing the Buddy Lab custom CDS rule, administrators must manually build their lab sets in one of their environments. Once lab set definitions are complete at this first site, customers can import this data at any of their other sites.Manually Creating Lab Sets
Authorized administrators can manually create lab sets from the admin user interface. Typically, customers are expected to designate one primary site for this purpose. Then, after manually creating all of their lab sets once, they can import these lab sets at other sites without having to manually create them again. To manually create a lab set:- Click the Admin tab and then the System Management tab.
- Click the CDS Rules Lab Set Config link.
- Click the Create New LOINC Group button.
- Name the lab set and provide its abbreviation in the appropriate fields.
- Enter each LOINC code belonging to the lab set into the Add LOINC Code field and click Add Code.
- For each LOINC Code that you add, configure the following properties:
- Name the LOINC Code by editing the Description column.
- Enter the number of lab results to display in the # Display column The # Display column indicates the number of lab results to display, which determines how these lab results are shown as part of buddy labs in custom CDS rules.
- Enter the lab result time frame in the Timeframe column Lab results must exist within the time frame defined in the Timeframe column to be evaluated within buddy labs in custom CDS rules. (optional) You can always delete LOINC Codes added in error by clicking the trash can icon in its row.
- Enter each medication belonging to the lab set into the Add Medication field and click Add Medication.
-
For each medication that you add, configure the following properties:
- Set the display rule in the Display Condition column. (optional) You can always delete medications added in error by clicking the trash can icon in its row.
- Click Save.
Editing Lab Sets
Authorized administrators can update lab sets by editing lab set names, editing properties of existing LOINC codes and medications, adding more LOINC codes or medications to an existing lab set, and deleting lab sets. To edit a lab set:- Click the Admin tab and then the System Management tab.
- Click the CDS Rules Lab Set Config link.
- Locate the lab set (by its LOINC group) under the Group Name column and click the row’s Edit button.
- You can update lab sets in any of the following ways:
- Update a lab set’s name or abbreviation by editing these two fields.
- To add an LOINC code to a lab set, enter it in the Add LOINC Code field and click Add Code.
- To add a medication to a lab set, enter it in the Add Medication field and click Add Medication.
- (optional) You can update LOINC Code properties in any of the following ways:
- Name the LOINC Code by editing the Description column.
- Update the number of lab results to display in the # Display column The # Display column indicates the number of lab results to display, which determines how these lab results are shown as part of buddy labs in custom CDS rules.
- Update the lab result time frame in the Timeframe column Lab results must exist within the time frame defined in the Timeframe column to be evaluated within buddy labs in custom CDS rules.
- You can delete a LOINC Code from its lab set by clicking the trash can icon in its row.
- (optional) You can update medication properties in any of the following ways:
- Update the display rule by editing the Display Condition column.
You can set the display condition to be either: - o Always — The buddy labs will always display if results exist from within the defined timeframe and from the # to display setting.
- Abnormal — The buddy labs will only display if there is at least one abnormal result from within the defined timeframe and from the # to display setting.
- You can delete a medication from its lab set by clicking the trash can icon in its row.
- Update the display rule by editing the Display Condition column.
You can set the display condition to be either: - o Always — The buddy labs will always display if results exist from within the defined timeframe and from the # to display setting.
- Click Save.
Importing Lab Sets for the Buddy Lab Rule
Prior to importing lab sets at your other sites, it is recommended that you thoroughly review your buddy labs to ensure that all of the data is accurate and complete.Import of buddy labs overwrites any existing lab sets that have been created in the target system.
- Click the Admin tab and then the System Management tab.
- Click the CDS Rules Lab Set Config link.
- Click the Import LOINC Group button and click OK to confirm the import of LOINC groups. A confirmation message informs you when the import is complete.
- Click OK. The import of lab sets (defined as LOINC Groups) is complete. The complete list of lab sets displays on the CDS Rules Lab Set Config pane, where each LOINC group displays as a table row.
Enforcing Custom Rules for Selected Groups or Users
Once you import custom CDS rules from a repository, you can delegate rule enforcement among all users and groups within your institution so that each rule is enforced more selectively. Enforcement of a particular rule can be restricted to one or more facilities, one or more departments or access levels, or restricted to specific individual users. To restrict enforcement of a rule to a specific group or user:- Click the Admin tab and then the System Management tab.
- Click the CDS Rules link.
- Locate the rule on the list and click the associated Edit button.
- Use the search button associated with each of the following fields to define which of your users will be subject to the specified rule. Note that these rules are enforced most liberally, meaning that a user must meet any of the four criteria to have the rule enforced.
- Apply to user levels: Restrict enforcement of the rule to one or more access levels.
- Users: Restrict enforcement of the rule to one or more individual users.
- Departments: Restrict enforcement of the rule to one or more individual departments.
- Facilities: Restrict enforcement of the rule to one or more individual facilities.
- Click Save. The specified custom rule will be enforced for all users meeting at least one of the four criteria described above.
Configuring CDS Rule Variable Overrides
There are scenarios in which a particular facility might define a variable differently than how it is defined within the custom CDS rules that they import. A single facility within a larger institution might define a custom variable that is specific to how they reference a specific order, location, or nursing query. For example, different customers might define the VTE Order Set mnemonic differently, and a single customer might define this mnemonic differently among their different facilities. To allow for such variations, the custom CDS rule admin user interface lets authorized administrators define a variable override and assign it to one or more specific facilities to limit the scope of its usage. To configure a custom CDS rule variable override:- Click the Admin tab and then the System Management tab.
- Click the CDS Rules link.
- Locate the rule that has a custom variable definition and click the associated Edit button.
- Click Add Override. The list of all editable variables displays in a table. Rules lacking a table do not have any variables that can be re-defined using overrides.
- Locate the variable you want to re-define and enter the custom value in the associated Override Value column.
- Use the Facilities setting to search for and select one or more facilities that will make use of this custom value. Alternatively, you can select Apply to all facilities if this custom value is used institution-wide.
- In the Name field, specify the name of the variable (use the same variable name that displays under the Variable column in the table).
- Click Save. The override is identified by the variable name and displays below the Add Override button on the Edit CDS Rules window.
Referencing Linked Data Resources and Evidence-Based Decision Support
CDS custom rules can incorporate links to external resources such as a transition of care or referral summary that has informed patient care such as choice of medications or indication of medication allergies, or for evidence-based decision support interventions. Authorized administrators can include any such links through configuration of two specific CDS rule variable override variables; one defines the label to use for the external link, the other specifies the URL of the external resource.Not all rules allow for configuration of links to external resources, but only those rules that are expected to require or reference this type of information.
- Click the Admin tab and then the System Management tab.
- Click the CDS Rules link.
- Locate the rule needing links to external resources and click the associated Edit button.
- Click Add Override. The list of all editable variables displays in a table. Rules that allow for configuration of links to external resources include the two variables Source Text and Source Links.
- For the Source Text Override Value, enter the label to use for the external link. For example, WebMD.
- For the Source Links Override Value, define one or more external links using the following syntax: [label]=http://[full domain name],[label2]=http://[full domain name2]
Configure multiple links using a comma-separated list, as shown in the above example.
- Click Save.
Configuring CPOE to Allow for Weight-Based Dosing
You can configure CPOE to display a weight-based dose among the Dose field options available to clinicians during order entry. Commure Pro CPOE includes a valuable weight-based dosing feature that leverages demographic data in the system (patient’s age and weight) to automatically calculate a (suggested) dose for patients who require a weight-based dosing approach (such as pediatric patients). Clinicians can override the automatically-derived dose before submitting orders by updating any of the data used in the calculation (patient weight, the weight-based dose from the selected Order Definition, and the calculated dose (that was automatically derived from the weight and weight-based dose)). Any overrides that clinicians make are retained for the remainder of the order session but do not impact any data outside of this session. For example, if a clinician updates the patient weight from 35 to 40 kg, any additional orders entered in the order session will retain the 40 kg value but the weight will not be updated for the patient’s demographic data stored in the system. To configure locations to use the weight-based dosing feature:- Enable WBD for one or more of your facilities and units (Admin > Location > [select facility or unit] > Edit > Enable Weight Based Dosing = Yes).
-
Configure the vital to be used when automatically calculating the Dose value. (Admin > Facility Group > CPOE Preferences > Vital to be used for Weight in KG).
In typical situations, you should set this preference to the value Weight. However, in some environments you might need to change this configuration if the weight value needed to perform the WBD calculation is pulled from a different field in the back-end system.
- Click Save.
Configuring Additional Route Choices for Orally-Administered Medications
You can configure additional medication routes to serve as alternate routes (such as “per tube”) for medication orders that are normally administered to patients orally. When “oral” is included as a route selection available to medication orders, any routes that have been configured using this preference are then provided as additional selections. Note that the list of routes that are available for configuring this preference is obtained from the CPOE Med Route reference list. For more information (including how to configure this feature), see Facility Group Reference Lists. To configure additional route choices for medications that are administered to patients orally:- Click the Admin tab and then the Facility Group or CPOE tab.
In deployments where Facility Groups are not enabled, the Facility Group tab is replaced by the CPOE tab.
- Click CPOE Preferences, then Edit.
- Locate the setting Additional Route Choices (for oral drugs), and enter any additional options in the Text area provided. (Use shift+Ctrl to make more than one selection.)
- Click Save.
Managing Medication Routes
You can manage the complete list of medication routes directly from within CPOE, which includes adding new medication routes and making simple changes to these med routes that remain local to the CPOE application. This list is updated automatically each time you import from your drug database to obtain the most recent updates to your medication list. To add or edit medication routes:- Click the Admin tab and then the Facility Group or CPOE tab.
In deployments where Facility Groups are not enabled, the Facility Group tab is replaced by the CPOE tab.
- Click the Med Routes link, then click either
- Add Med Route to create a new medication route, or
- Edit to make changes to an existing medication route.
- Modify or add the values for the following settings:
- Name: To specify an alternate name for the medication route.
- Patient Instructions Name: To specify additional patient instructions (such as “by mouth”) that supplement the medication route name. This information is appended after the Name field, followed by the discharge route. This field is restricted to a maximum of 100 characters in length.
- Discharge Route: To specify a med route for the medication specifically when entered as part of the discharge medication reconciliation (DMR) workflow.
- Click Save. Your medication route settings are saved. Note that these changes are only used within the Commure Pro CPOE and Medication Reconciliation applications; all medication route values remain unchanged in the drug database.
Converting Liquid Medication Units for ePrescribing
Note that ePrescribing now requires that liquid medications be prescribed in mL units (for meaningful use compliance). When providers prescribe liquid medications (as determined by medication routes), the system automatically converts any mg units found in the patient instructions to mL units. If the system is unable to complete this conversion, providers are required to specify the dose value in mLunits.Medication Route Settings
The following Facility Group preference is used to specify additional medication routes to be applied only to orally-administered mediation orders. Additional Route Choices (for oral drugs) Specifies a list of medication routes to provide only when displaying medication orders that are administered orally. For more information about configuring this list, see Configuring Additional Route Choices for Orally-Administered Medications. Name Specifies an alternate med route name to use within the PatientKeeeper CPOE and Medication Reconciliation applications. You can map an alternate name to an FDB name from the CPOE Med Route Maintenance pane ( Discharge Route Specifies an alternate medication route to use with medications specifically when entered from within the PaitnetKeeper discharge medication reconciliation (DMR) application. You might specify a discharge med route in cases where the medication form of an inpatient medication is unavailable or less convenient than a medication route that is more suitable for home use.Configuring an Alternate Parent / Child Hierarchy for Scheduled Additives
If there are I.V. medications used within your facility that are administered on a schedule instead of being administered continuously, you can configure your facility to reverse the parent / child assignments of these two orders. Set the facility group preference Backend IV Piggyback to specify the name of any back-end Order Type that will trigger this reversal of assignments. In order submissions consisting of two orders that have at least one order type matching this setting, the parent / child roles are switched. For example, when the ‘piggyback’ medication sodium bicarbonate (typically considered as an additive when delivered continuously) is administered on a schedule along with an IV fluid, the sodium bicarbonate order becomes the parent order, and the IV fluid is assigned the role of child in determining how this I.V. medication order displays to providers. For more information about configuring how I.V. medications display, see Displaying Combined I.V. Medications in a “Parent / Child” Hierarchy. To configure an alternate parent / child hierarchy for scheduled additives:- Click the Admin tab and then the Facility Group or CPOE tab.
In deployments where Facility Groups are not enabled, the Facility Group tab is replaced by the CPOE tab.
- If your institution uses multiple Facility Groups, select the Facility Group you want to configure from the Facility Group drop-down list.
- Depending on the type of order category you want to configure, click either the Order Groups or the Order Definitions link. Either the CPOE Order Group Maintenance page or the CPOE Order Definition Maintenance page is displayed.
- Use the search criteria fields provided to locate the Order Group(s) or Order Definition(s) you want to edit.
- Select the Order Group(s) or Order Definition(s) that you want and click the Edit button that displays in the lower-right portion of the screen. The Edit CPOE Order Group or Edit CPOE Order Definition screen displays.
- Locate the setting Backend IV Piggyback and enter the name of any back-end Order Type for which the parent / child assignments are to be reversed.
- Click Save. In order submissions involving two medications, one of which is a piggyback medication that is administered on a schedule, the parent / child assignments will be reversed in the selected facility.
Setting(s) for Defining an Alternate Parent / Child Hierarchy
Backend IV Piggyback Specifies the name of any back-end Order Type for which the parent / child assignments are to be reversed. When this match is detected, the medication order that would normally be assigned the role of additive (for example, sodium bicarbonate) is now considered the parent order. The order that would ordinarily be considered the parent (the IV fluid) is assigned the role of the child order. For more information about configuring how I.V. medications display, see Displaying Combined I.V. Medications in a “Parent / Child” Hierarchy.Preparing for Configuring Pre-Admission Workflows
Pre-admission workflows represent clinical scenarios that require clinicians to enter orders for patients prior to patient registration and admission, such as when scheduling patients for surgery. In many cases, such workflows involve entering both the prerequisite orders needed to be completed prior to a future appointment (such as labs and/or tests, in the case of surgery) and also “day of admission” orders (such as orders to complete the surgical procedure). In Commure Pro CPOE, administrators can configure pre-admission workflows by enabling pre-admission ordering for one or more visit types, defining workflow types to associate each pre-admission visit type with a location within their facility, and enabling pre-admission workflows for one or more of their facilities. An overview of this process is described in the section below, along with detailed procedures for completing the configuration of pre-admission workflows. Note that when using pre-admission workflows, clinicians can enter orders for patients that have not yet been registered in the back-end system and therefore are not found in patient search results. When you configure and enable pre-admission workflows, a Pre-Admit tab displays in the Commure Pro user interface that allows clinicians to create a new patient record if no corresponding patient account is found during entry of the pre-admission orders For more information about entering pre-admission orders from the user’s perspective, see the Commure Pro CPOE User’s Guide.Configuring Pre-Admission Workflows
Configuring Pre-Admission Workflows is a process requiring completion of the following basic steps.- Configuring the Commure Pro Visit Types for all visits that involve some type of pre-registration activity prior to the patient’s arrival at the facility, such as when clinicians enter both pre-surgical orders and day of admission orders when scheduling patients for general surgery.
- Configuring Pre-Admission Workflow Types to define workflow types to represent the pre-admission scenarios that you plan to support. For example, you might choose to create the workflow type “Labor and Delivery” for clinicians to use when ordering lab tests and entering day of admission orders to administer to obstetrics patients on the day of delivery.
- Enabling the Pre-Admission Workflows for one or more of your facilities. Procedures for completing these configuration steps are provided below. These steps are organized to be followed sequentially if you are configuring the Pre-Admission Order Reconciliation feature for the first time.
Configuring Visit Types for Pre-Admission Order Entry
Before configuring pre-admission workflow types in CPOE, you must configure at least one Commure Pro visit type to allow for entry of pre-admission orders. Typically, you should make this configuration change for all visit types that might require pre-registration of patients prior to admission within your facility or institution. For example, you should make this configuration change for both the Pre-Registration and Same Day Surgery visit types. To configure visit types to allow for pre-admission order entry:- Click the Admin tab and then the System Management tab.
- Click the Commure Pro Visit Types link.
- From the Active Visit Types list on the Commure Pro Visit Type Maintenance pane, locate and select the visit type to configure.
- Click Edit from the lower-right portion of the screen.
- From the Edit Commure Pro Visit Type window, locate the Enable CPOE option and use the drop-down menu to set this value to Enter Pre-Admission Orders.
- Click Save.
- Repeat steps 3 through 6 for any additional visit types that you want to enable for pre-admission order entry. The selected visit types are enabled for order entry prior to patient admission.
Configuring Pre-Admission Workflow Types
Pre-admission workflow types define an association between a workflow and a particular location, which is typically where the printer is most frequently used to route all activity pertaining to a given workflow (for example, you would configure the General Surgery workflow to use the location of the main surgery printer). Configuration of workflow types also involves specifying a default visit type to assign to the (temporary) visits that clinicians create when their patient searches yield no existing visits for the current patient. Workflow types also define an association between a workflow and one or more back-end visit type(s), which correspond with the ADT visit types that are used by a particular workflow. For example, you would configure the General Surgery workflow to correspond to both Pre-Registration and Same Day Surgery visits). To create and configure pre-admission workflow types:- Click the Admin tab, then the Facility Group (or CPOE) tab and click the Pre-Admission Workflow Types link.
- Click the Add Pre-Adm Workflow Type button.
- From the Add CPOE Pre-Admission Workflow Type window, complete the following fields:
- Name Enter the name of the workflow type you want to create. This name displays among the Pre-Admission Type options available to clinicians when creating patient accounts from the Pre-Admit tab. This name also displays within the portal as the “Reason for Visit”.For example, you might assign the name Labor and Delivery for obstetrics patients.
- Location Set the Facility and Unit drop-down menus to specify the location that is most associated with the pre-admission workflow type that you are creating. Continuing with the above example, this would be the location of the main printer used for obstetrics patients during delivery.
- Visit Type used for Temporary Visit Creation Use the drop-down menu to select a visit type to assign to new patient visits. These visits are created when no patient visit is found during searches conducted from the Pre-Admit tab, and serve as temporary visits until the patient is registered and a proper patient account is created for this patient in the system.
- Visit Type(s) for corresponding back-end visits Use the drop-down menu to assign (ADT) back-end visit types to the pre-admission workflow type that you are creating. For example, you might set this field to “Pre-Registration” for the labor and delivery workflow, which corresponds with the ADT visit type PRE SDC.Click the Add Visit Type link if there are multiple ADT visits that correspond to a single pre-admission workflow. For example, when configuring a workflow for general surgery, you might configure this setting to specify the two ADT visit types “Pre-Registration” and “Same Day Surgery”.
- Always use active visit if available This setting controls if providers are able to create a new visit when entering pre-admission orders while an active visit already exists in the system. By default, Always use active visit if available is set to No, meaning there are no restrictions on creating a visit when an active visit already exists. Select Yes to allow new visits only when an active visit does not exist. If a provider selects to create a new visit when entering pre-admission orders while an active visit already exists, they will receive a message that a visit already exists, and to choose one from the list that is displayed.
- Click Save. You can confirm your Pre-Admission Workflow Type configuration settings, which display in the right-hand side of the screen.
Enabling Pre-Admission Workflows
You must enable pre-admission order entry for a clinician before (s)he can enter pre-admission orders using the visit types and workflows that you created above. Note that configuration of pre-admission workflows involves enabling this feature for any of the facilities to which the user has access. To enable pre-admission workflows for a specific user:- Under the Admin tab, navigate to the User tab, select the user, and click Edit.
- Select CPOE from the Edit Settings drop-down menu.
- Locate the Create Pre-Admission CPOE Visits preference and click the associated Edit link.
- Enable the checkbox associated with the facility in which to enable the pre-admission workflows for this user.
- Click Save from the Quick Details box, then Save from the CPOE Settings screen. Your pre-admission workflows are enabled for the visit types that you configured in the above section. In addition, the Pre-Admit tab now displays for the selected user(s), enabling them to enter pre-admission orders for selected visit types as determined by your configuration.
Configuring Lab Orders to be Identified as “Timed” Orders
You can configure how the Order Detail window responds when providers schedule routine lab orders for a specific time. You can set a Facility Group preference so that the category “Timed” is automatically selected on the Order Detail window when providers specify a time for a routine lab order. When this preference is disabled, providers belonging to the selected Facility Group must explicitly select this radio button after they specify a time (using the “Today at” value for the When field). To configure the Order Detail window to automatically identify “timed” routine lab orders:- Click the Admin tab and then the Facility Group or CPOE tab.
In deployments where Facility Groups are not enabled, the Facility Group tab is replaced by the CPOE tab.
- If your institution uses multiple Facility Groups, select the Facility Group you want to configure from the Facility Group drop-down list.
- Click the Edit button.
- Locate and enable the setting Timed Priority for Lab tests.
- Click Save. The Order Detail window will now automatically identify routine lab orders as “timed”.
Configuring Lab Orders to Remain on the Patient List
In some back-end systems (those other than MEDITECH), interfaced lab orders sometimes do not get sent back to the CPOE application until a short time before their associated test has been scheduled in the system. In this case, the duration specified by the existing CPOE preference Timeframe to display Commure Pro Non-Medication orders that have a corresponding backend order might not allow for the display of some lab orders that get interfaced later than the specified time frame. When you need to ensure that lab orders remain on the patient list for a duration that exceeds the other non-medication orders, you can configure the setting Do not remove lab orders until NN hours before order start time (Admin > Facility Group > CPOE Preferences) to ensure that lab orders continue to be available before a test has been scheduled.This preference does not display to customers with a MEDITECH back-end, since interfaced lab orders are obtained earlier from MEDITECH systems.
Limiting the Entry of Diet Orders
You can configure the entry of diet orders so that, within a given session, providers are restricted to entering one diet order per meal for any specific date and meal time. Use the setting Allow Multiple Diets (with same start date/meal) to allow or prevent the entry of multiple diet orders during order sessions of providers belonging to a particular Facility Group. When you enable this setting, providers can enter multiple diets within an order session that share the same start date and time. When you disable this setting, duplicate order messages are triggered when providers enter two or more diet orders in an order session that share the same start date or time. To limit the entry of diet orders to one order per date/time:- Click the Admin tab and then the Facility Group or CPOE tab.
In deployments where Facility Groups are not enabled, the Facility Group tab is replaced by the CPOE tab.
- If your institution uses multiple Facility Groups, select the Facility Group you want to configure from the Facility Group drop-down list. The CPOE Preferences pane displays by default.
- Click the Edit button.
- Locate and set the preference Allow Multiple Diets (with same start date/meal) to No.
- Click Save. A duplicate order message will be triggered when providers enter two or more diet orders that share the same date and time during a single order session.
Configuring Order Types to Display “Now” as a Priority
You can configure which of the Order Types in CPOE include the value “Now” as one of the options available to providers when they choose a priority during order entry. Administrators can configure CPOE to provide “Now” as a priority for all Order Types, or they can restrict this option to medication orders only, since it is expected that some facilities might want to restrict this option to situations requiring an urgent response. To configure which of the Order Types display “Now” as one of the options available to the priority field:- Click the Admin tab and then the Facility Group or CPOE tab.
In deployments where Facility Groups are not enabled, the Facility Group tab is replaced by the CPOE tab.
- If your institution uses multiple Facility Groups, select the Facility Group you want to configure from the Facility Group drop-down list.
- From the CPOE Preferences pane, click Edit.
- Locate and configure the Show ‘Now’ Priority for Meds only setting to specify either:
- No: To enable providers to choose “Now” as a priority for orders from any Order Type.
- Yes: To enable providers to choose “Now” as a priority for medication orders only.
- Click Save. Your configuration determines whether providers can set a “Now” priority for medication orders or for all Order Types.
Configuring Stopped One-Time or STAT Orders to Allow Providers to Discontinue Them
You can configure one-time or STAT medication orders that are initiated from a hospital’s MEDITECH system to be discontinued by providers, as long as the orders meet the following criteria:- The orders have exceeded their specified Stop Date/Time.
- The orders have not yet been administered to patients (there is no MAR event with a status of GIVEN or NOT GIVEN). This configuration is specific to backend medication orders with a MEDITECH Schedule value of ONE or STA.
- Select the Admin tab and then the Facility Group or CPOE tab.
In deployments where Facility Groups are not enabled, the Facility Group tab is replaced by the CPOE tab.
- If your institution uses multiple Facility Groups, select the Facility Group you want to configure from the Facility Group drop-down list.
- From the CPOE Preferences pane, click Edit.
- Locate and configure the Timeframe to DC One-Time Orders (hours) setting by entering the number of hours during which providers can discontinue medication orders. Specify a time of 1 - 99 hours. The default time of 0 indicates that providers cannot discontinue one-time or STAT orders after the end date.
- Select Save.
Configuring the Display of Radiology Orders
You can configure how radiology orders display in the Order Detail window. In some cases, including Order Group data along with the Order Definition name can help providers to identify the radiology order, since these types of orders sometimes use less descriptive Order Definition names when compared to other types of orders. You can configure radiology orders to display in the Order Detail window as follows:- Using the full Order Group name of the order along with the Order Definition name. For example:General X-Ray Miscellaneous Radiology Order
- Using an abbreviated Order Group name along with the Order Definition name. For example:XR Miscellaneous Radiology Order
- Using the Order Definition name only. For example:Miscellaneous Radiology Order
- Click the Admin tab and then the Facility Group or CPOE tab.
In deployments where Facility Groups are not enabled, the Facility Group tab is replaced by the CPOE tab.
- If your institution uses multiple Facility Groups, select the Facility Group you want to configure from the Facility Group drop-down list.
- Click the Edit button.
- Locate the setting Include Order Group Info in Order Description (Rad Only), and specify either:
- Abbreviation: To include the Order Group abbreviation with the Order Definition name.
- Name: To include the complete Order Group name with the Order Definition name.
- No: To identify radiology orders only by their Order Definition name.
- Click Save. Radiology orders will display as configured for all providers in the selected Facility Group.
Configuring Facility Group Reference Lists
Reference lists are lists of values that you can use to further configure the CPOE application. Reference lists are often used to define a list of choices that you can provide to your users in a prompt when they choose a specific action.The Level 0/1 parameter Can Edit Code Sets (Reference Lists) is used to grant administrators the permission to edit reference lists. To enable this setting, contact your Commure Pro representative.
Accessing the Facility Group Reference Lists
Access to all reference lists taking effect at the Facility Group level is generally restricted to level 0 and level 1 administrators. However, these reference lists are also available to any selected level 2 administrators for whom you grant administrative access. For more information about granting administrative access to level 2 administrators, see Controlling a User’s Administrative Access to CPOE. To access the facility group reference lists:- Click the Admin tab and then the Facility Group tab.
- Click the Details link.
- Click the Reference Data Set button. The Facility Group Reference Data Set window displays the complete list of all reference lists that you can configure for all behavior that takes effect across the selected Facility Group.
For information about the reference list used to map back-end medication routes to the CPOE application’s medication routes, see Mapping Medication Routes.
Configuring How Reference Lists Display to Users
Each reference list provides a configuration option for specifying the order to use when displaying its elements to your end users as a list of options.Reference list elements display to your end-users in alphabetical order when you do not specify a sort order.
- From the Facility Group Reference Data Set window, select the reference list you want to configure. For info on accessing this window, see Accessing the Facility Group Reference Lists.
- Locate the Sort Order column from the table displaying the reference list entries.
- Enter sequential integer values (starting with 1) into each field to represent the order to use to display these options to your end-users, until you populate the field associated with each entry.
- Click Save. These reference list entries will display to your users in the sort order you specified.
Mapping Order Status From a Back-end System
The Order Status (ORDER_STS_CD) reference list is used to map the back-end status of all orders to a corresponding status in the CPOE application. You must provide this mapping assignment so that both your medication and non-medication orders display correctly. To map order status between the CPOE application and your back-end system:- Click the Admin tab and then the System Management tab.
- Click the Reference Lists link, then locate and select the Order Status reference list. The list displays in the right-hand pane. The list of available back-end order statuses displays in the left-most Name column.
- From the Mapping column, use the drop-down menus in each row to assign a CPOE order status to correspond to each back-end order status.
- Click Save when you complete the mapping assignment.
Mapping Medication Routes
The Route reference list provides a way to map medication routes between the CPOE application and your back-end system. Each back-end medication route displays in a table, enabling you to specify the corresponding medication route to use in the CPOE application. Note that this specific list is accessed in a slightly different manner than the other Facility Group reference lists (different button). During order entry, the medication routes available to order strings are obtained from their associated Order Definition, as well as any related orders, provided these related orders belong to an Order Group that shares the same interface type as the Order Group of the order string selected for order entry. To simplify management of order strings for both administrators and users, the medication routes made available during order string creation are limited to those with a back-end mapping assignment. Similar filtering out of unmapped med routes also occurs when providers manage their favorites and when they create free-text orders. Note that medication routes are not shared between discharge order strings (in MEDITECH, those from RXM) and inpatient order strings (those from the PHA MEDITECH module). To map medication routes between the CPOE application and your back-end system:- Click the Admin tab and then the Facility Group or CPOE tab.
In deployments where Facility Groups are not enabled, the Facility Group tab is replaced by the CPOE tab.
- If your institution uses multiple Facility Groups, select the Facility Group you want to configure from the Facility Group drop-down list.
- Click the Details link.
- Click the Route Mappings button.
- The Facility Group Route Mapping window displays the Route reference list. Use this list to make the mapping assignments that map medication routes used by your back-end system to corresponding medication routes in the CPOE application
- Click Save.
- (optional) To facilitate the process of validating these routes in your source system, you can export your entire list of med routes into an Excel spreadsheet. Upon clicking Export from the Facility Group Route Mapping window, a complete export of the med route data set is saved to your local machine, which provides a mapping of all med route data. The export includes the following med route data:
- Facility Group: The facility group to which the med route belongs.
- Name: The name assigned to the med route in the back-end / source system.
- System Identifier: Specifies the unique identifier used to identify each med route in the CPOE system. Once you save an entry, you should not change the value of this field unless you suspect it specifies an incorrect value.
- Context: (not used by the CPOE application)
- Sort Order: Use sequential numerical values to specify how to order these entries in the drop-down list displaying reason overrides to users.
- Alias: Specifies one or more aliases referencing the specified med route.
- Authority: Specifies the authority used to define the med route alias(es). For example, CPT or ICD9.
- Code ID: (not used by the CPOE application)
- Alias ID: (not used by the CPOE application)
For descriptive information about the medication routes used by the CPOE application, contact your Commure Pro representative.
Mapping External Allergy Codes to the Allergies Used by CPOE
If your institution uses an allergy database that differs from the database used by the CPOE application (the First Databank database), the CPOE application lets you define a map to associate your list of external allergy codes with their corresponding FDB allergy codes. This mapping is done to facilitate drug-allergy interactions. If allergies are not mapped using this tool, then the system uses NDC codes to map allergies between the two drug databases. Note that use of NDC codes to perform this mapping can trigger false positive allergy interactions. To map a list of external allergy codes to First Databank screen allergies:- Click the Admin tab and then the Facility Group or CPOE tab.
In deployments where Facility Groups are not enabled, the Facility Group tab is replaced by the CPOE tab.
- If your institution uses multiple Facility Groups, select the Facility Group you want to configure from the Facility Group drop-down list.
- Click the Details link.
- Click the Allergy Mappings button.
- The Allergy Code Mapping window displays the list of all external allergy codes that have been received from the back-end interface. These codes can identify allergies by abbreviation, name, or both.
- Click Edit From the Edit Allergy Code window, you can perform mapping assignments between a particular external allergy code and one or more (FDB) allergy codes that are typically used by the CPOE application
- Click Save.
- Continue to repeat these steps until your allergy code mapping process is complete.
Mapping Frequency Values for Individual Order Types
Because the various Order Types can use the Frequency Field differently, reference lists are provided that enable you to define these values independently for each Order Type. Use the following reference lists to define the Frequency Fields for each Order Type:- CPOE Lab Frequency (CPOE_LAB_FREQ)
- CPOE Med Frequency (CPOE_MED_FREQ)
- CPOE Nursing Frequency (CPOE_NURSING_FREQ)
- CPOE Other Frequency (CPOE_OTHER_FREQ)
- CPOE Radiology Frequency (CPOE_RAD_FREQ) These definitions are applied to any one of the five Order Types listed above on a per-Facility Group basis, to allow for variations in how these values are defined in different Facility Groups throughout your institution. For more information on configuring reference lists, see Configuring How Reference Lists Display to Users.
- Click the Admin tab and then the Facility Group or CPOE tab.
In deployments where Facility Groups are not enabled, the Facility Group tab is replaced by the CPOE tab.
- If your institution uses multiple Facility Groups, select the Facility Group you want to configure from the Facility Group drop-down list.
- Click the Details link.
- Click the Reference Data Set button.
- The Facility Group Reference Data Set window displays the available reference lists.
- Select from one of the five reference lists described above and use the reference list table to define the mapping for any of the five Order Types shown. You can add a new Frequency value or edit an existing Frequency value, but you cannot delete an existing entry.
- Click Save. The Frequency values are defined and mapped for the selected Order Type.
Configuring a Default Frequency Value for Medication Orders
You can configure the Frequency field to specify a default value for medications that do not require providers to specify a frequency value. This value will then be interfaced to the back-end system when providers do not select a frequency value for orders having an optional frequency setting. To configure a default frequency value for medication orders:- Click the Admin tab and then the Facility Group or CPOE tab.
In deployments where Facility Groups are not enabled, the Facility Group tab is replaced by the CPOE tab.
- If your institution uses multiple Facility Groups, select the Facility Group you want to configure from the Facility Group drop-down list.
- Click the Display Overrides link.
- Locate and select the Generic Medication override, and click Edit.
- From the drop-down menu displaying under the Default Value column for the Frequency field, set the default frequency value.
- Click Save. The default value is used for Frequency values that remain optional to providers when they do not explicitly specify a value.
The system is designed to detect any/all frequencies that involve a one-time administration of a medication (sometimes referred to as “once” frequencies). In cases where clinicians select one of these “once” frequencies, any fields involving multiple frequency values are hidden, such as the Days/Doses and Bags/Hours fields. These fields are also hidden for orders specifying “once” frequencies in Order Sets or in pre-selected medication orders that specify a “once” frequency.
Configuring IV Rate Choices for Order Groups or Order Definitions
You can configure the medication display override in order to provide other values for the IV Rate field at either the Order Group or Order Definition level. Prior to configuring the Generic Medication Display Override to define additional IV rate values to use for specific Order Groups or Order Definitions, you must define these additional IV rate values using the CPOE Med Rate reference list. For more information about this specific list, see Facility Group Reference Lists. For more general information about configuring these types of reference lists, see Accessing the Facility Group Reference Lists. To configure additional choices for the IV Rate field to use for Order Groups or Order Definitions:- Click the Admin tab and then the Facility Group or CPOE tab.
In deployments where Facility Groups are not enabled, the Facility Group tab is replaced by the CPOE tab.
- If your institution uses multiple Facility Groups, select the Facility Group you want to configure from the Facility Group drop-down list.
- Click the Display Overrides link.
- Locate and select the Generic Medication override, and click Edit.
- From the Name column associated with the Medication IV Rate field, click the IV rate link.
- Use the Reference List setting to select the CPOE Med Rate reference list. You should have already defined the additional choices provided by this reference list. For more information, see Accessing the Facility Group Reference Lists.
- Click Save. The default value is used when the IV Rate field is considered optional and when physicians do not explicitly specify a value for this field.
Facility Group Reference Lists
The following reference lists are provided for additional configuration of the CPOE application at the Facility Group level. When you configure any of the following lists, your changes take effect across all users belonging to a particular Facility Group that you define within your institution.| Reference List Name | Function |
|---|---|
| CPOE Lab Frequency | Used to define and map the values that are made available for the Frequency Field when used with orders of type Lab. |
| CPOE Med Form | Determines the form of the medication that is administered to a patient. For example, Aerosol, Lozenge, or Ointment.These forms are populated using data from the drug database. In some cases these names are used to form an Order Definition description. You can modify this portion of the description by editing the name column from the Med Form Reference Data Set. |
| CPOE Med Frequency | Used to define and map the values that are made available for the Frequency Field when used with orders of type Medication. Note that when you use this reference list to configure a specific field display override, the “Other” option is dynamically removed from the list of default values that are available to that display override. |
| CPOE Med Rate | Used to define additional IV rate values to provide with orders at the Order Group or Order Definition list level. Any entries that you define on this list are provided along with any/all IV rates that have already been defined and are available from the drug database. This reference list is typically used to provide additional IV rate choices using the IV rate field from the Generic Medication display override. |
| CPOE Med Route | Determines the medication routes that are available for administering medication. For example, Oral, IV, or Injection.These routes are populated using data from the drug database. Any routes that you manually add using this reference list will remain intact during subsequent loading of medications from the drug database. Note that you can manage this list from a dedicated CPOE Med Route Maintenance pane (Admin > Facility Group > Med Routes). |
| CPOE Nursing Frequency | Used to define and map the values that are made available for the Frequency Field when used with orders of type Nursing. Note that when you use this reference list to configure a specific field display override, the “Other” option is dynamically removed from the list of default values that are available to that display override. |
| CPOE Other Frequency | Used to define and map the values that are made available for the Frequency Field when used with orders of type Other. |
| CPOE Radiology Frequency | Used to define and map the values that are made available for the Frequency Field when used with orders of type Radiology. |
| CPOE Reason to override allergy/drug interactions | Specifies a list of reasons for continuing with an order that triggers an allergy / drug interaction. |
| CPOE Reason to override drug/drug interactions. | Specifies a list of reasons for continuing with an order that triggers a drug - drug interaction. |
| CPOE Reason to override duplicate interactions | Specifies a list of reasons for continuing with an order that triggers a duplicate interaction. |
| Non-Formulary Reason | Specifies a list of reasons for selecting a medication that is not on your facility’s formulary list. |
| PRN Reason | Specifies a list of reasons for adding a PRN to an existing medication order. |
Configuring Institution-Level Reference Lists
Reference lists are often used to define a list of choices that you can provide to your users in a prompt when they choose a specific action. Some of the available reference lists are provided for configuration of CPOE at the institution level. These settings are applied across all Facility Groups that you define within your institution.The Level 0/1 parameter Can Edit Code Sets (Reference Lists) is used to grant administrators the permission to edit reference lists. To enable this setting, contact your Commure Pro representative.
Accessing the Institution-Level Reference Lists
For information on accessing all institution-level reference lists, see the Commure Pro Administration Tools User’s Guide.Institution-Level Reference Lists
The following reference lists are provided for institution-level configuration of the CPOE application.| Reference List Name | Function |
|---|---|
| CPOE Backend Order Status | Maps the status of all orders that are interfaced from a back-end system. For example, Active, DC’d, or Held. |
| CPOE Interaction Check Types | Determines the types of interaction checking that can be performed on orders as providers enter them into the system. For example, Drug-Allergy or Duplication - Non-Medication. |
| CPOE Interaction Mapping Types | Specifies the categories used in the definition of interaction checking rules. For example, Interaction Severity or Interaction Type. |
| CPOE Order Definition Link Types | Determines the types of links to use with linked Order Definitions. |
| CPOE Order Priorities | Determines the list of categories that are used to prioritize orders. For example, Routine, Urgen t, or Stat. |
| CPOE Order Prototype Type | Determines the list of categories used in the organization of Order Strings. For example, Manual or Drug Database. |
Configuring Which Visits are Available to Users by Default
There are several rules that are used to evaluate which visits are made available to users as they select a patient and enter orders. Some of these rules are standard and apply to all sites, regardless of configuration. Other rules are determined by system settings that are configured under System Management. Understanding how these rules work in conjunction with each other is essential to ensure that the correct set of visits is made available to all providers belonging to each of your facility groups.Basic Rules for Including Visits
Several basic rules are enforced on all visits within a given Facility Group, regardless of system configuration. For a visit (other than future visits) to be included in the drop-down enabling users to make a selection, the visit must meet all of the following criteria:- The visit must not have been canceled
- The visit must belong to a CPOE-enabled location.
- The visit must be active. Visits are evaluated for active status differently, depending on how their visit type is configured, as described below.
- In the case of Scheduled visits, the visit must have a date and time stamp that is no more than 24 hours in the past to be considered active.
- In the case of Admit visits, the visit must not have exceeded the end date that you specified for the associated visit type. Future visits are included in the CPOE drop-down menu regardless of whether these visits have been activated.
Basic Rules for Excluding Visits
Many of the rules for determining which visits to exclude from the visit selection drop-down menu follow logically from the rules establishing inclusion, since these rules are largely applied conversely. A visit is excluded from the user’s list of available visits when it meets any of the following criteria:- The visit has been canceled
- (Unless the visit meets the first two criteria for inclusion described in the previous section) The visit has no association with any CPOE location, or it is associated with one or more locations, none of which is enabled
- The visit is inactive
- If the visit is one of multiple visits associated with a single MEDITECH account number, it will be excluded unless it is the visit with the most recent start date.
Rules for Establishing When Visits are Considered Active
The rules governing how visits are defined as active are represented by options that are available to the two configuration settings:Current Visit: Start Date and Current Visit: End Date. These two settings are used to configure each of the visit types used in the CPOE application. Note that these settings are not used to specify calendar dates, but rather they specify rules for determining when visits (belonging to a particular visit type) are considered active. Note that when multiple active visits are found among Commure Pro visits that share the same back-end account number, precedence is given to the visit with the start date that is closest to today’s date (with past visits prioritized over future visits). These rules are:- Admit—Visits belonging to a visit type set to this rule become active at patient admission. Typically, you might set the start date of an inpatient visit type to the setting Admit. As a result, all inpatient visits are considered active from the time of patient admission and remain active until the visit end date (as determined by the setting Current Visit: End Date). Once the end date passes, visits subjected to this rule no longer show to users when selecting a visit from the drop-down menu. Future visits are included with these active visits in the drop-down menu. Visits scheduled for a future date are always considered active; therefore, these visits are always available to users when selecting a visit from the drop-down menu.
- Discharge—Although available to both of the CPOE visit type settings, this rule is generally used with the Curent Visit: End Date setting. Typically, a value of Discharge is used to configure the end date for Inpatient and/or Observation visit types. Visits subjected to this rule no longer show to users for a patient once the patient is discharged. Defining these activities for each visit type is important, since these rules are applied as part of the evaluation that is made to determine which visits to display to users as they enter and submit orders for patients.
Rules for Establishing a Visit Type to Display as Pre-Selected by Default
The CPOE application should be configured properly to establish which visit types are selected by default among a list of available visits. Administrators will assign a relative ranking among all of their visit types so that the system follows a defined sequence to pre-select the first available among multiple visit types. You can configure this sequence by numbering each visit type (with the sequence 1-N, where N represents the number of available visit types) to determine how precedence is established among the available visit types. Typically, visit types are configured with the following relative ranking assignments:- Inpatient=1
- Observation=2
- ER=3
- Outpatient=4
- Pre-Admission=5 However, you can re-number these to establish precedence rules that work best for your facility or institution.
The relative ranking values that you assign to your various Commure Pro visit types have other implications for use and operation of the patient list. Before you configure your relative ranking assignments, make sure to consult with your Commure Pro representative.
Configuring When Visit Types are Considered Active
The settings used to define when visit types are considered active are configured under System Management. Note that when multiple active visits are found among Commure Pro visits that share the same back-end account number, precedence is given to the visit with the start date that is closest to today’s date (with past visits prioritized over future visits). To configure when visit types are considered active:- Click the Admin tab and then the System Management tab.
- Click the Commure Pro Visit Types link.
-
From the Commure Pro Visit Type Maintenance screen, select one of the following visit types:
- Inpatient
- Observation
- ER
- Outpatient
-
From the table displaying on the right side of the screen, locate and configure the following two settings:
- Current Visit: Start Date
- Current Visit: End Date For more information about the various options available to both of these settings, see Rules for Establishing When Visits are Considered Active.
- Locate the setting Current Visit: Relative Ranking and specify a unique number to define precedence rules for the currently selected visit type, relative to all of the available Commure Pro visit types. For more information about establishing precedence rules among visit types, see Rules for Establishing a Visit Type to Display as Pre-Selected by Default.
- (optional) If you set the Current Visit: Start Date preference to Scheduled, locate the setting CPOE Deactivate Days to configure how many days (if any) visits of this type are to remain available for order entry after their end date. For more information, see Rules for Establishing When Visits are Considered Active.If configuring multiple visit types, continue steps 3 through 5 for each of these remaining types.
CPOE Default Visit Settings
Current Visit: Start Date (Web, Android, Apple) To define the start of an active window period for all visits belonging to this visit type, select the event that you want to use to trigger the start of the visit type’s active period. You can select the patient admission date or a scheduled date. If there should be no limitations, leave this field blank. For example, for an inpatient visit, you would most likely set this field to Admit. Current Visit: End Date: (Web, Android, Apple) To define the end of an active window period for all visits belonging to this visit type, select the event that you want to use to trigger the end of the visit type’s active period. You can select the patient discharge date or a scheduled date. For example, for an inpatient visit, you would most likely set this field to Discharge. It is important that you do not leave the value of this field unspecified. Current Visit: Relative Ranking: (Web, Android, Apple) To establish precedence rules to determine how the system prioritizes among multiple visit types to determine which of these types to display as pre-selected to users in a drop-down menu that provides a list of visits to users. CPOE Deactivate Days (Web, Android, Apple) This setting controls how long after the current visit end date that visits of a specified type remain available for order entry. Administrators can enter any number (in the range 0 - 5, inclusive) to define this duration in days. When this preference is set to 0, visits belonging to this type cease to be available as soon as they reach their end date. When this preference is set to any other number in the range 1-5, visits belonging to this type remain available for the number of specified days after the end date. For example, when this preference is set to 3, visits with an end date of 2/11/14 remain available for order entry until the end of the calendar date of 2/14/14.Disabling Multi-tab Warnings
(sites using MAP integration only) If you are using CPOE and Med Rec in environments employing MAP integration (used for accessing CPOE functionality through a third-party interface), you can disable the warnings that display to users when signing and submitting orders with multiple open browser sessions. While these warnings are intended to prevent inconsistencies, they are not applicable when MAP integration is in use. To disable multi-tab warnings:- Click the Admin tab and then the Facility Group or CPOE tab.
In deployments where Facility Groups are not enabled, the Facility Group tab is replaced by the CPOE tab.
- If your institution uses multiple Facility Groups, select the Facility Group you want to configure from the Facility Group drop-down list. The CPOE Preferences pane displays by default.
- Click the Edit button.
- Locate and set the preference Show Multi-Tab warning on sign and submit to No.
- Click Save. Clinicians are free to sign and submit orders in both the CPOE and Med Rec applications without encountering multi-tab warnings. As mentioned, you should only set this to No in sites using MAP integration.
Working with and Defining Admin Criteria
The Admin Criteria field set is an extra field set that is available to providers when placing medication-type orders. Unlike the field sets that are attached to Order Groups or Definitions (which apply to all orders belonging to a given medication), the admin criteria fields can be specific to an order string. For example, there maybe be specific titration fields with specific default values that are needed for only some of the strings associated with a specific medication. Admin Criteria fields can be interfaced discretely to MEDITECH or Med Host back-ends if the medication in the receiving system is configured with the same fields. This facilitates interfacing orders that previously could not be interfaced with this discrete data. If the resulting medication order is modified, the responses then carry over to their appropriate fields again, which facilitates the provider workflow and ensures synchronization between Commure Pro CPOE and the back-end system. If you configure the field set definitions used within Admin Criteria to interface inbound data from MEDITECH or Med Host systems, note that any row and column positions defined in those systems are retained in CPOE. (The fixed font is used for this reason). There are new configuration settings and new meta-data added in support of Admin Criteria, including new Admin Critieria Order Definitions, links to Admin Criteria on Order Definitions, and links to Admin Criteria on Order Strings (including strings used within Order Sets).Updates to the Admin User Interface
A new Admin Criteria screen lets authorized administrators configure Admin Criteria definitions directly from the Facility Group / CPOE tab.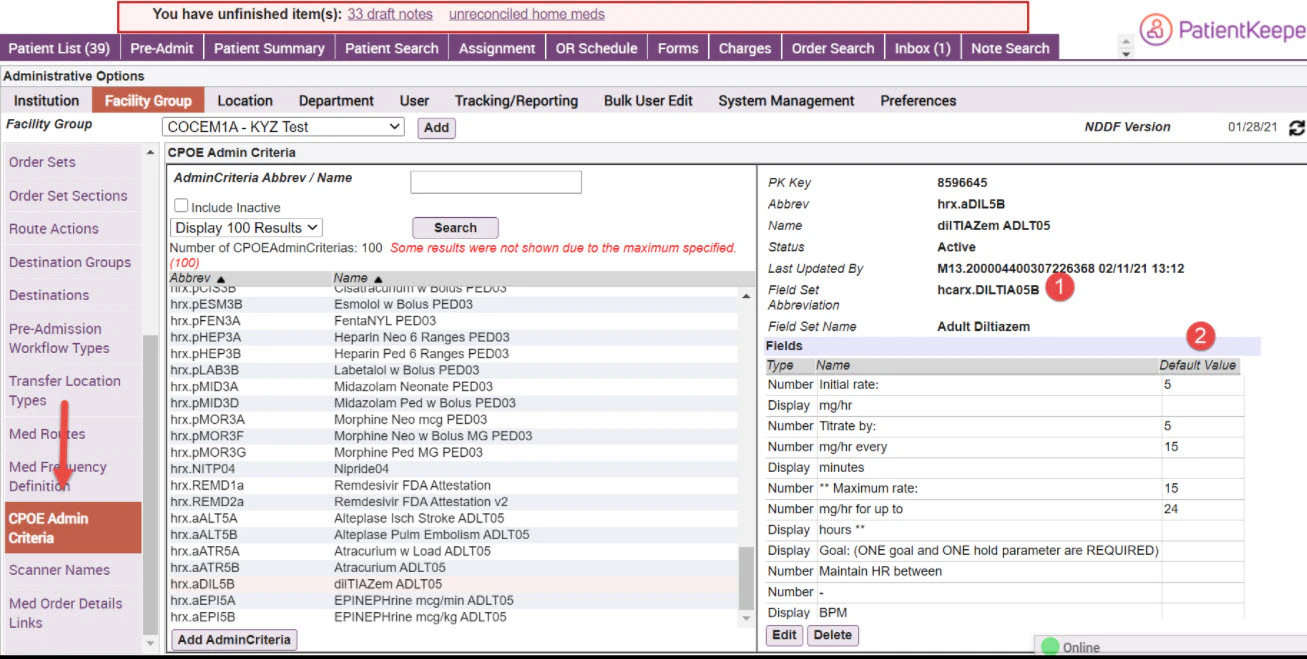
Configuring CPOE for Admin Criteria
There are several configuration preferences that are used to configure CPOE for Admin Criteria usage, including preferences for configuring the following:- Bridge component (for customers using MEDITECH only)
- CPOE preferences
- Admin Criteria Definition settings
- Order Definition, Order String, and Order Set String settings
Configuring the Bridge
(MEDITECH customers only) There is a new Admin Criteria bridge stage (enabled by default) for creating Admin Criteria definitions via the bridge from the MEDITECH PHA Admin Criteria dictionary. Admin Criteria definitions that are created via the bridge retain their row and column formatting as defined in the MEDITECH CDS dictionary for the CDS associated with the Admin Criteria. Note that enabling the bridge stage only results in pulling this data; you must configure your system (see other configuration settings below) specifically for associating the Admin Criteria with orders or enabling Admin Criteria usage for providers.Configuring CPOE for Admin Criteria Usage
The following three preferences let administrators configure CPOE for the appropriate customer environment as noted below. Authorized administrators can access these settings from the CPOE Preferences pane (Admin > Facility Group > CPOE Preferences).- Interface CDS Admin Criteria For MEDITECH systems, this preference determines whether the bridge performs the following Admin Criteria associations:
- Admin Criteria associated with Order Definitions (interfaced from page 8 of the MEDITECH PHA drug dictionary)
- Admin Criteria associated with medication order strings (interfaced from the MEDITECH OE Quick Script dictionary)
- Admin Criteria associated with medication strings (interfaced from the MEDITECH OE Order Set dictionary) For MedHost systems, enabling this preference is required to support the association of titration templates to order strings within the interface.
-
Allow Manual Association of Admin Criteria to Order Definitions
Administrators should set this preference to
- Yes: for customers intending to manually add Admin Criteria to Order Definitions. This is a prerequisite step for using Admin Criteria with one or more strings for a medication.
- No: for customers intending to enable the Interface CDS Admin Criteria preference so that Admin Criteria will be associated to Order Definitions automatically (from page 8 of the MEDITECH Magic Pharmacy Drug dictionary). Once Admin Criteria is associated with an Order Definition (either manually or via the bridge), then it can be used on manually-created strings within that Order Definition.
-
Enable Admin Criteria
Administrators should set this preference to
- Yes: for customers seeking to enable the display and usage of discrete Admin Criteria in physician workflows (in both Commure Pro orders and back-end orders).
- No: for customers seeking to disable the display and usage of discrete Admin Criteria in physican workflows (in both Commure Pro orders and back-end orders).
Guidelines for Configuring CPOE by Customer Environment
Administrators are encouraged to review the following guidelines before configuring Admin Criteria at a customer site to ensure that the configuration proceeds according to the correct back-end system.| Customer Environment | Enable Admin Criteria | Association of Admin Criteria to Order Definitions | Interface CDS Admin Criteria |
|---|---|---|---|
| MEDITECH Magic customer meeting either of the following criteria: - Plans to associate Admin Criteria to Order Definitions from page 8 in conjunction with manual strings, or - Plans to use interfaced order strings from the MEDITECH QuickScript dictionary | Yes | No | Yes |
| MedHost customer | Yes | Yes | Yes |
| Any customer (MEDITECH or other) planning to use Admin Criteria with manually-created Order Strings only and who does not intend to interface metadata. | Yes | Yes | No |
| Customer does not plan to use Admin Criteria | No | No | No |
Associating Admin Criteria with Order Definitions and Strings
Before administrators can associate Admin Criteria with a string, they must first associate the Admin Criteria with the string’s Order Definition. Each medication-type Order Definition can then have a list of associated Admin Criteria. How an administrator associates Admin Criteria with a Definition is determined by whether the admin setting Allow Manual Association of Admin Criteria to Order Definition is set to:- Yes: Administrators can do the association manually via the Select Admin Criteria button on the Edit Order Definition pane (Admin > Facility Group > Order Definitions > Edit)
- No: Administrators can configure the bridge so that this association is defined automatically (based on page 8 of the MEDITECH Magic Pharmacy Drug dictionary list of Admin Criteria defined in MEDITECH). When medication strings are interfaced from the MEDITECH QuickScript dictionary, the Admin Criteria are automatically associated with these strings as long as the Interface Admin Criteria preference is enabled. The Select Admin Criteria button does not display in such cases.
Associating Admin Criteria with Order Sets
When Order Set strings are interfaced from the MEDITECH Magic Order Set dictionary, all Admin Criteria will be associated with strings automatically as long as the Interface Admin Criteria preference is enabled. When Order Set strings are manually created, administrators can add Admin Criteria to these strings; first by associating the Admin Criteria to the Order Definition, and then by using the Select Admin Criteria button (that displays for all manually-created strings).Using Admin Criteria with a Provider’s Favorites
When a provider’s “favorite” (order string) was created via Manage Favorites, Admin Criteria is available to be used with the string. First, administrators need to associate the Admin Criteria with the Order Definition, and are then able to use it for any of the strings. When a providers “favorite” (order string) was created from patient orders, any Admin Criteria used on the current strings will also be used on the favorite.Changes that providers make to Admin Criteria default values are not saved. When providers make changes, they are informed of this behavior with the message “Warning: Customized values for admin criteria will not be saved (and will revert back to default values”.
Rules for Displaying Admin Criteria on the Order Detail Screen
Formatting of admin criteria on the Order Detail screen varies based on how many Fields belong to any of the following Field types:- Checkbox Group
- Radio Buttons
- Text Area When these Field types include Fields belong to their own distinct row, they display in the Admin Criteria just as these three Field types display in typical Field Sets (but are formatted in plain text font).
Defining How Medications are Mapped to the Back-End System
You can configure the type of association that medication orders in Commure Pro CPOE have with back-end medication orders. This association determines how certain actions taken in the CPOE application (such as discontinuing an order or ordering a medication again) are interpreted by the back-end system. You can configure CPOE to associate medications either by back-end mnemonic values or NDC values. Note that mapping to NDC values is generally not recommended; customers are advised to associate medications by back-end mnemonic values only. Check with your Commure Pro representative before making any configuration changes. To define how medications are mapped to your back-end system:- Click the Admin tab and then the Facility Group or CPOE tab.
In deployments where Facility Groups are not enabled, the Facility Group tab is replaced by the CPOE tab.
- If your institution uses multiple Facility Groups, select the Facility Group you want to configure from the Facility Group drop-down list.
- Click the Edit button.
- Locate the setting Identifier used to map back-end meds to Commure Pro order defs and select:
- NDC: to associate regular or home medications in CPOE with the NDC values of medication or home medication orders in the back-end system. (IMPORTANT: Customers are advised not to configure their system to specify NDC but should generally set this configuration to Mnemonic).
- Mnemonic: to associate medications in CPOE with the back-end mnemonic values of medication orders in the back-end system. Note that when clinicians enter a Dose value, an automatic conversion is done to translate this Dose value into the correct strength value for the interfaced Order Definition mnemonic. This translation can convert between the following units: MG/GM, MG/MCG, and L/ML.
- (optional) Locate the setting Delete Cancelled Medications and select:
- Yes: To respond to medications that have been canceled on the back-end system by deleting these orders in the CPOE application.
- No: To respond to medications that have been canceled on the back-end system by marking these orders as canceled in the CPOE application, but not deleting these orders.
- (optional) Locate the setting Interface Controlled Order Groups and select:
- Yes: To update the Order Group assignment of Order Definitions in CPOE when the messages sent from the back-end system specify an Order Group as part of the (HL-7) Order Definition data.
- No: To retain the current Order Group assignment of Order Definitions in CPOE, regardless of whether the messages sent from the back-end system specify an Order Group as part of the (HL-7) Order Definition data.
- Click Save. You are returned to the CPOE Preferences screen and your configuration changes are applied.
Medication Definition Mapping Settings
Identifier to use when mapping medications (Web, Android, Apple) Specifies the association that exists between medication orders in CPOE to identify how these relate to medication orders in the back-end system. This association determines how certain actions taken in the CPOE application (such as DC or order again) are interpreted by the back-end system. You can configure this setting to specify either NDC or Mnemonic but customers are generally advised to leave this configuration set to specify Mnemonic. Identifier to use when mapping home medications (Web, Android, Apple) Specifies the association that exists between home medication orders in CPOE to identify how these relate to home medication orders in the back-end system. This association determines how certain actions taken in the CPOE application (such as DC or order again) are interpreted by the back-end system. You can configure this setting to specify either NDC or Mnemonic. Delete Cancelled Medications (Web, Android, Apple) Determines how the CPOE application handles medication orders that are canceled on the back-end system. When this setting is enabled, medications that are canceled on the back-end system are deleted in the CPOE application. When this setting is disabled, medications that are canceled on the back-end system are marked as canceled in the CPOE application. Interface Controlled Order Groups (Web, Android, Apple) Determines how the CPOE application responds when receiving (HL-7) Order Definition data that includes an Order Group assignment. When this setting is enabled, any Order Group assignment included with the Order Definition data sent from the back-end system is used to update the Order Group assignment in the CPOE application. When this setting is disabled, the current Order Group assignment in CPOE is retained, regardless of whether the messages sent from the back-end system specify an Order Group as part of the (HL-7) Order Definition data.Restricting Access to the CPOE and Med Rec Applications During Maintenance
Level 0 administrators and selected level 1 administrators (if granted access through user preference) can disable the CPOE application with a single setting and prevent users from accessing the application during maintenance window periods, such as during upgrades or validation testing. When CPOE is disabled, users are prevented from logging into the application unless they are exempt from this restriction (instructions for exempting users is provided below). Instead, users with restricted access see the message “Access to the system is temporarily disabled. Please try again later. Contact your administrator for more details.” To restrict access to the CPOE application during maintenance window periods:- Click the Admin tab and then the Institution tab. The Institution Settings screen displays.
- Choose Site Administration from the Edit Settings preference.
- Scroll to the bottom of the screen, locate the section Temporarily Disable System Access, and enable the preference CPOE (order entry on the portal).
- (optional) Locate the preference Bypass List and select an administrative level to exempt from the access restriction.
- In the same (Temporarily Disable System Access) section, enable the preference Medication Reconciliation.
- (optional) Locate the preference Bypass List and select an administrative level to exempt from the access restriction.
- From the Quick Details box, click the Save button. You are returned to the Institution Settings screen and your access restriction rules are saved.