Department Tab User Interface
The Department tab consists of a toolbar, a Quick Details area for editing or searching for departments, and a workspace with context-sensitive forms that change based on the task you are performing.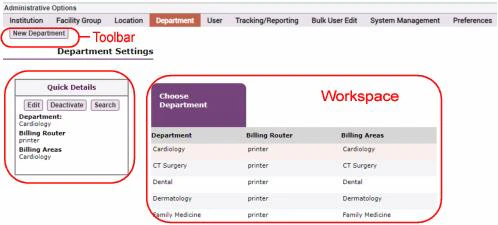
Creating a New Department
To create a new department:- Click the New Department button from the Department Settings Toolbar.
- In the Create Department window, enter the following information: Name Enter a name for the new department.
- Yes: This option ignores the user’s membership in this department, as if they did not belong to it, when performing user level security checks that are based on department.
- No (default): This option ensures that the user is considered as a member of this department when performing user level security checks that are based on department.
- Click the Save button to save the new department, or Cancel to exit without saving it.
Editing an Existing Department
To access the settings for an existing department, follow these steps:- Select the Department tab under the Admin tab.
- Under Department Settings, select the department from the Choose Department form.
- Click Edit in the Quick Details box on the left.
- From the Edit Settings drop-down menu in the Edit Department form, select the category of settings you want to change (for example, General, Patient List, Lab Results, Charge Capture, or Problem List). The options available in this menu may vary depending on which modules are licensed at your site. See Reference Guide for Department Settings for a description of all department-level settings.
- Click Save or Cancel.
- Click OK to return to the Choose Department screen.
De-activating a Department
To de-activate an existing department, follow these steps:- Select the Department tab under the Admin tab.
- In the Choose Department screen on the Department tab, select the department you want to deactivate.
- Click Edit in the Quick Details box, then remove all active users from the department, and clear all transactions from its Holding Bin and Outbox.
- Click Deactivate in the Quick Details box. When the department is de-activated, the Quick Details box displays an Activate button so that you can re-activate the department.
Reference Guide for Department Settings
The following sections describe the settings that you can configure for a given department.General Settings
To access the General Settings form for a department:- From the Choose Department form, select a department by clicking on its name, and then click Edit in the Quick Details box.
- On the Department Settings screen, click the Edit Settings drop-down list and select General. In addition to specifying settings when the department is created (Name, Label, whether to Exclude the department checks when sharing data between users), the General Settings screen lets you assign users to the department.
- All administrators with an Access Level of 1 (site administrators)
- Administrators with an Access Level of 2 for whom the Level 2: Can Edit Assigned Departments setting is set to Yes (one of the User Permissions settings on the User tab) The Edit Department form lets you establish the following settings for a department:
- Yes: This option ignores the user’s membership in this department, as if they did not belong to it, when performing user level security checks that are based on department.
- No (default): This option ensures that the user is considered as a member of this department when performing user level security checks that are based on department. Many settings that define a user’s access to patient data have restrictions that are based on the user’s membership in a department. For example, the user’s access may be restricted to only those patients that are seen in facilities that are associated with the user’s department, only those patients that are seen by providers who work in the user’s department, or only those charges entered for the user’s department. Some common examples of settings that utilize departmental restrictions are the Restrict Patient Lookup To and Charge Desktop View Access settings.
- Yes: This department has a protected status so that users who are not members cannot view charges within it, even if they have “All Charges” access.
- No (the default): This department does not have protected status. Users who are members can view charges in this department, and users who are not members but who have “All Charges” access can also view charges in this department. Users (Web, Android, Apple) This setting specifies the list of all current users for the department. Only current users can submit charges using the billing router for that department or use the stock filter, rounding lists, charge macros, profiles, snapshots, and other utilities available for that department. To modify the list of current users, click Edit and the Department Users screen opens.
- To add a user to the department, use the Search button in the Quick Details box to locate the user and then check the Select box next to its name.
- To remove a user from the department, uncheck the Select box next to its name.
- To save your changes, click Save in the Quick Details box or click Cancel to discard them. Facilities (Web, Android, Apple) This setting specifies the facilities to which the department, and all users within it, belong. For example, to configure the Surgical Cardiology department for a multi-facility health care organization, you could select General Hospital North and General Hospital South, if the same Surgical Cardiology department were to span both of those facilities.
If a patient is registered in more than one domain, they are listed multiple times in the Commure Pro system, typically with a different medical record number for each domain. The demographic, clinical, and charge information associated with each medical record in each domain are separate.
- Existing department—Use the search field to locate a target department for the copy operation. Note that level 2 administrators see only their own departments (those to which they are assigned) among the search results. Also note that all departments are included among search results, whether active or inactive.
- New department—Select this option to name and create a new department that will inherit all preferences from the selected department.
Charge Capture Settings
The Charge Capture settings form lets Level 1 administrators create new billing areas, assign billing routers to a department, schedule how charges are batched for a billing area, and activate and deactivate billing areas. This form also lets department administrators create stock Charge Pickers and stock Charge Macros for a department. When you select Charge Capture from the Edit Settings drop-down list, the Charge Capture Settings screen opens. On the Charge Capture Settings form you can view and configure the settings below.Administration
Add/Edit Charge Pickers (Web, Android, Apple) This setting displays a categorized list of charge codes and charge macros that is available to all members of the department. Charge Pickers are subsets of codes and charge macros organized into custom categories that make it easier for all users in a department to enter charges. To create charge Picker lists for a department, click Edit. For detailed instructions on how to create or modify charge Pickers, see Configuring Charge or Diagnosis Pickers. Please note that changes can be made to charge Pickers at the user level to customize them for a particular user. For example, if specific items from the department-level Pickers are not helpful for a particular provider, they can be hidden for that user. In addition, new items can be added to the charge Picker for a user. See the corresponding user-level setting Add/Edit Charge Pickers for more information. Add/Edit Department Macros (Web, Android, Apple) Charge macros are groupings of charge codes, modifiers, and diagnoses. Instead of entering each of these items individually on a charge transaction, a user can select a charge macro and post the entire group with one tap or mouse click. Departmental charge macros are available to all members of the department. To create charge macros for a department, click Edit. For detailed instructions on how to create or modify charge macros, see Configuring Charge Macros. Please note that departmental charge macros can be hidden for an individual user, if they are of no value to that user. In addition, custom personal macros can be created for a user. See the corresponding user-level setting Add/Edit User Macros for more information. Enable Batch Entry (Web) This option allows all users within a department to quickly add the same diagnosis and charges to multiple patients at once. It also determines how department users can enter batch charge information. The default for this setting is No. Click Yes to allow Batch Charge Entry for the current departments. The Allowed Selections list is then displayed, allowing you to further configure Batch Charge Entry feature for this department. See Configuring Batch Charge Entry for more information about this particular setting, as well as an overview of the Batch Charge Entry feature and complete instructions for configuring this feature for use.This setting is available only when the institution level Enable Batch Charge Entry setting is set to Yes.
Billing Configuration
Configure Billing Areas (Web, Android, Apple) This setting displays a list of available billing areas for the department. Billing areas separate charges within a department for later review in the Holding Bin and also allow for the creation of separate batches of charges once they are committed from the Outbox to final billing. For more information, see Defining Billing Areas. See also Configuring Charge Routing to External Systems for an overview of the different ways in which charge transactions can be routed to external systems. Configure Billing Router (Web, Android, Apple) For clients who are using a Billing Interface, this setting lets you assign one of the available billing routers to the department. A billing router determines where charge information for the department is sent: either to a printer or to a file. You can create or edit the available billing routers using the Institution-level setting: Admin - Institution - Charge Capture - Configure Billing Routers See Defining Billing Routers for instructions on how to configure billing routers. See also Configuring Charge Routing to External Systems for an overview of the different ways in which charge transactions can be routed to external systems. Batch Charges by Billing Area or Department (manual commits only) (Web) This option determines how many batches will be created for this department when an administrator manually commits charges for multiple billing areas (in this department) from the Outbox to final billing, using the Charges > Outbox option. The options are:- Department (the default): If the user selects multiple billing areas from this department to manually commit, a single batch is created for the entire department. The batch includes charges for all the billing areas (in this department) that were selected by the user.
- Billing Area: If the user selects multiple billing areas from this department to manually commit, a separate batch is created for each billing area. This setting does not affect how charges are grouped when automatically committed according to a schedule; automatic commits always create separates batches for each billing area. See Billing Batch Schedule for information about committing and batching charges automatically according to a schedule. See also Configuring Charge Routing to External Systems for an overview of the different ways in which charge transactions can be routed to external systems after they are batched.
Charge Entry Controls
Charge Transaction Routing
The following settings determine what types of charges are kept in the Holding Bin for review, instead of being automatically submitted to the Outbox for batch billing:- Send All Transactions to Holding Bin
- Send Transactions with Validity Errors or Non-Forced Code Edits to Holding Bin
- Send Transactions with Free Text to Holding Bin
- Send Transactions with Comments to Holding Bin
- Send Imported Transactions to Holding Bin These department-level settings can be overridden at the user level, but only if the override has the effect of sending more charges to the Holding Bin for a particular user. For example, if the department is configured to Send Transactions with Validity Errors or Non-Forced Code Edits to Holding Bin, and a user is configured to Send All Transactions to the Holding Bin, then all charges for that user are sent to the Holding Bin. In contrast, a particular user cannot send less charges than defined here. For example, if the department is set up to Send All Transactions to the Holding Bin, then all charges are sent to the Holding Bin for all users in that department, even though a particular user may have only Send Transactions with Validity Errors or Non-Forced Code Edits to Holding Bin set to Yes.
If Automated Code Entry is enabled, all charge transactions that have auto-added codes are always sent to the Holding Bin, regardless of the settings below. See Auto-Added Code Entry.
- Send Transactions with Validity Errors or Non-Forced Code Edits to Holding Bin
- Send Transactions with Free Text to Holding Bin
- Send Transactions with Comments to Holding Bin
- Send Imported Transactions to Holding Bin Send Transactions with Validity Errors or Non-Forced Code Edits to Holding Bin (Note: All L 0-2 users can override Non-Forced Code Edits and send them to the Outbox.) (Web, Android, Apple) When enabled, sends any charges containing Validity Errors or Non-Forced Code Edits to the Holding Bin.
- If the user is not allowed to save charge transactions as a draft, then they must either enter the correct number of diagnoses, or discard the transaction.
- If the user is allowed to save transactions as a draft, then they can save the transaction as a draft without correcting the problem, but the charge does not go to the Holding Bin until the user completes the charge or the draft expires. See also Diagnoses - Min and Max Number (Type 19), which describes a code edit that can be used instead of this department setting to set a minimum number of diagnoses per CPT, and also describes the subtle differences between using each of them.
- If the user is not allowed to save charge transactions as a draft, then they must either enter the correct number of diagnoses, or discard the transaction.
- If the user is allowed to save transactions as a draft, then they can save the transaction as a draft without correcting the problem, but the charge does not go to the Holding Bin until the user completes the charge or the draft expires. See also Diagnoses - Min and Max Number (Type 19), which describes a code edit that can be used instead of this department setting to set a maximum number of diagnoses per individual CPT code, and also describes the subtle differences between using each of them.
Configuring Charge or Diagnosis Pickers
Charge Pickers and diagnosis Pickers organize charge or diagnosis codes into categories. Organizing codes into categories makes it easier for users to find and enter charges or diagnoses. For example, when an administrator creates a departmental charge Picker for charges, all physicians in that department can quickly find the charges they commonly use for x-rays, because the charge codes are organized under familiar categories.- Charge Macros (for charge Pickers only): A charge macro is a set of related charges, modifiers, and/or diagnosis codes that are grouped together. When a user selects a charge macro, the entire set of charges/modifiers/diagnoses is added to the charge transaction with a single tap or mouse click.
- Diagnosis Macro Groups (for diagnosis Pickers only): A diagnosis macro group is special type of Picker category that contains a set of related diagnosis codes that are typically always used together. For example, a diagnosis macro group might consist of a primary diagnosis that is always associated with one or more secondary diagnoses. When a user selects a diagnosis macro group, all of the diagnosis codes in that Picker category are automatically added to the charge transaction with a single tap or mouse click.
- Diagnosis Search Terms (for diagnosis Pickers only): A diagnosis search term is a term which can be used to execute a search for a diagnosis code. When a user selects a diagnosis search term, a search is automatically executed for that term, without the user having to type the term. Diagnosis search terms are useful for administrative and maintenance purposes because the search terms are not tied to a specific code. They will find and display only active codes to the provider (as opposed to placing a specific code on the Picker list, which could eventually become inactive). You can use a partial diagnosis code as a search term, or a text phrase. For example, if you use “E11” as a search term, when the user selects it, all diagnoses starting with “E11” in the code are displayed. And if you use the phrase “elevated” as a search term, when the user selects it, all diagnoses containing the phrase “elevated” in the description are displayed. Pickers are typically created by administrators at the department level for all users of the department via the settings below:
- Charge Macros can only be added to charge Pickers.
- Diagnosis Macro Groups and Diagnosis Search Terms can only be added to diagnosis Pickers.
- Only charge Pickers allow you to define separate Pickers for different visit types.
Accessing Charge or Diagnosis Pickers
To create or edit a charge or diagnosis Pickers at the departmental level:- Select one of the following options:
- Admin > Department > [select a department, click Edit]> Charge Capture > Add/Edit Charge Pickers > Edit
- Admin > Department > [select a department, click Edit] > Problem List > Diagnosis Pickers > Edit The Department [Charge/Diagnosis] Pickers for [Current Department] window opens.
- The left side of this window displays any categories or subcategories that are already defined for this department. It simply says Department Pickers (the top-level category) if none have yet been defined.
- (For charge Pickers only) Any categories that are defined for a specific visit type show a chain link icon. You can hover your mouse over the icon to view the visit types with which the category is associated.
- Click on Department Pickers (on the left side of the screen) to display the department’s entire charge or diagnosis Picker list on the right side of the screen, or click on a category, to display the contents of just that category.
- You can now add new codes/macros/search terms/categories to the departmental Pickers as necessary.
To create or edit a charge or diagnosis Pickers at the user level
- Select one of the following options:
-
For Level 0/1/2 administrators:
- Admin > User > Charge Capture > Add/Edit Charge Pickers > Edit.
- Admin > User > Problem List > Diagnosis Pickers > Edit.
-
For Level 3 providers:
- Admin > Personal Preferences > Charge Capture > Add/Edit Charge Pickers > Edit.
- Admin > Personal Preferences > Problem List > Diagnosis Pickers > Edit. The [Charge/Diagnosis] Pickers for [User Name] screen opens, displaying the user’s default departmental Picker list, as well as any user-level modifications that have been made to it thus far.
- Any categories that are part of the user’s default departmental charge or diagnosis Picker display the word (Dept) next to their name. You can hover your mouse over the word (Dept) to see the department from which they are derived.
- Any departmental items or categories that have been previously marked as hidden display the word (Hidden) next to their name.
- (For charge Pickers only) Any categories that are defined for a specific visit type show a chain link icon. You can hover your mouse over the icon to view the visit types with which the category is associated.
- At any point you can click the Reset User Pickers button at the bottom of the screen to reset the user’s charge or diagnosis Picker list back to the default departmental picker.
-
For Level 0/1/2 administrators:
- Click on My Pickers (on the left side of the screen) to display the user’s entire charge or diagnosis Picker list on the right side of the screen, or click on a category, to display the contents of just that category.
- You can now hide departmental codes/macros/search terms/categories, or add new codes/macros/search terms/categories at the user level, as necessary.
Displaying Pickers by Visit Type (Charge Pickers Only)
By default when you first open the main Charge Pickers for [Department Name/User Name] dialog, all categories and codes for all Visit Types are displayed. However, you can filter this list to show only those charge Picker categories or codes that you previously associated with a particular Visit Type. This can be helpful when you are trying to compare and contrast which codes you have made available for each of the various Visit Types.- Select Commure Pro to filter the list by the Commure Pro Visit Types defined in Commure Pro. The Commure Pro system uses Commure Pro Visit Types to determine how and on what reports various visit types are displayed, when they should appear/disappear from patient lists, etc. These are the visit types that are seen in most of the displays throughout the Commure Pro system. When you select Commure Pro, a drop-down list becomes available on the right. Select a visit type from the drop-down list to show only pickers for that visit type.
- Select ADT to filter the list by the ADT Visit Types. ADT Visit Types include the visit types that are derived from your source ADT/Registration system, as well as the visit types that were created specifically to allow users to manually register patients directly in the Commure Pro system. All ADT Visit Types are mapped to Commure Pro Visit Types (several ADT visit types can be mapped to one Commure Pro visit type). When you select ADT, a drop-down list becomes available on the right. Select a visit type from the drop-down list to show only pickers for that visit type.
Searching for a Picker Item
To search for an item in a Picker:- Start typing in the Search field. As you type, all pickers that do not match the text you are typing are filtered from the picker list.
- Click the Clear button to clear anything you’ve typed in the Search field and start a new search.
Adding Top-Level Categories to a Picker
You can add a variety of items to a charge or diagnosis Picker. Start by creating one or more top-level categories, and then edit each category in order to add items to it. You can add subcategories, codes, charge macros, diagnosis macro groups, or diagnosis search terms. This creates a hierarchy that is clearly visible in the dialog. To create a top-level category for the Picker:- From the main [Charge/Diagnosis] Pickers for [Department Name/User Name] dialog, click Edit to the right of the words “Department Pickers” or “My Pickers,” depending on whether you are editing department-level or user-level Pickers, respectively. The Edit [Department/My] Pickers dialog opens and displays any categories or codes that were previously created at the top level.
- Click the Add Category button. The Add Category dialog opens.
- Type a name for the new top-level category and click OK. The new category appears at the bottom of the list on the Edit [Department/My] Pickers dialog.
- Repeat Steps 2 and 3 to create all of the necessary top-level categories.
- For charge Pickers only: You can now edit the category in order to specify a Visit Type, and then add items to it (charge codes, charge macros, or subcategories).
- For diagnosis Pickers only: You can now edit the category to add items to it (diagnosis codes, diagnosis macro groups, search terms, or subcategories).
Editing Picker Categories or Sub-Categories
Once you have defined the top-level categories, you can add charge or diagnosis codes, charge macros, diagnosis macro groups, diagnosis search terms, or second-level categories (subcategories). To open a category or subcategory for editing, so that you can add one of the above items to it:- From the main [Charge/Diagnosis] Pickers for [Department Name/User Name] dialog, locate the category that you want to edit, and click the Edit link next to its name. The Edit [Department/My] Pickers/[Category Name] dialog opens.
-
(For Charge Pickers only) Determine for what type of visit this category will be visible. The choices are:
- All ensures that the category will be visible for all visit types.
- Commure Pro means that it will be visible for only the selected Commure Pro Visit Types. Keep in mind that ADT visit types are mapped to Commure Pro visit types, and that there can be multiple child ADT visit types mapped to the same parent Commure Pro visit type. So if you set up a charge/charge macro/category for a parent Commure Pro visit type, that item will show up for all of the child ADT visit types that are mapped to that parent Commure Pro visit type.
- ADT means that will be visible for only the selected ADT Visit Types.
-
(For Diagnosis Pickers only) Determine whether this entire category should be designated as a diagnosis macro group.
- Check the box for Macro Group to designate the category and all of it s contents as a diagnosis macro group.
- Leave the box for Macro Group unchecked to designate this as a “regular” picker category.
- Add or remove subcategories, charge or diagnosis codes, charge macros, diagnosis macro groups, or diagnosis search terms as necessary.
Adding a Sub-Category to a Picker
- From the main [Charge/Diagnosis] Pickers for [Department Name/User Name] dialog, locate the category to which you want to add a subcategory, and click the Edit link next to its name. The Edit [Department/My] Pickers/[Category Name] dialog opens.
- Click the Add Category button. The Add Category dialog opens.
- Type a name for the new subcategory and click OK. The new subcategory is added to the charge or diagnosis Picker.
Adding a Charge or Diagnosis Code to a Picker Category
- From the main [Charge/Diagnosis] Pickers for [Department Name/User Name] dialog, locate the category to which you want to add the codes, and click the Edit link next to its name.
- In the Add Code field, search for the desired code by entering a full or partial numeric code, or part of the code’s description, and then click the Search button to the right of the field (or press the Enter key on your keyboard). A list of matching codes appears.
- Select the code that you want to add to your category. The code is added to the Charge or Diagnosis Picker.
Adding a Charge Macro to a Picker Category (For Charge Pickers Only)
- From the main Charge Pickers for [Department Name/User Name] dialog, locate the category to which you want to add the charge macro, and click the Edit link next to its name.
- Click the Add Macro button. The Add Macro dialog opens, displaying all of the macros that are available for the selected department.
- Highlight the charge macro you’d like to add to the category and click Add. The charge macro is added to the Department Pickers list and the dialog is dismissed. For a description of charge macros including how to create them, see Configuring Charge Macros.
Adding a Diagnosis Macro Group (For Diagnosis Pickers Only)
- Follow the steps to add a subcategory, as described in Adding a Sub-Category to a Picker. The subcategory name will be the name of the diagnosis macro group.
- From the main Diagnosis Pickers for [Department Name/User Name] dialog, locate the subcategory that you just created in Step 1, and click the Edit link next to its name.
- Check the box for Macro Group (at the top right) to designate this subcategory and all of its contents as a diagnosis macro group.
- Add the desired diagnosis codes to the macro group, as described in Adding a Charge or Diagnosis Code to a Picker Category, and then click Save. The diagnosis macro group is added to the Diagnosis Picker list.
Adding a Diagnosis Search Term to a Picker Category (For Diagnosis Pickers Only)
- From the main Diagnosis Pickers for [Department Name/User Name] dialog, locate the category to which you want to add the diagnosis search term, and click the Edit link next to its name.
- In the Add Search field, type the partial code or text phrase that you want to use as a diagnosis search term, and then select the Save Search button.

- The diagnosis search term is added to the Diagnosis Picker (notice that the Type column says “search”).
Copying a Picker Category to Create a New One
You can copy an existing category from the current department’s or user’s Picker list, and use it as a source for creating a new category or subcategory. When modifying a user-level Picker list, if you copy a departmental category, the newly formed category is designated as a personal category from that point forward. Once a category is copied, you can then modify its contents in any way you choose. To copy a category and use it as a source for creating a new category or subcategory:- From the main [Charge/Diagnosis] Pickers for [Department Name/User Name] dialog, locate the category that you want to copy, and click the Edit link next to its name.
- Click the Copy button at the bottom of the screen. The Copy Category dialog appears.
- Enter a name for the new category in the New Category Name field.
- Select the destination category under which this newly copied category should reside, and then click OK. The new category is created, containing all of the tasks from the source category. It is located in a subordinate position under the destination category.
Copying Pickers from Another Department
You can copy a Picker category from a specific department to another department’s Picker list, or to a user’s Picker list. This feature is available only if enabled in your user profile via the setting below: Admin - User - User Permissions - Allow Copy Pickers from Departments- Start by opening the destination department’s or user’s Picker list for editing.
- From the main [Charge/Diagnosis] Pickers for [Department Name/User Name] dialog, click the Copy from Department button. The Copy from Department dialog appears.
- In the Select a Department to Copy from field, select the department from which you want to copy pickers. After making this selection, a list of picker categories from the other department’s Picker list appears in the bottom half of the screen.
- Click to highlight the category or subcategory that you want to copy. If you select a category, all the subcategories beneath it are copied with it. Click OK.
- A dialog opens asking you to name the new category. The pickers you are copying will have this new name in the current department’s Picker. Type a name for the new category.
- Below the name, select a destination category for the pickers you are copying.
- When you click OK to finish, the copied pickers appear in the destination category you selected, with the name you specified.
Changing the Order of the Items within a Picker Category
You can change the order in which the charge codes, charge macros, diagnosis macro groups, diagnosis search terms, and subcategories are listed within a category, as follows:- When modifying department-level Pickers, you can change the order of any departmental items/subcategories as desired.
- When modifying user-level Pickers, you can change the order of the items/subcategories within a personal category, but you cannot do so for the items within a departmental category. In addition, you can change the order of all the top-level categories (including the departmental categories) that are seen when you click the Edit link next to My Pickers. To change the order in which the items or subcategories are listed within a category:
- From the main [Charge/Diagnosis] Pickers for [Department Name/User Name] dialog, locate the category whose items you want to re-order, and click the Edit link next to its name.
- Click on the Sort icon to the right of the word Children at the top of the list.
- Select the item you want to move and use the Top, Up, Down, and Bottom buttons to place the category where you want it in the list.
- When they are in the order you prefer, click OK to save the order and dismiss the dialog.
Moving a Picker Subcategory
You can move subcategories to different locations within the Picker structure, as follows:- When modifying department-level Pickers, you can move a departmental subcategory to a new location under a different departmental category.
- When modifying user-level Pickers, you can move a personal subcategory a new location under a different personal category, but you cannot move it to a location under a departmental category. You cannot move a departmental subcategory. To move a subcategory to a new location in the Picker structure:
- From the main [Charge/Diagnosis] Pickers for [Department Name/User Name] dialog, locate the subcategory that you want to move, and click the Edit link next to its name.
- Click the Move button at the bottom of the screen. The Move Item dialog appears.
- Select the destination category to which you want to move it, and then click OK. The original category is now relocated to a subordinate position under the destination category.
Deleting Items from a Picker Category
You can delete a code, charge macro, diagnosis macro group, diagnosis search term, or subcategory from a category, as follows:- When modifying department-level Pickers, you can delete any departmental items/subcategories as desired.
- When modifying user-level Pickers, you can delete any of the items/subcategories within a personal category, but you cannot delete anything within a departmental category. However, you can hide departmental items/categories that you do not find useful. To delete an item or subcategory from a category:
- From the main [Charge/Diagnosis] Pickers for [Department Name/User Name] dialog, locate the category that contains the item(s) you want to delete, and click the Edit link next to its name.
- Click the Delete button at the beginning of the row for the item(s) you want to delete.
Deleting an Entire Picker Category or Subcategory
You can delete an entire category or subcategory, as follows:- When modifying department-level Pickers, you can delete any category or subcategory as desired.
- When modifying user-level Pickers, you can delete only personal categories or subcategories. However, you can hide departmental categories or subcategories that you do not find useful. To delete an entire category or subcategory:
- From the main [Charge/Diagnosis] Pickers for [Department Name/User Name] dialog, locate the category that you want to delete, and click the Edit link next to its name.
- Click the Delete button at the bottom of the screen.
Hiding Departmental Items or Categories in a User’s Picker
When editing user-level Pickers, you have the option to hide or unhide departmental items or subcategories that are not useful to a specific user. However, you cannot hide or unhide the user’s personal items or subcategories. Instead, simply delete a personal item or subcategory if it is no longer useful to that user. When editing department-level Pickers, there is no option to hide or unhide items. Instead, simply delete a departmental item or subcategory if it is no longer useful to anyone in the department.- Start by opening the user’s Picker list for editing. The [Charge/Diagnosis] Pickers for [User Name] screen opens, displaying the user’s default departmental Picker list, as well as any modifications that have been made to it thus far.
-
To hide a departmental code, charge macro, diagnosis macro group, or diagnosis search term in the user’s Picker:
- Click on a specific code, charge macro, diagnosis macro group, or diagnosis search term to open a pop-up window listing just that one item.
- Click on the Hidden check box to place a check mark in it.
- Click Save.
-
To hide an entire departmental category, or several items within a departmental category, follow these steps:
- Click on the Edit link located to the right of a category name. The system opens a window displaying that category, as well as all the subcategories and individual items within the category.- b. Click on the Hidden check box to the right of the category name at the top of the screen, to place a check mark in it. This hides the entire category.
- Or, alternately, you can hide one or more of the individual codes, charge macros, diagnosis macro groups, diagnosis search terms, or subcategories contained within the category by clicking on the Hidden check boxes associated with them.
Deleting an Entire Picker List for a Department
If you make a mistake and want to delete an entire charge Picker or diagnosis Picker for a department, you can do so easily. This feature is not available for user-level Pickers.- Start by opening the department’s Picker list for editing. The Department Charge/Diagnosis Pickers for [Department Name] dialog is displayed.
- Click the Delete All Pickers button.
Resetting a User’s Picker List Back to the Departmental Default
If you or a user make changes to the user’s charge or diagnosis Pickers, you can later undo these changes using the Reset User Pickers button. When you use this option:- All departmental items or categories what were previously hidden become unhidden.
- All personal categories are moved to the top of the Picker list.
- All departmental categories are listed next, in alphabetical order by department.
- All items within departmental categories are resorted based on the sort order used at the departmental level. To reset a user’s Pickers:
-
Select one of the following options:
- Admin > User > [select a user, click Edit]> Charge Capture > Add/Edit Charge Pickers > Edit
- Admin > User > [select a user, click Edit]> Problem List > Diagnosis Picker > Edit
- Admin > Personal Preferences > Charge Capture > Add/Edit Charge Pickers > Edit.
- Admin > Personal Preferences > Problem List > Diagnosis Pickers > Edit. The [Charge/Diagnosis] Pickers for [User Name] screen opens, displaying their default departmental Picker list, as well as any modifications that have been made to it thus far.
- Click the Reset User Pickers button at the bottom of the screen.
-
Choose your next step:
- Click Reset All to make all of the changes described above.
- Click Delete All to make all of the changes described above and also delete all personal categories and their contents.
Importing or Exporting Charge or Diagnosis Pickers
When first implementing the Commure Pro system, you may find it easier to create spreadsheets of the charge or diagnosis codes that you want to use in your Charge Pickers and Diagnosis Pickers, and then import those files to create Pickers for each department. Keep in mind that any code you want to import into a Picker must be a valid code in the Commure Pro master list of charge or diagnosis codes (see Update Charges/Modifiers and Nomenclature Vocabularies). This option does not load charge or diagnosis codes into the Commure Pro system (these are pre-loaded for you) — it imports existing charge codes and diagnosis codes into a Charge Picker or Diagnosis Picker hierarchy. Another common use of the import/export function is to export a Picker from one instance of a Commure Pro system (such as a test system), and then import the resulting file to another instance (such as a production system). A given CSV import file should contain only the codes for a single department or user. In other words, you cannot import just a portion of a CSV file—all items in the file will be imported to the destination department or user. Each CSV file should include the columns listed below, and must use the exact column headings described here. Then create a separate row in the CSV file for each charge or diagnosis code, as well as each category or subcategory, that you want to import into the departmental or user Picker. Each row describes the code or category/subcategory and its overall placement in the charge or diagnosis Picker hierarchy. When you export a charge or diagnosis Picker, the resulting CSV file contains the same columns described here.| Column Heading | Used for Picker Type | Description | Sample Value for a Code | Sample Value for a Category/Subcategory |
|---|---|---|---|---|
| Department | Charge, Diagnosis | (Optional) If this row is a code, enter the department in which the code should be imported as a Picker.(Optional) If this row is a category or subcategory, enter the department in which the category/subcategory should be imported as a Picker. This column is ignored during the import, but you may include it in the CSV file for informational purposes. | Internal Medicine | Internal Medicine |
| User | Charge, Diagnosis | (Optional) If this row is a code, enter the user for whom the code should be imported as a Picker.(Optional) If this row is a category or subcategory, enter the user for whom the category/subcategory should be imported as a Picker. This column is ignored during the import, but you may include it in the CSV file for informational purposes. | kjones | kjones |
| Code | Charge, Diagnosis | If this row is a code, enter the specific CPT/HCPC code that you would like included in the Charge Picker, or the specific ICD-9/ICD-10 code that you would like included in the Diagnosis Picker. If this row is a category or subcategory, this column should be blank. | 33218 | |
| Vocabulary | Charge, Diagnosis | If this row is a code, enter the vocabulary from which this code is derived. Acceptable values are: 1=ICD-9 2=CPT 3=Modifier 6=ICD-10 8=Custom diagnosis code. For diagnosis Pickers, if this column is left blank for a code, the system assumes ICD9.If this row is a category or subcategory, this column should be blank. | 2 | |
| Description | Charge, Diagnosis | If this row is a code, enter the description that you want to appear to the user when they search for this code on the Picker. If this row is a category or subcategory, enter the category or subcategory’s name, as you want it to appear in the Picker. | Repair lead pace-defib, one | Repairs |
| Sort | Charge, Diagnosis | If this row is a code, enter a numeric value to indicate the order in which the codes should be listed within each Picker category or subcategory. For example, if you have three charge codes in the Procedures category and five charge codes in the Immunizations category, you would number the Procedure codes 1 to 3, and the Immunization codes 1 to 5. When imported into the Charge Picker, the codes within each picker category are listed in the numeric order that you specified in the CSV file. If you do not enter any values in the Sort column, the codes are imported in the exact order that they are listed in the CSV file. If this row is a category or subcategory, enter a numeric value to indicate the order in which the categories should be listed within the Picker. For example, if you have three main categories, you would number them 1 to 3. If the first main category had two subcategories within it, you would number those subcategories 1 to 2. | 2 | 1 |
| pkVisitType | Charge | If this charge code or category should only be used for a specific Commure Pro Visit Type, enter that Commure Pro Visit Type’s abbreviation here. You can enter multiple visit types, separated by commas. Leave this column blank to allow the charge code or category to be used for all Commure Pro Visit Types.Leave this column blank for Diagnosis Pickers. | IP,ER | IP,ER |
| adtVisitType | Charge | If this charge code or category should only be used for a specific ADT Visit Type, enter the ADT Visit Type here. The ADT Visit Type must use the format ABBREVIATION:SOURCE. You can enter multiple visit types, separated by commas. Leave this column blank to allow the charge code or category to be used for all ADT Visit Types.Leave this column blank for Diagnosis Pickers. | IP:GENHOSPITAL, ER:GENHOSPITAL | IP:GENHOSPITAL, ER:GENHOSPITAL |
| IsBranch | Charge, Diagnosis | Indicates whether this row contains a code or a category/subcategory:If this row is a code, the value should always be 0.If this row is a category or subcategory, the value should always be 1. | 0 | 1 |
| SelectableGroup | Diagnosis | Indicates whether this row is a diagnosis macro group. If this row is a category or subcategory, whose contents are part of a diagnosis macro group, the value should be TRUE.If this row is a code, or if it is a regular category or subcategory, the value should be FALSE. | FALSE | TRUE |
| ImportID | Charge, Diagnosis | This is a unique numeric ID for the row. Every row for a code or category/subcategory should have a unique number in this column. | 12 | 5 |
| ParentImportID | Charge, Diagnosis | Indicates whether this row belongs to a specific category or subcategory. If this row is a code that should be listed under a particular category or subcategory, the value here should be the ImportID of the specific category or subcategory to which the code belongs. If this row is a subcategory, the value here should be the ImportID of the specific category or subcategory to which this subcategory belongs. If this row is a main category, the value should always be 0. | 5(This would place code “33218 Repair lead pace-defib, one” under the Repairs category.) | 0(This makes “Repairs” a main category.) |
- Start by opening the destination department’s or user’s Picker list for editing.
- From the main [Charge/Diagnosis] Pickers for [Department Name/User Name] dialog, click the Import Pickers button. An Import Pickers dialog box is displayed.
- Click the Browse button, locate the CSV file, and select it.
- Click the Import button on the Import Pickers dialog. The codes from the CSV file are imported into Commure Pro and displayed on the [Charge/Diagnosis] Pickers for [Current Department/ User Name] window.
- Start by opening the department’s or user’s Picker list (that you want to export) for editing. The [Charge/Diagnosis] Pickers for [Department Name/User Name] dialog is displayed.
- (Optional) If you want to export the pickers for only a specific category, click on the category to select it.
- Click the Export Pickers button. The following message is displayed: “Would you like to export all available pickers or only the selected category [Category Name]?”
- Click the Export All button to export all of the pickers from the department, or click the Export Category button to export only the currently selected category. A Commure Pro File Download—Web Page Dialog box with the following message is displayed:* “Please click here to begin the download. The file could take several minutes to generate.”*
- Click here in the message dialog. A File Download dialog appears.
-
Determine whether you want to open the archive file now, or save it.
- To open the file immediately: click the Open button.
- To save the file: click the Save button, and then select a location to save the file.
- Click the Close button on the Commure Pro File Download—Web Page Dialog box.
The exact download prompts may vary depending on your browser. Follow the on-screen prompts to save or open the archive file.
Configuring Charge Macros
A charge macro is a set of charges, modifiers, and diagnosis codes that are grouped together to make it possible to add the entire set to a charge transaction with a single tap or mouse click on the web, Android, and Apple platforms. For example, a cardiac exam charge macro might include the following:| Charge Codes | Modifiers | Diagnosis Codes |
|---|---|---|
| 93000: Electrocardiogram, complete | R07.9: Chest pain | |
| 93010: Report on transmitted ECG | 26: Professional component only | R07.9: Chest pain |
| 83719: Assay of blood lipoproteins | 90: Reference (outside) laboratory | R07.9: Chest pain |
| 85007: Differential WBC count | 90: Reference (outside) laboratory | R07.9: Chest pain |
- On the web platform, users may select charge macros from the charge Picker (if the user or an administrator has added them to the Picker).
- Apple users may select charge macros via the Macros > Select Macro option, or from the charge Picker (if the user or an administrator has added them to the Picker).
- Android users may select charge macros via from the charge Picker (if the user or an administrator has added them to the Picker). Charge macros are typically defined by administrators at the department level, via the setting below:
- When created on the fly during charge entry, personal charge macros are automatically added to the user’s charge Picker under a category called “My Macros.”
- When created in the Admin > User or Admin > Personal Preferences options, personal charge macros are not automatically added to the user’s charge Picker. They must be manually added to the picker via the setting below. Admin - User - Charge Capture - Add/Edit Charge Pickers The steps for creating, editing, or deleting a charge macro in the Department, User, or Personal Preferences options are the same, regardless of the access point, and are described in the topics below.
- Adding a New Charge Macro
- Editing an Existing Charge Macro
- Deleting an Existing Charge Macro See also:
- Adding a Charge Macro to a Picker Category (For Charge Pickers Only)
- Hiding or Unhiding a Departmental Charge Macro
Adding a New Charge Macro
Use the Department option to create a departmental charge macro for all users of a given department, or use the User or Personal Preferences option to create a personal charge macro for one specif user.-
Select one of the following options:
- Admin > Department > [select a department, click Edit]> Charge Capture > Add/Edit Department Macros > Edit
- Admin > User > [select a user, click Edit]> Charge Capture > Add/Edit User Macros > Edit
- Admin > Personal Preferences > Charge Capture > Add/Edit User Macros > Edit
- Click the New Macro button. The Create Macro form opens.
- Enter a name for the macro in the Macro Label field in the Quick Details box.
-
Add a charge code to the macro:
- Click the New Charge button, located at the top left of the screen. The Add Charge form opens letting you add the first charge/modifier/diagnosis combination to the charge macro.- b. Click the Add button next to Procedure in the Add Charge form. The Search for Procedure dialog opens.
- In the Search for Procedure dialog, enter a partial code, description, guideline, or keyword, and then click the Search button to find the procedure to include in the charge transaction.
- In the Results for Procedure dialog, highlight the charge you want to include and then click Select.
-
(Optional) Associate one or more modifiers with the charge code:
- Click the Add button next to Modifiers in the Add Charge form.
- In the Search for Modifier dialog, enter a partial modifier code or description, and then click the Search button to find the modifier to include in the charge transaction.
- In the Results for Modifiers dialog, highlight the modifier you want to include and then click Select.
- (Optional) Repeat Steps 4a through 4c if you want to associate more than one modifier with this charge code.
-
(Optional) Associate one or more diagnoses with the charge code:
- Click the Add button next to Diagnosis in the Add Charge form.
- In the Search for Diagnoses dialog, enter a partial diagnosis code, description, or keyword, and then click Search to find the diagnosis to include in the charge transaction.
- In the Results for Diagnoses dialog, highlight the diagnosis you want to include in the charge transaction and then click Select.
- (Optional) Repeat Steps 5a through 5c if you want to associate more than one diagnosis with this charge code.
- Click the Save button below the Add Charge form to save the charge and its associated modifiers and diagnoses to the charge macro. The system now displays a summary of the first charge (with its associated modifiers and diagnoses) that you have added to the charge macro.
- (Optional) Repeat Steps 4 through 7 to add further charges (and their associated modifiers and diagnoses) to the charge macro.
- When you have added all of the desired charges, modifiers, and diagnoses, click Save in the Quick Details box to save the charge macro.
- Click Return to Charge Capture Settings.
- Click Save. Next steps: Once the macro is saved, it is available for selection during charge entry by Apple users via the Macros > Select Macro option. However, in order to make it available for Android or Desktop Charge Capture users, you must add it to a Charge Picker. See Adding a Charge Macro to a Picker Category (For Charge Pickers Only).
Editing an Existing Charge Macro
When working in the Department option, you can only view and edit departmental macros. When working in the User or Personal Preferences options, you can view departmental macros, but you can only edit the user’s personal charge macros (personal macros are indicated by an underscore preceding their name).-
Select one of the following options:
- Admin > Department > [select a department, click Edit]> Charge Capture > Add/Edit Department Macros > Edit
- Admin > User > [select a user, click Edit]> Charge Capture > Add/Edit User Macros > Edit
- Admin > Personal Preferences > Charge Capture > Add/Edit User Macros > Edit
- Select the charge macro you want to edit in the Manage Macros form and then click Edit in the Quick Details box. The Edit Macro form opens and displays the elements that make up the charge macro.
-
Take any of the following actions:
- To add a new charge to the macro, follow the instructions described in Adding a New Charge Macro (starting at Step a).
- To remove a charge from the macro (along with its associated modifiers and diagnoses), or click the Delete button next to the charge.
- To change a charge in the macro (change the charge code, add or remove modifiers, or add or remove diagnoses), click the Edit button next to the charge.
- When you have made all of the desired changes, click Save in the Quick Details box to save the modified charge macro.
Deleting an Existing Charge Macro
When working in the Department option, you can only view and delete departmental macros. When working in the User or Personal Preferences options, you can view both departmental and personal macros, but you can delete only the user’s personal charge macros (personal macros are indicated by an underscore preceding their name).- Select one of the following options:
- Admin > Department > [select a department, click Edit]> Charge Capture > Add/Edit Department Macros > Edit
- Admin > User > [select a user, click Edit]> Charge Capture > Add/Edit User Macros > Edit
- Admin > Personal Preferences > Charge Capture > Add/Edit User Macros > Edit
- Select the charge macro you want to delete in the Manage Macros form and then click Delete in the Quick Details box.
- Click OK to confirm the deletion.
Hiding or Unhiding a Departmental Charge Macro
When working in the Department option, there is no option to hide or unhide macros. When working in the User or Personal Preferences options, you can hide or unhide departmental macros, but you cannot hide or unhide the user’s personal charge macros (personal macros are indicated by an underscore preceding their name). Instead, simply delete a personal macro if it is not useful. This option hides or unhides the macro in the Macros > Select Macro option on Apple devices during charge entry. It does not affect the appearance of the macro on the or user’s charge Picker. If you want to hide it on the Picker list, you must modify the charge Picker.- Select one of the following options:
- Admin > User > [select a user, click Edit]> Charge Capture > Add/Edit User Macros > Edit
- Admin > Personal Preferences > Charge Capture > Add/Edit User Macros > Edit
- Click the Edit link next to the Add/Edit User Macros setting.
- Select the charge macro you want to hide or in the Manage Macros form and then click Hide in the Quick Details box. If the macro is already hidden and you want to unhide it, click Unhide in the Quick Details box.
Lab Results Settings
If the Lab Results module is enabled for your facility, the Lab Results Settings screen lets a department administrator create stock snapshots that will be automatically available to users within the department. Users can choose to hide these stock snapshots by using the Lab Results Settings on the Preferences tab if they so choose. When you select Lab Results from the Edit Settings menu, the Lab Results Settings form appears. The Lab Results Settings form lets you view and configure the following: Stock Snapshots (Web, Apple) This setting displays those stock snapshots that are available as filters on the main Lab Results screen (on the web or Apple platforms) to all current users within the department. A snapshot is a customized grouping of lab components from arbitrary panels in the lab system. For example, your department’s users may prefer to see Cholesterol, Sodium, and Triglyceride results grouped together. These could be added as components of a snapshot, so that the information could be viewed collectively as a single result. If there are stock snapshots that are not useful, the user can choose to hide them, using the Lab Results settings on the Preferences tab, so that they aren’t available. To define stock snapshots for the department:- Click Edit.
- To create a new stock snapshot, click the New Snapshot button on the toolbar. Enter a Snapshot Title in the Quick Details box. Select the tests that you want to include in the snapshot from the list in the Create Snapshot form.
- To more easily locate tests, click the Search button in the Quick Details box and enter search text, or click the Mnemonic or Test Name headings at the top of the form to sort the list of tests by either of those criteria. Once you have selected all of the tests you want to include, click the Save button in the Quick Details box to create the snapshot.
- To edit an existing stock snapshot, select the snapshot in the Manage Snapshots form, and then click the Edit button in the Quick Details box. Edit the snapshot title or tests that you want to include, or both, and then click the Save button.
- To delete an existing snapshot, select the snapshot in the Manage Snapshots form for the department, click the Delete button in the Quick Details box, and then click OK.