Charge Transaction Screen At a Glance
The Charge Transaction screen is where you enter new charge transactions, or edit existing ones. The Charge Transaction screen contains three sections, listed vertically in this order:- Charges: Search for and enter charge codes; enter modifiers and charge details for specific charges if necessary.
- Diagnoses: Search for and enter diagnosis codes.
- Details: Enter additional detail information that applies to the entire charge transaction, such as service date, billing provider, service site, etc. At the top of the screen there are three buttons:
- Back : Exit without saving your work.
- SUBMIT : Submit the charge transaction as complete.
-
More : View the following additional options:
- Save as Draft: Save the charge transaction as a draft. See Saving a Transaction as a Draft.
- Check Code Edits: Check your work for errors. See Checking Your Work for Errors.
- Change Visit: Change the visit for this charge transaction. See Changing the Account (Visit) Associated with the Charge Transaction
Basic Steps: Entering a New Charge Transaction
New charge transactions are created in the Charges module. You can create a new transaction from scratch, or you can copy an existing one to create a new one. It does not matter which option you use, the resulting Charge Transaction screen is the same in all cases. The basic steps are as follows:- Select a patient from the Patient List and then choose an option for adding or copying a charge transaction.
- Enter charge codes, including modifiers and details for specific charge codes.
- Enter diagnosis codes.
- Enter additional detail information for the entire charge transaction, such as service date, billing provider, billing area, service site, etc.
- (Optional) Enter a comment.
- (Optional) Review the charges and diagnoses you have entered, and possibly make changes to your work.
- (Optional) Check you work for errors.
- Determine the best method for saving your work.
Methods for Creating a New Charge Transaction
There are two ways that you can start a new charge transaction:Entering a New Charge Transaction
In the Charges module, the Summary screen displays each visit in separate section, and within that, each day of the visit is listed as a separate row.- Visit days that do not yet have any charges entered show the date and the words ADD CHARGE, as in this example:

- Visit days that already have charges entered show the date and the details of the charge. You can enter a charge for either type of visit day (those that do not already have charges, and those that do).
- From the Charges Summary screen, identify the exact visit, and specific day of that visit, for which you want to enter charges. Then take either of these actions:
-
If the visit day row does not yet have a charge entered, it will show the words ADD CHARGE:. Tap anywhere on the visit day row to add a new charge transaction.
- If the visit day row already has a charge entered, and you want to enter another charge for that same date, tap anywhere on the visit day row to expose the action buttons at the top of the screen. Then tap the Add button

- If the visit day row already has a charge entered, and you want to enter another charge for that same date, tap anywhere on the visit day row to expose the action buttons at the top of the screen. Then tap the Add button
- Depending on how your user profile is configured, the application may now automatically copy the diagnosis codes from a previous charge transaction to the new transaction, or it may display the Add Previous Diagnoses screen with a list of the diagnosis codes from a previous transaction and allow you to select the ones you want to copy forward. When copying or presenting diagnoses for copying, this may or may not include any free text or flagged diagnoses from the source transaction. If the Add Previous Diagnoses screen is displayed, all the diagnoses will show a checkmark to the right to indicate that they are selected by default. If you do not want to copy any of the diagnoses to the new transaction, simply tap on a diagnosis row to remove the checkmark, and then tap OK.
- Follow the steps outlined in Basic Steps: Entering a New Charge Transaction, starting with Step 2, to enter the data for the charge transaction
- Tap SUBMIT in the upper right corner. The Charges Summary screen is re-displayed, with the patient’s new charge transaction listed.
Copying A Charge Transaction
The copy function is available when working from the Summary screen of the Charges module. The copy function is a convenient feature if you are repeating a previous routine and want to quickly add the same transaction again with a different service date. When you copy the transaction, the charges on the original transaction are automatically copied to a new transaction. In addition, your administrator determines which other items are copied forward (modifiers, regular diagnoses, free text diagnoses and charges, flagged diagnoses and charges, comments, or specific charge detail fields). To copy a charge transaction, follow these steps:- From the Charges Summary screen, identify the visit day row that has the transaction you want to copy. Tap on the row to expose the action buttons at the top of the screen, and then tap the Copy button
-
Depending on how the system and your user profile are configured, the copy function now does the following:
- It will automatically copy the charges from the source transaction. This may or may not include any free text or flagged charges from the source transaction.
- It may automatically copy the modifiers from the source transaction.
- It may automatically copy the diagnosis codes from the source transaction, or it may display the Add Previous Diagnoses screen with a list of the diagnosis codes from the source transaction and allow you to select the ones you want to copy. If the Add Previous Diagnoses screen is displayed, all the diagnoses will show a checkmark to the right to indicate that they are selected by default. If you do not want to copy any of the diagnoses forward, simply tap on a diagnosis row to remove the checkmark, and then tap OK. When copying or presenting diagnoses for copying, this may or may not include any free text or flagged diagnoses from the source transaction.
- It may automatically copy the values for specific charge detail fields from the source transaction.
- It may automatically copy the provider comments from the source transaction. The main Charge Transaction screen is shown with all of the information described above copied forward. The service date defaults to the most recent billable date for the patient.
-
Review the copied information and modify any of it as appropriate for the current transaction. For example, you might:
- Change the service date or other charge detail information.
- Entering Additional Detail Information for the Entire Charge Transaction
- Add new charges, diagnoses, or modifiers.
- Entering Charge Codes on a Charge Transaction
- Entering Diagnosis Codes on a Charge Transaction
- Entering a Modifier for a Specific Charge Code
- Remove or change the charges, diagnoses, or modifiers that were copied forward from the original transaction.
- Removing a Charge Code from a Transaction
- Adding or Changing Modifiers for a Specific Charge Code
- Changing the Quantity or Details for a Specific Charge Code
- Removing a Diagnosis from One Charge on a Transaction
- Removing a Diagnosis from an Entire Transaction
- Change the sort order of the charges or diagnoses.
- Re-Ordering the Diagnoses or Charges on a Transaction
- Tap SUBMIT in the upper right corner. The Charges Summary screen appears and you can see the new transaction.
Entering Charge Codes on a Charge Transaction
Once you have selected a patient visit for the charges you are about to enter, the Charge Transaction screen appears. There are several ways that you can quickly select the appropriate charge codes:- Select it from one or more lists: You can select charge codes from two list options. Each of these list options contains a different set of codes, such as your personal favorites (Favorites), or commonly used codes from your department (Department). See Selecting Charges from Favorites or Department Lists.
-
Use a Charge Macro: You can use a Charge Macro to enter a predefined set of charges, modifiers, and diagnoses with a single tap, rather than having to select and enter each item individually. You simply choose the charge macro from the Favorites or Department list, and all of the charges, modifiers, and diagnoses in that group are automatically added to the Charge Transaction screen. Charge macros are preceded by the word “Macro:” so that you can distinguish them from regular charge codes, as in this example:
 See Selecting Charges from Favorites or Department Lists and Using Charge Macros to Enter Multiple Charges.
- Search for it: If you cannot find the code you want using one of the options above, you can search for it from the master charge list. See Selecting Charges Using the Search Option.
- Enter it as free text: If you cannot find the code you want using the options above, you can enter a charge as free text. See Entering Charges as Free Text.
Selecting Charges from Favorites or Department Lists
There are two options that allow you to select charge codes or charge macros from a list. The main difference between the options is the type of items that each list contains.- Favorites: This option displays your personal list of favorite charge codes and macros, and is available only if your administrator has enabled it in your user profile. For instructions on how to add a code or macro to your favorites list, see Adding Items to your Charge or Diagnosis Favorites Lists.
- Department: Below the Favorites list are a series of charge Department categories. These categorized lists of charge codes and macros are created specifically for your department by your administrator to make it easier for you to find the codes or macros you need. With Department categories, you progressively drill down through the categories to find the specific item that you want. The contents of the Department categories may be different depending on the type of visit (inpatient or outpatient) for which you are entering charges. To select a charge code or charge macro using one of the list options, follow these steps:
-
Tap ADD CHARGE .
The Add Charge screen appears.
By default, the Favorites list is automatically opened when you first access the Add Charge screen. However, if you had previously used the Pin button to pin open a particular Department category, then that category is instead automatically opened. See Pinning a Charge or Diagnosis Subcategory Open.

-
Review the available charge codes in the options below:
- Favorites: This is a list of your favorite charge codes or macros. If you have created categories, tap a category name to open it and view th charge codes or macros within it. (See also Adding Items to your Charge or Diagnosis Favorites Lists.)
- Department: Scroll down to see all of the Department categories. Tap a category name to open it and view the charge codes or macros within it.
- (Optional) Tap More and then select Expand All or Collapse All to expand or collapse all the Favorites and Department categories. Please note that charge codes are updated each year. As a result, a code that was included on your Favorites or Department list in the past may be inactive today. If a code is inactive on the service date of the charge transaction, it does not show on either list, since it cannot be used on a new charge transaction for that service date.
-
Select each charge that you want. You may select as many items, from as many options or categories, as you wish.
- When you select a charge code or macro, a checkmark appears next to it.
- To select the same charge code twice, see Entering the Same Charge Code Twice on a Transaction.
- To view guideline for proper usage of a specific charge code, see Viewing Charge Guidelines.
- Tap Back when you are through selecting charge codes. The main Charge Transaction screen appears, with the codes that you selected displayed on it.
Selecting Charges Using the Search Option
If you cannot find the code you want in the Favorites or Department list, you can use the Search option to search the entire master list of charge codes.- Tap ADD CHARGE . The Add Charge screen is displayed.
-
Tap into the Search field at the top of the screen and type a full or partial CPT code, or a portion of the charge description.
As soon as you enter at least two characters, any charges that match the code or phrase that you typed are displayed. As you continue typing, the list of results changes. When you are done typing, tap the Search button on the virtual keyboard to close it so that you can see the full list of results.
- If you enter a CPT code or description that has a single exact match, it is displayed and automatically selected for you (as indicated by a checkmark).
- If you enter a CPT code or phrase that does not have a single exact match, then all charges with that code or phrase in their CPT code or description are displayed. Each charge in the master charge list can also have common keywords associated with it. The application also automatically searches the charge keywords for the phrase that you entered. If the list of potential matches is long, you can change the way it is sorted to help you find the code you want. Tap More and then choose Sort by Code (to sort numerically by code in ascending order) or Sort by Description (to sort in alphabetic order by description). You can also tap More again and then choose the same sort option a second time, to reverse the sort order.
-
Select the charge(s) that you want from the search results, and/or perform additional searches as necessary (repeat steps 2 - 3). Or, if you cannot find the charge you want in the search results, see Entering Charges as Free Text.
- When you select a charge code or macro, a checkmark appears next to it.
- To select the same charge code twice, see Entering the Same Charge Code Twice on a Transaction.
- To view guideline for proper usage of a specific charge code, see Viewing Charge Guidelines.
- Tap Back when you are through selecting charge codes. The main Charge Transaction screen appears, with the codes that you selected displayed on it.
Entering Charges as Free Text
If you cannot find the charge that you want by looking in your Favorites or Department list, or by performing a Search for it, you may be able to enter it as free text. You can add free text charges only if your administrator has enabled this feature in your user profile. It is best practice to always search for a charge, before adding it as free text:- Tap ADD CHARGE . The Add Charge screen appears.
- (Optional, but recommended) Tap into the Search field at the top of the Add Charge screen and type a charge description. Review the list of search results, and if you do not see the charge that you want, proceed to the next step.
- Tap the Free Text button at the top right of the screen.

- Tap Back to go back to the main Charge Transaction screen.
The main Charge Transaction screen appears, with the free text charge displayed on it, preceded by the words “Free Text” as in this example:

Using Charge Macros to Enter Multiple Charges
A Charge Macro is a predefined group of charges, modifiers, and diagnoses that are commonly used together. They enable you to enter an entire set of charges, modifiers, and diagnoses with a single tap, rather than having to select and enter each item individually. This speeds up the charge entry process considerably. Department administrators may have created some commonly used charge macros for all providers in your department. You may also create personal charge macros on the web application, if this feature has been enabled in your user profile. You might see charge macros on your Favorites list (if you marked them as favorites), or on the Department list if you or your department administrator have defined them and added them to a charge Department category. They are preceded by the word “Macro:” so that you can distinguish them from regular charge codes:- Tap ADD CHARGE . The Add Charge screen is displayed.
-
Look through your Favorites list or the various Department categories to find the macro that you want, and then tap on it to select it. Macros are preceded by the word “Macro,” as in this example:
- Tap Back to go back to the main Charge Transaction screen. All of the charges, modifiers, and diagnoses associated with the charge macro are added to the charge transaction.
- Review the items that were added.
- You can change or remove any of the charges, modifiers, or diagnoses as necessary for this patient. See the following topics for instructions:
Viewing Charge Guidelines
When selecting charge codes, sometimes it is helpful to view the guidelines associated with a charge code, to determine if a particular code is the correct one for the service you provided. You can view guidelines for any charge on the Favorites or Department list, or for any charge listed in the Search Results after using the Search option.- On the Add Charge screen, identify the charge code whose guidelines you want to view, and tap on the charge code to select it. This exposes an Edit button in the top banner (you can also swipe right to left on a charge code’s row to expose an Edit button on the same row).
- Tap the Edit button . The Charge Detail screen is displayed and shows the guidelines for proper usage of the charge code at the bottom of this screen.
- (Optional) After looking at the guidelines, if you decide that you have selected the wrong code, you can tap the Delete button at the top of the Charge Details screen to remove the charge code from the charge transaction.
- Tap Back to go back to the main Charge Transaction screen.
Entering the Same Charge Code Twice on a Transaction
Occasionally, you may need to enter a charge code two times on the same transaction. For example, if you performed the same surgery on both eyes for a patient, you would need to enter the charge code for the surgery twice: once for the left eye with a modifier of Left Side, and once for the right eye with a modifier of Right Side. This is different than increasing the quantity associated with the charge code, as you might do to indicate multiple biopsies (see Entering the Quantity for a Specific Charge Code).- Tap ADD CHARGE . The Add Charge screen is displayed.
- Find the charge code you want to enter using any of the standard methods:
- Select the charge code that you want to enter multiple times. A checkmark appears to indicate that you have added one instance of the code to the charge transaction.
- To add more instances, tap More and then select Add same CPT (2) from the menu. A second instance of the charge code is added to the transaction, and a counter “(2)” is displayed next to the selected charge code on the Add Charge screen to indicate the same.
-
To add more instances, repeat Step 4 as many times as necessary. The menu option changes to Add same CPT (3), Add same CPT (4), and so on, to indicate the number of instances that will be added to the transaction when you select it.
If you make a mistake, you can remove all instances by simply tapping the charge code again. The confirmation message is shown: “Remove CPTs? Remove all copies of this CPT from the charge transaction?” Tap YES to remove them. The counter and the checkmark are removed to indicate that the charge code is no longer selected.
- Tap Back to go back to the main Charge Transaction screen. The charge code is listed multiple times in the Charges section of the screen.
- You can now add differing modifiers to each instance, if necessary. See Entering a Modifier for a Specific Charge Code.
Entering a Modifier for a Specific Charge Code
Modifiers provide additional information about a charge. You can add one or more modifiers to each of the charges on a charge transaction. If you are copying a previous transaction, the modifiers on the original transaction may be copied forward to the new one, based on a setting in your user profile. In addition, the GC modifier for resident/teaching physician services can be configured to behave in a variety of manners. For example:- If you never teach, the application can be configured to never add GC modifiers to your charges.
- If you act as a teaching physician all of the time, the application can be configured to add GC modifiers to all of your charges automatically.
- If you teach only occasionally, a dialog box can be configured to pop-up with every charge that you enter, asking if you want to add a GC modifier to it. Please note that your administrator can also specify a list of CPT codes that should never have a GC modifier added. For example, for evaluation and management services and other services based on time (such as critical care or psychotherapy), your organization may prefer not to use the GC modifier, since the teaching physician must be physically present for the entire period of time billed in order to qualify for the modifier. For any code that your administrator has marked as exempt, you will never be prompted to add a GC modifier, nor will a GC modifier ever be automatically added to the CPT code for you.
- You can add modifiers to a charge code while in the process of selecting that charge code. See Entering Modifiers While Selecting Charge Codes.
- You can add modifiers to a charge code after you have selected all of your charge codes, by tapping on the code from the main Charge Transaction screen. See Entering or Removing Modifiers After Selecting All Charge Codes.
Entering Modifiers While Selecting Charge Codes
To add a modifier while in the process of selecting a specific charge code:- From the main Charge Transaction screen, tap ADD CHARGE . The Add Charge screen is displayed.
- Find the charge code you wan to enter using any of the standard methods:
- Tap on the charge code to select it. This exposes an Edit button in the top banner (you can also swipe right to left on a charge code’s row to expose an Edit button on the same row).
- Tap Edit . The Charge Detail screen appears.
-
Tap SELECT MODIFIER
 A list of modifiers appears. Those modifiers that you marked as favorites on the web application are listed at the top of the screen. All other modifiers are listed below.
- Scroll through the list and select one or more modifiers. Or, you can tap the Search button in the top right to expand the Search field and then search for a modifier by typing a few letters of its code or description. A checkmark appears next to each modifier as you select it. To remove a modifier, select it again (to remove the checkmark).
- Tap Back to go back to the Charge Details screen. Tap Back twice more to go back to the main Charge Transaction screen. The modifiers you selected are listed under the charge code and description, in the same order that you selected them.
Entering or Removing Modifiers After Selecting All Charge Codes
To add or remove a modifier after having selected all of your charges:- From the main Charge Transaction screen, tap ADD CHARGE . The Add Charge screen is displayed.
- Select all of the charges that you want to enter using any of the standard methods:
- Tap Back to return to the main Charge Transaction screen. All of the charges that you selected are listed in the Charges section. If you previously entered modifiers for a charge, or if a GC modifier was added automatically, the modifier(s) are listed just below the charge code and description.
- Tap on the charge for which you wish to add or change modifiers. The Charge Detail screen appears.
-
Tap SELECT MODIFIER
A list of modifiers appears: modifiers that you have marked as favorites using the Commure Pro web application are listed at the top of the screen, followed by all other modifiers below. Any modifiers that were previously selected are shown with a checkmark to the right.
-
While viewing the modifier list, make your changes:
- To add a modifier, scroll through the list and select one or more modifiers. Or, you can tap the Search button in the top right to expand the Search field and then search for a modifier by typing a few letters of its code or description.
- To remove a modifier, select it again (to remove the checkmark).
- Tap Back to go back to the Charge Details screen. Tap Back again to go back to the main Charge Transaction screen. The modifiers you selected are listed under the charge code and description, in the same order that you selected them.
Entering the Quantity for a Specific Charge Code
Every charge code in the master list of charge codes has a defined minimum and maximum quantity. When you use a charge code in a charge transaction, the Quantity field defaults to the minimum quantity required for that charge code. If appropriate, you can change the quantity for a particular charge, but you cannot enter less than the minimum or more than the maximum. For some charge codes, such as biopsies, it may make sense to increase the quantity to reflect the number taken.Increasing the quantity is different than entering the same charge code twice on a transaction. If you need to enter the same charge code twice, with different modifiers for each, as might be the case when you perform the same surgery on both the left and right eye for a patient, see Entering the Same Charge Code Twice on a Transaction.
- You can change the quantity for a specific charge code while in the process of selecting each charge code. See Changing the Quantity While Selecting Charge Codes.
- You can change the quantity for a specific charge code after you have selected all of your charge codes, by tapping on the code from the main Charge Transaction screen. See Changing the Quantity After Selecting All Charge Codes.
Changing the Quantity While Selecting Charge Codes
To change the quantity for a specific charge code while in the process of selecting that charge code:- From the main Charge Transaction screen, tap ADD CHARGE . The Add Charge screen is displayed.
- Find the charge code you want to enter using any of the standard methods:
- Tap on the charge code to select it. This exposes an Edit button in the top banner (you can also swipe right to left on a charge code’s row to expose an Edit button on the same row).
- Tap Edit . The Charge Detail screen appears.
- Select the correct quantity in the Quantity field.
- Tap Back to go back to the Add Charge screen. Tap Back again to go back to the main Charge Transaction screen.
Changing the Quantity After Selecting All Charge Codes
To change the quantity for a specific charge code after having selected all of your charges:- From the main Charge Transaction screen, tap ADD CHARGE . The Add Charge screen is displayed.
- Select all of the charges that you want to enter using any of the standard methods:
- Tap Back to return to the main Charge Transaction screen. All of the charges that you selected are listed in the Charges section.
- Tap on the code or description of the specific charge whose quantity you want to change. The Charge Details screen for that one charge code is displayed.
- Select the correct quantity in the Quantity field.
- Tap Back to go back to the main Charge Transaction screen.
Entering Detail Information for a Specific Charge Code
Your administrator may have created charge detail fields (also known as charge header fields) to capture additional information about the individual charge codes on the transaction. For example, if your organization bills for both professional and technical services on the same charge transaction, two charge detail fields that you might see are the Supervising MD Present and Rendering Provider fields.- Rendering Provider: This field is used to indicate the specific person who provided each service, such as the name of the attending physician, resident, nurse, or medical assistant.
- Supervising MD Present: Select Yes or No to indicate whether a supervising MD was present when the service was provided. See also Entering Additional Detail Information for the Entire Charge Transaction for examples of the different field types you might encounter.
- You can enter both required and non-required detail information for each charge code while in the process of selecting each charge code. See Entering Charge Detail Information While Selecting Charge Codes.
- You can enter both required and non-required detail information for each charge code after you have selected all of your charge codes, by tapping on each code individually from the main Charge Transaction screen. See Entering Charge Detail Information After Selecting All Charge Codes.
- You can enter only the required detail information for each charge code after you tap the SUBMIT button, at which time the application will present you with a dialog showing every charge code and the required detail fields below it. See Entering Charge Detail Information After Tapping SUBMIT.
Entering Charge Detail Information While Selecting Charge Codes
To enter detail information for a specific charge code while in the process of selecting that charge code:- From the main Charge Transaction screen, tap ADD CHARGE . The Add Charge screen is displayed.
- Find the first charge code you want to enter using any of the standard methods:
- Tap on the charge code to select it. This exposes an Edit button in the top banner (you can also swipe right to left on a charge code’s row to expose an Edit button on the same row).
- Tap Edit . The Charge Details screen appears. The charge detail fields are displayed in the middle section, just below the charge code and the quantity.
- Enter information for each charge detail field.
- Tap Back to go back to the Add Charge screen.
- On the Add Charge screen, repeat Steps 2 through 6 for each charge code that you want to add to the charge transaction.
- Tap Back to go back to the main Charge Transaction screen.
Entering Charge Detail Information After Selecting All Charge Codes
To enter detail information for each charge code after having selected all of your charges:- From the main Charge Transaction screen, tap ADD CHARGE . The Add Charge screen is displayed.
- Select all of the charges that you want to enter using any of the standard methods:
- Tap Back to return to the main Charge Transaction screen. All of the charges that you selected are listed in the Charges section.
- Tap on the first charge for which you wish to enter detail information. The Charge Details screen appears. The charge detail fields are displayed in the middle section, just below the charge code and the quantity.
- Enter information for each charge detail field.
- Tap Back to return to the main Charge Transaction screen.
- Repeat Steps 4 through 6 for each charge on the main Charge Transaction screen.
Entering Charge Detail Information After Tapping SUBMIT
To enter the required detail information for each charge code after tapping SUBMIT:- From the main Charge Transaction screen, tap ADD CHARGE . The Add Charge screen is displayed.
- Select all of the charges that you want to enter using any of the standard methods:
- Tap Back to return to the main Charge Transaction screen. All of the charges that you selected are listed in the Charges section.
- Complete all of the other fields necessary for the charge transaction, including the diagnosis codes and the fields in the Details section at the bottom of the main Charge Transaction screen.
- Tap SUBMIT. If there are any required charge detail fields, the Required CPT Fields screen is now displayed. It shows each charge code on the transaction, along with the required charge detail fields below it. Non-required charge detail fields are not listed on this screen.
- Complete each charge detail field and then tap OK.
- Tap SUBMIT again to submit the charge transaction.
Entering NDC Codes for a Specific Charge Code
When billing for the administration of drugs such as vaccinations or other injections (such as steroids), Medicare and other insurance providers require organizations to submit the National Drug Codes (commonly referred to as NDC codes) that are associated with those drugs. If your organization provides these types of services, they may have implemented Commure Pro’s NDC Selection feature. When this feature is implemented, each time a user enters a charge code for the administration of a drug on the web application, two additional fields for NDC and Qty (quantity) are listed below the charge code. These fields allow the user to enter the necessary NDC information. On Android devices, the NDC and Qty (quantity) fields are not available. This means that although you can enter charge codes for the administration of drugs, you cannot enter the associated NDC information. As a result, when you submit a transaction with a drug administration charge code, it is automatically saved as a Draft transaction with a “Missing/invalid NDC code or quantity” error status. You can later edit the transaction on the web application and enter the NDC information.Entering Diagnosis Codes on a Charge Transaction
Once you have selected a patient visit for the charges you are about to enter, the Charge Transaction screen appears. Typically you enter charge codes first, and then diagnosis codes.-
Tap ADD DIAGNOSIS
 The Add Diagnosis screen displays.
-
There are several ways that you can quickly select the appropriate diagnosis codes:
- Select it from one or more lists: You can select diagnosis codes from a variety of list options. Each of these list options contains a different set of codes, such as diagnosis codes from the patient’s history (Existing), your personal favorites (Favorites), and commonly used codes from your department (Department). See Selecting Diagnoses from Existing, Favorites, or Department Lists.
- Search for it: If you cannot find the code you want using one of the list options above, you can search for it from the master diagnosis list. See Selecting Diagnoses Using the Search Option.
- Enter it as free text: If you cannot find the code you want using the options above, you can enter a diagnosis as free text. See Entering Diagnoses as Free Text.
- Add secondary diagnoses: The application alerts you when one or more secondary diagnoses may be applicable, and provides an easy method for selecting them. See Selecting Secondary Diagnosis Codes.
Entering Additional Detail Information for the Entire Charge Transaction
Every transaction includes general information about the charge transaction as a whole. The general information is particularly important because it contains departmental information that is used directly for billing. This information is commonly referred to as the charge transaction details or the charge transaction headers.Each individual charge code on the transaction can also have detail information associated with it. See Entering Detail Information for a Specific Charge Code.
- Service Date: The date when the service took place. Your administrator can configure the system to determine the billable date range for the visit (i.e., whether you can enter a service date that is before or after the admission and discharge dates, or before or after the appointment date). They can also configure whether or not a date of service is defaulted for you and how far in the past you can backdate the charge. Even if a service date is defaulted for you, you can change the defaulted date, as long as you stay within the parameters defined by your administrator. Select the field to enter or edit the service date.
- Other date and/or time fields: Your system administrator may define various other date and/or time fields, such as Injury Date, Posting Date, Time of Injury, etc. Depending on your system’s configuration, a default date may be populated in these fields, although you can typically change the default date if necessary. Select the field so to enter or edit the date/time.
- Provider fields, such as Billing Provider, Admitting MD, Referring MD, or Primary Care MD. Select the field to view and select from a list of providers. In some cases, you may be able to either select from a list, or enter a provider name as free text.
- Miscellaneous details, such as Service Site, Billing Area, or Injury Type. Select the field to view and select from a list of values. In some cases, you may be able to either select from a list, or enter a the information as free text.
- The visit with which this charge transaction is associated, also commonly referred to as the Account (see Changing the Account (Visit) Associated with the Charge Transaction). To view or change the charge transaction detail fields for any transaction:
- On the main Charge Transaction screen, scroll down to the Details section.
- Tap any field to enter or change the data in it.
-
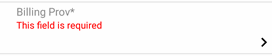
Required fields are indicated by an asterisk and the message “This field is required.”
-
If a field requires that you to select a value from a pre-defined list, an Expand icon is displayed to the far right. Select the Expand icon to view the values and select one.


- If a field requires only a Yes/No response, it typically defaults to either On (Yes) or Off (No). Simply tap the ON/OFF button to change it to the other value.

- If a field allows you to enter your own text or numbers, instructions are shown below the field name in light gray text. Tap into the text area and start typing.

- Some fields allow you to either select from a list of predefined values, or to enter your own text. Tap on the field name to choose from a list of predefined values, or tap into the text area below the field name to enter your own free text value.

- To clear the value from a field, tap the Delete button .
- Select the Comments option to enter a comment for this transaction. See Entering a Comment on a Charge Transaction for more information.
- The Hold for Review field is view-only and cannot be changed on Android devices. See Holding a Transaction for Review for more information.
- If a field requires only a Yes/No response, it typically defaults to either On (Yes) or Off (No). Simply tap the ON/OFF button to change it to the other value.
Changing the Account (Visit) Associated with the Charge Transaction
The account specifies the encounter, or visit, with which the charges are associated. If the patient has had more than one visit with your healthcare organization, there are account numbers for each of those visits. You can change the account number for a charge transaction. However, keep in mind that the defaulted values in some of the charge transaction detail fields are often dependent on the type of visit. As a result, when you change visits, all of the data in the detail fields will be cleared.-
On the main Charge Transaction screen, use either of these methods to change the visit:
- Tap More and then choose Change Visit from the menu.
- Scroll down to the Details section and tap on the Account field. The Select Visit screen is displayed and shows the date, visit number, and facility for each visit. If the patient has only one visit (this one), then only one visit is listed. If the patient has more than one visit, those additional visits are listed as well.
- Select a different visit from the list and then tap OK. All of the detail fields are cleared, but any charges or diagnoses that you entered remain in place.
Entering a Comment on a Charge Transaction
You can use the Comments field to enter notations about the transaction or to communicate billing questions to supervisory physicians or billing administrators. When you enter a comment and SUBMIT, the transaction may also be automatically held for review, or you may be presented with a prompt asking if you want to hold the transaction for review (based on your user profile). If held automatically, or if you respond Yes to the prompt, the charge transaction is held with a reason of Comment Review, so that an administrator can review the question. To enter a comment, follow these steps:- Scroll down to the bottom of the main Charge Transaction screen and then tap into the Comments field.
- Enter your comment in the text box.
- Finish entering the charges, diagnoses, and detail information, and then select SUBMIT to submit your transaction.
- If your user profile is configured to automatically hold the charge for review when you enter a comment, then the transaction is automatically held for review with a Comment Review reason.
- If your user profile is instead configured to prompt you, you are now prompted with the following message: “You have entered a comment. Hold charge for review?”
- Select Yes to submit and hold the transaction for review with a Comment Review reason.
- Select No to submit without holding the transaction for review.
- Select Continue Editing to return to the charge transaction screen without submitting.
Reviewing the Charge Transaction
Once you have entered your charges and diagnoses, you might want to review them for accuracy. For example, you might decide to remove a charge or diagnosis that you entered in error, or change the order in which they are listed. If you copied a previous transaction, you might want to remove some of the copied charges or diagnoses if they do not apply to today’s services. To review and possibly change the charges, modifiers, diagnoses, or detail information on a transaction, scroll up or down on the main Charge Transaction screen to see all of the information. This screen is broken into three sections:Charges, Diagnoses, and Details. From main Charge Transaction screen, you can then do any of the following:- Remove a charge code from the transaction. See Removing a Charge Code from a Transaction.
- Adjust the quantity for a charge code. See Changing the Quantity or Details for a Specific Charge Code.
- Remove a diagnosis from one charge on the transaction. See Removing a Diagnosis from One Charge on a Transaction.
- Remove a diagnosis from the entire transaction. See Removing a Diagnosis from an Entire Transaction.
- Change the order in which either the charges or the diagnoses are listed. See Re-Ordering the Diagnoses or Charges on a Transaction.
- Add or remove modifiers. See Adding or Changing Modifiers for a Specific Charge Code.
Checking Your Work for Errors
Every transaction is automatically checked for billing errors when you select the SUBMIT option. However, you also have the option of checking for errors at any point in the charge entry process. You might do this if you think there is a potential problem with the data you entered. To check your work for errors:-
Tap More and then choose the Check Code Edits option.
The application immediately checks for coding errors on the data you entered.
- If no errors are found, the message says: “No Code Edits Found. No code edits were found for this charge transaction.” Tap OK to acknowledge the message and then tap SUBMIT when you are ready to save your work.
- If certain types of errors are found, you might see a message such as: “Code Edits Found. There are errors on your charge transaction. Please select your next step.” Then you might see one or more of these buttons:
- CORRECT ERRORS
- SAVE, INGORE ERRORS
- SAVE AS DRAFT
- If other types of errors are found, you might see an error message displayed in red text next to the charge, diagnosis, or charge detail field that is causing the problem. You can correct the error and then tap SUBMIT when you are ready to save your work.
Methods for Submitting Transactions
Once you have entered as much information as possible for the charge transaction, you must submit it. There are three possible ways that you can submit the transaction. The method you choose depends upon whether the transaction is ready to be billed to the patient.- Submit the transaction as complete. You have entered complete information and the transaction is ready for billing. See Submitting a Transaction as Complete.
- Save the transaction as a draft. You have entered partial charge information, but the transaction is still incomplete. You would like to complete the transaction at a later time, and you are not ready to submit the transaction for billing. See Saving a Transaction as a Draft.
- Hold the transaction for review. You have completed the transaction to the best of your ability, but it is either missing information, or you have coding questions. You want to send the transaction to the Holding Bin where a billing administrator or supervisory physician can review your work and make any necessary corrections before final billing.
- You can enter a comment describing the issue, and then if enabled in your user profile, you can hold the transaction for Comment Review. See Entering a Comment on a Charge Transaction.
- In addition, your administrator may configure your user profile to hold all of your transactions for review using other hold reasons such as Review Requested or Biller Review. See Holding a Transaction for Review for a full explanation. Your ability to submit a transaction as complete or as a draft also depends on whether your device is connected to the Commure Pro Application Server at the time you attempt to submit it. See Submitting Transactions when Connected or Disconnected from the Server for more information.
Submitting Transactions when Connected or Disconnected from the Server
In most cases, you are at your workplace when you are entering charges, and your device is connected to the organization’s server. However, there may be instances when you want to submit a charge transaction and your device is not connected to the server. Commure Pro allows you to submit charges in both a connected and a disconnected state.- Submitting Charges When Connected. When you submit a charge in a connected state, it is submitted to the server immediately. You can submit a charge as complete, or as a draft. Any appropriate code edit error messages are immediately displayed on your device, and you can address them or not, as described in Submitting a Transaction as Complete and Correcting Errors in a Charge Transaction.
- Submitting Charges When Disconnected. When your device is not connected, you can still submit the charge, but it is not immediately submitted to the server. A setting in your user profile determines whether you are allowed to submit transactions as complete, or only as drafts. In either case, the completed or draft transaction is held on your device, and is not submitted to the server until the device is connected again. In the case of a completed charge, the checks for code edit errors are not run until the transaction is submitted to the server. If errors are found at that time, it is sent to the Holding Bin for review and correction by an administrator.
Submitting a Transaction as Complete
If you have entered all of the necessary information for the charge transaction, you can submit the transaction as completed. At a minimum, in order to submit a transaction as completed, you must enter a Service Date, Billing Provider, Billing Area, Service Site, and at least one charge code. In addition, you may also be required to enter at least one diagnosis code, depending on how your administrator has configured the system. Follow the steps below to submit a completed charge:- Enter all of the necessary data on the Charge Transaction screen.
- Select the SUBMIT button at the top of the screen.
- The system automatically checks the transaction for errors. Depending on the results, you may have to take some action.
- If the transaction has no errors, it is submitted as completed and is sent it to the server.
- If the transaction has errors, a warning message describing the error is displayed. You can correct the issue and submit again. Or, if you are not able to correct it, then depending several factors, you may be able to SAVE, IGORE ERRORS or SAVE AS DRAFT.
If you do not have connectivity to your organization’s network at the moment that you attempt to submit the transaction as complete, you may be required to save it as a draft instead. See Submitting Transactions when Connected or Disconnected from the Server.
- If you were able to submit the transaction as complete, and PQRS is enabled at your organization, the application now checks the transaction to see if it qualifies for quality reporting. If it does, the Commure Pro Clinical Metrics screen is displayed so that you can submit quality measure information. See Answering the Clinical Metrics Questions.
Correcting Errors in a Charge Transaction
The application checks for the following types of errors when you attempt to submit a transaction:- All fields have the appropriate type of information and all required fields contain information.
- The transaction date makes sense with respect to the patient’s admission and discharge dates, as well as in relation to the day of the charge.
- Data fields for charges adhere to the code edit rules that your organization has chosen to implement. For example, a code edit error message might be shown if you forgot to enter a referring MD with a consultation charge, or if you entered a charge code normally only used for female patients on a male patient. If the transaction is missing information, does not pass the validity checks, or does not pass your organization’s code edit rules, you are prompted with one or more options. The possible options you might see include:
-
A dialog box with the following message is displayed: “Code Edits Found. There are errors on your charge transaction. Please select your next step.” The dialog box has two or three of the following buttons:
- CORRECT ERRORS: Go back to the Charge Transaction screen to immediately correct the issue, and then try to SUBMIT again. A description of the problem is displayed in red text next to the charge, diagnosis, or detail field that is causing the error. If you are unable to correct the error, you can tap Back to exit and discard the transaction.
- SAVE, IGNORE ERRORS: Submit the transaction as complete, even though it has errors. The transaction is sent to the Holding Bin with an error status, where an administrator can make the necessary corrections.
- SAVE AS DRAFT: Save the transaction as a draft (with errors). It is not submitted to billing until you edit it at a later time, correct the issue, and then try to SUBMIT it again.
- You simply remain on the Charge Transaction screen with an error message displayed in red text next to the charge, diagnosis, or charge detail field that is causing the problem. You can correct the error and then try to SUBMIT again, or if you are unable to correct the error, you can tap Back to exit and discard the transaction. Which of the options above that are available to you depend upon the type of error and how your user profile is configured. The specific cases in which you would see each of the options above are as follows:
-
Non-Forced Code Edit (there are errors, but you can submit despite them):
- You are presented with the following options:
- CORRECT ERRORS
- SAVE, IGNORE ERRORS
- SAVE AS DRAFT
-
Forced Code Edit (there are errors that must be corrected before submitting):
- If your administrator allows you to save transactions with forced code edits as drafts, then you are presented with the following options:
- CORRECT ERRORS
- SAVE AS DRAFT
- If your administrator does not allow you to save transactions with forced code edits as drafts, then:
- CORRECT ERRORS
-
Does not pass validity check:
- A description of the problem is displayed in red text next to the charge, diagnosis, or charge detail field that is causing the validity error. Correct the problem and then try to SUBMIT again. Otherwise, you must tap Back to exit and discard the transaction.
Saving a Transaction as a Draft
You may save a transaction as a draft, if this feature enabled in your user profile. When enabled, you can create a draft transaction any time you are unable to completely enter all of the details of a particular charge transaction. You might do this if you do not have all of the necessary information at the moment, or if you do not have time to complete the charge. In addition, there are some situations in which you must save the transaction as a draft:- If a charge does not pass the standard validity checks for completeness or accuracy, the system does not allow you to submit it as a completed transaction. You can either correct it immediately, or save it as a draft (so that you can correct it later).
- If a charge does not pass the forced code edits implemented by your organization, the system does not allow you to submit it as a completed transaction. You can either correct it immediately, or you may be allowed to save it as a draft (so that you can correct it later).
- If you do not have connectivity to your organization’s network at the moment that you attempt to submit a charge, you may be required to save the transaction as a draft. See Submitting Transactions when Connected or Disconnected from the Server. Draft transactions are transactions that are not yet complete, and therefore are not submitted for billing processing. Since they are not complete, draft transactions are not eligible for quality reporting, and the Commure Pro Clinical Metrics screen never appears for them (see Answering the Clinical Metrics Questions).
- Enter as much charge data as possible on the Charge Transaction screen. At a minimum, even for a draft charge, you must enter a Service Date, Billing Provider, Billing Area, and Service Site.
- If desired, enter a comment describing the information that is needed to complete the charge, as a reminder to yourself.
- Tap More and then choose the Save as Draft option. The Charges Summary screen appears with the draft transaction listed. The draft transaction has a Draft icon to indicate its draft status.
To complete a draft transaction
- From the Charges Summary screen, identify the visit day row that has the draft transaction that you want to complete. Tap on the draft charge’s row to expose the action buttons at the top of the screen.
- When the action buttons appear at the top of the screen, tap the Edit button . The Charge Transaction screen opens in edit mode.
- Enter the missing information.
-
Tap the SUBMIT button at the top of the screen.
The transaction is automatically checked for errors.
- If the transaction has no errors, it is submitted as completed.
- If the transaction has errors, a warning message describing the error is displayed. You can correct the issue and submit again. Or, if you are not able to correct it, then depending several factors, you may be able to SAVE, IGNORE ERRORS or SAVE AS DRAFT. See Correcting Errors in a Charge Transaction.
- If you were able to submit the transaction as complete, and PQRS is enabled at your organization, the application now checks the transaction to see if it qualifies for quality reporting. If it does, the Commure Pro Clinical Metrics screen is displayed so that you can submit quality measure information. See Answering the Clinical Metrics Questions.
Holding a Transaction for Review
Once the details of a charge transaction have been entered, you may be able to hold the charge transaction for review. You might hold a transaction for a variety of Hold Reasons, such as Review Requested (you want the designated reviewer in your department to review the charges for accuracy) or Biller Review (you want a billing administrator to confirm whether you have used the proper codes for billing). Your administrator determines whether you are allowed to hold a transaction for review using the Review Requested reason, or for any other custom reason (such as Biller Review or Hold Until Discharged).See also Entering a Comment on a Charge Transaction for information about holding a charge for review using the Comment Review reason when you enter a comment on the charge transaction.
- Enter as much data as possible on the Charge Transaction screen.
- (Optional) Enter a comment in the Comment field describing the problem or question with the transaction. This comment will be visible to the person who reviews the transaction.
- Select one or more Hold Reasons in the Hold for Review field. This field may already have one or more Hold Reasons selected for you by default. When you first start using the system, you should tap the field at least once to familiarize yourself with all of the Hold Reasons that are available to you, as well as which ones are selected by default. From that point forward, you can then take any of the following actions:
- Tap the Hold for Review field to display the list of reasons and then select or unselect various reasons, so that only the ones that apply to this transaction are chosen. (If you do not want to hold the transaction for review, then make sure to unselect all of the reasons.) Then tap SUBMIT.
- If the Hold for Review field already has one or more reasons selected by default, and they are correct for this transaction, then just tap SUBMIT to hold the transaction for review based those reasons.
- If PQRS is enabled at your organization, the application now checks the transaction to see if it qualifies for quality reporting. If it does, the Commure Pro Clinical Metrics screen is displayed so that you can submit quality measure information. See Answering the Clinical Metrics Questions. The charge is now sent to the Holding Bin with a Held for Review charge status.
Answering PQRS/MIPS Clinical Metrics Questions
Commure Pro makes it easy for physicians to participate in the Merit-based Incentive Payment System (MIPS) sponsored by the Centers for Medicare and Medicaid Services (CMS). If Commure Pro PQRS (Physician Quality Reporting System) is implemented at your organization, each time you enter a charge transaction, it is evaluated to determine if it fits the quality reporting criteria. Patient information such as age and gender, and the charges and the diagnoses that you enter, are all taken into account. The reporting frequency for the each measure determines how often you are prompted to answer the Commure Pro Clinical Metrics form (each time a provider uses a particular charge code, once per visit, once per calendar month, or once per reporting period). When appropriate, you are prompted to answer a series of clear and concise quality measure questions. Your answers to the quality measure questions are then conveyed to CMS using either of the methods below:- Registry method: After you answer the quality measure questions, the answers are recorded by the Commure Pro application. You can then monitor your performance throughout the year using the Charges > PQRS Report option on the web application. At the end of the reporting period, Commure Pro reports the information to the CMS.
- Claims Billing method: After you answer the quality measure questions, those answers are translated into one or more CPT II codes and modifiers which are automatically added to the charge transaction. The codes are then submitted along with the original charges to your billing system, and are then reported to the CMS when the claim is submitted for payment.
Answering the Clinical Metrics Questions
Every time you enter a charge transaction and submit it as a completed charge transaction, it is evaluated to determine if it fits the criteria for one or more quality measures. If it does, you are presented with the Clinical Metrics screen, which guides you through the question or questions for each qualifying measure. All, some, or none of the questions on the screen may be required, as determined by your system administrator:- If all of the questions are required, or if there is a mix of required and non-required questions:
- At a minimum, you must answer all of the required questions and then SUBMIT your responses. You cannot CANCEL out of the Clinical Metrics screen.
- If you leave any of the non-required questions unanswered when you SUBMIT your responses, it means that you have chosen to report nothing for those questions, resulting in a possible loss of the incentive revenue or a penalty. You will not be prompted to answer that measure’s questions again for that patient during the measure’s reporting time frame. For example, if a measure’s reporting frequency is once per calendar month, and you submit answers for only one out of the three questions for Joe Smith in January, then that one answer is your total submission for that measure for Joe Smith in January.
- If none of the questions are required, you have two options:
- You can answer some or all of the questions, and then SUBMIT your responses. Again, if you leave any of the non-required questions unanswered, this means that you have chosen to report nothing for that question for that specific patient, and this could possibly result in a loss of the incentive revenue or a penalty. You will not be prompted to answer that measure’s questions again in the same reporting time frame.
- You can CANCEL out of the Clinical Metrics screen entirely, without answering any questions. If in the same reporting time frame you later edit the same qualifying charge transaction, or enter a new qualifying charge transaction, you will be prompted to answer the same measure’s questions again. As a general rule, in order to maximize your quality incentive revenue and/or decrease penalties, it is best practice to answer all of the questions when they are presented to you.
-
Enter the charges, diagnoses, and detail information for your charge transaction as normal, and then tap SUBMIT.
If the charge transaction qualifies for quality reporting, the Clinical Metrics screen is displayed.
If you instead save the charge as a draft, the Commure Pro Clinical Metrics screen is not displayed; quality data is not collected for draft charges.
- Answer each question as it is presented to you. As soon as you answer a question, the application automatically proceeds to the next question. Here are some tips for navigating through the clinical metrics questions:
-
Tap Details to toggle between showing or not showing the full description of the question. When Details are on or off, they are on or off for all questions.

-
The bottom of the screen displays “Question n of n” to indicate your overall progress through the questions. Use the NEXT and BACK buttons to move forward and backward sequentially through the questions.


- Required questions are indicated by the words “This question is required” at the top of the screen.
- If there are any required questions, the SUBMIT button is not visible on the screen, and you must answer all of the required questions before the SUBMIT button is displayed.
- If none of the questions are required, the CANCEL button is enabled (so you may CANCEL without responding). You must answer at least one question before the SUBMIT button is enabled.
- Select SUBMIT to submit the charge transaction with your answers to the clinical metrics questions.
- If your organization is using the Registry method, your answers are recorded by the system and will be reported to the CMS at the end of the reporting period.
- If your organization is using the Claims Billing method, the appropriate CPT II codes and modifiers are now automatically added to the charge transaction and the entire transaction is submitted to the server. The Charges Summary screen is now displayed. After a moment, you should see a “Clinical metrics are submitted” message at the bottom of the screen. If the ability to view auto-added CPT II charges is enabled in your user profile, the Charges Summary screen will refresh and you will see the CPT II codes that were automatically added to the transaction. Each auto-added code has “(P)” for PQRS listed after the charge description. If this feature is not enabled, you can see only the original charges for services that you entered.
Making Changes to Charge Transactions with PQRS/MIPS Data
When a new completed transaction is submitted, the PQRS feature automatically records quality data in the registry (Registry method) or adds CPT II codes to the charge transaction (Claims Billing method). With the Claims Billing method, the auto-added CPT II codes are added after the transaction is submitted on the web or mobile application; the user does not see them being added. If a user views or edits the transaction after it has been submitted, they can see the auto-added CPT II codes only if the ability to view these type of charges has been enabled in their user profile. There may be occasions when a provider, biller, or administrator needs to make changes to either the original charges for services that the provider entered, or to the quality data. A user can only make changes if the charge transaction is still in an editable state, as described in Restrictions to Editing Charge Data. When a user edits a charge transaction that has charges with associated quality data, it may affect the auto-added CPT II codes on the transaction, or it may trigger an error status. The table below lists some common scenarios in which a user might need to make corrections to these charge transactions, along with the effect that each change will have.- This first set of scenarios might be encountered by a provider when entering their charges for service. They include cases where the provider made a mistake while entering charges or answering the questions on the Commure Pro Clinical Metrics screen. These cases apply to both the Registry method and the Claims Billing method.
- Scenario: Oops! You accidentally tapped CANCEL on the Clinical Metrics screen (this is possible only if all of the questions are non-required). Now you want to try again to answer the questions. Solution: When you tap CANCEL, no quality data is recorded by the system (Registry method) or no CPT II codes are added to the charge transaction (Claims Billing method). If you want to try to answer the Clinical Metrics form again, you can open the charge transaction for editing and then tap SUBMIT. The Clinical Metrics screen now displays. Answer the questions and tap SUBMIT.
- Scenario: You tapped SUBMIT on a Clinical Metrics screen, but you think that you answered one or more questions incorrectly, and now you want to correct those answers. Or, you left some or all of the non-required questions unanswered, and now you want to answer the questions that you skipped.
Solution: Once you tap the SUBMIT button on the Clinical Metrics screen, you cannot access it again to make changes. If you answered a question incorrectly, the wrong answer was recorded by the system (Registry method) or the wrong CPT II code was added to the transaction (Claims Billing method). Or if you left some questions unanswered, those were recorded by the system as unanswered (Registry method) or the additional CPT II codes that should have been added were not added to the charge transaction (Claims Billing method). To fix this, you can either:- ◊Delete the entire charge transaction and re-enter your original charges for services. The transaction will be re-evaluated, and the Clinical Metrics screen will display again if appropriate.
- Or, only for users of the Claims Billing method who have permission to view auto-added CPT II codes: Edit the charge transaction, remove the incorrect CPT II code, and/or manually add the missing CPT II code.
- Scenario: You entered your charges for services, answered all the questions on the Clinical Metrics screen, and then tapped SUBMIT. Now you want to delete some of the charges/diagnoses on the original charges for services. Solution: Based on your original charges for services, you answered questions for a specific measure or measures, which were either recorded by the system (Registry method) or added as CPT II codes to the transaction (Claims Billing method). If you remove an original charge or diagnosis, some of those measures (and their associated answers or CPT II codes) may no longer apply. If you edit the charge transaction and remove the original charges or diagnoses, the system will not automatically remove the associated answers or CPT II codes. To fix this, you can either:- ◊Delete the entire charge transaction and re-enter it, entering only the correct charges for services. The transaction will be re-evaluated, and the Clinical Metrics screen will display only if appropriate.
- Or, only for users of the Claims Billing method who have permission to view auto-added CPT II charges: Edit the transaction and remove both the original (incorrect) charge/diagnosis codes, as well as their associated (incorrect) CPT II codes. The CPT II codes will have a “(P)” next to them.
- Scenario: You entered your charges for services, answered all the questions on the Clinical Metrics screen, and then tapped SUBMIT. Now you realize that you forgot to include a related charge or a supporting diagnosis in your original charges for services, and you want to add it to the transaction. Solution: Based on your original charges for services, you answered questions for a specific measure or measures, and those answers were recorded by the system (Registry method), or the appropriate CPT II codes were automatically added to the transaction (Claims Billing method). Depending on the additions that you make to your original charges and diagnoses, some new measures may now apply. Edit the charge transaction, make your additions to the original services, and then tap SUBMIT (do not modify the existing CPT II codes on the transaction). The charge transaction is re-evaluated to see if it qualifies for any new quality measures, and if so, the Clinical Metrics screen is displayed. Answer the new questions and tap SUBMIT.- *The remaining scenarios below concern edits made to manually entered charges or auto-added CPT II charges. These scenarios apply only to clients using the Claims Billing method, and can be disregarded for clients using the Registry method. All of these scenarios start with a provider entering their charges for services, answering all the questions on the Clinical Metrics screen, and then tapping SUBMIT. Later, the same or a different user edits the transaction and takes one of the actions below. *
- Scenario: A user deletes an auto-added CPT II code. Solution: For a user who does not have permission to see auto-added CPT II charges, this action is impossible. For a user who does have permission to see auto-added CPT II charges, a PQRS Measures Mismatch error status is triggered, but the auto-added CPT II code is deleted and not reinstated.
- Or, only for users of the Claims Billing method who have permission to view auto-added CPT II codes: Edit the charge transaction, remove the incorrect CPT II code, and/or manually add the missing CPT II code.
- Scenario: A user deletes a diagnosis code at the transaction level (a diagnosis that was associated with all of the charges on the transaction, including auto-added CPT II charges). Solution: The diagnosis is removed from all of the charge codes on the transaction (whether visible or not) and is not reinstated.
- Scenario: A user checks or unchecks the box for a specific diagnosis code on a specific manually entered charge code, to associate or disassociate that diagnosis to/from that one charge code. Solution: For all users, the diagnosis is associated/disassociated to/from only the specific manually entered charge code that they changed. Any auto-added CPT II codes (whether visible or not) are not changed in any way.
- Scenario: A user checks or unchecks the box for a specific diagnosis code on a specific auto-added CPT II code, to associate or disassociate that diagnosis to/from that one charge code. Solution: For a user who does not have permission to see auto-added CPT II charges, this action is impossible. For a user who does have permission to see auto-added CPT II charges, the diagnosis is associated/disassociated to/from only the specific auto-added CPT II code that they changed.
Copying Transactions That Have PQRS/MIPS Data
Users may copy charge transactions for which they have completed a Commure Pro Clinical Metrics form. When copying such a transaction, only the original charges for service are copied (along with their modifiers, diagnoses, and charge detail information). The responses to the questions on the Commure Pro Clinical Metrics form, or the CPT II charges that were auto-added, are not copied to the new transaction. Prior to saving the copied transaction, the user may change the charge detail information, remove some of the copied charges/diagnoses, or add new charges/diagnoses. Once the user submits the new transaction, the entire transaction is evaluated to see if it meets quality reporting criteria, and if so, the Commure Pro Clinical Metrics screen is displayed so that the user can fill it out.Editing Charge Transactions
Making corrections to charge transactions is easy in Commure Pro. You can quickly change the charge codes, diagnosis codes, or charge detail information for a transaction. You can also remove individual charges or diagnoses from a transaction, or even delete an entire charge transaction, if necessary.Restrictions to Editing Charge Data
A charge can be edited or deleted if it meets all of the criteria below. These rules apply to providers (who are typically Level 3 users).- You entered the transaction yourself, or you are the billing provider on the transaction.
In addition, you may also be able to edit the transactions that were entered by other providers in your assigned departments, but only if those transactions are available on your device and you have permission to edit them.
- The transaction has a status of Draft, Draft (HH), or Holding Bin.
In addition, you may also be able to edit transactions that have a status of Outbox, but only if this ability is enabled in your user profile.
- The transaction is still within the editable date range defined in your user profile.
The visit’s end date is based on the date range defined for the Commure Pro visit type.
Opening a Charge Transaction for Editing
Follow these steps to open a charge transaction for editing:- From the Charges Summary, identify the visit day row that has the transaction that you want to edit.
-
Tap on the visit day row to select it. When the action buttons appear at the top of the Charges Summary screen, tap the Edit button .
The Charge Transaction screen opens in edit mode.
If the transaction opens in view-only mode, it means that it cannot be edited because it does not meet the criteria for allowing edits.
-
You may now perform the desired action:
- Make changes to the charge codes (including their associated quantity, modifiers, or detail fields). See Editing Charge Codes.
- Make changes to the diagnosis codes. See Editing Diagnosis Information.
- Make changes to the charge transaction detail information. See Entering Additional Detail Information for the Entire Charge Transaction.
- Delete the entire charge transaction. See Deleting an Entire Charge Transaction.
Editing Charge Codes
When you create a new charge transaction, you must select one or more charge codes. If you copied the transaction from a previous one, all of the charge codes on the previous transaction are copied to the new one. If you make a mistake when entering new charge codes, or if you want to remove a copied charge code, you can do so. Every charge on the transaction also has a quantity, and possibly one or more modifiers or charge detail fields. The quantity, modifiers, and detail fields can be changed as well. To edit the details of a specific charge code on a transaction, open the transaction for editing and then do one of the following:- Add a new charge code using any one of several methods to find the specific code. See the following:
- Remove a charge code. See Removing a Charge Code from a Transaction.
- Change the quantity, modifiers, or detail fields associated with a specific charge code. See the following:
- Change the order in which the charge codes are listed. See Re-Ordering the Diagnoses or Charges on a Transaction.
Removing a Charge Code from a Transaction
You can easily remove one or more charges from a charge transaction. Keep in mind that the transaction itself still remains - you are only removing a one item from it. To remove the entire charge transaction, see Deleting an Entire Charge Transaction. There are two ways to remove a charge code from a transaction; both are described below. While viewing the main Charge Transaction screen, you may decide that a charge code is not appropriate, and immediately delete it:- From the main Charge Transaction screen, select the Delete button to the right of the charge code that you want to remove.
- Tap SUBMIT to submit your changes. While viewing the main Charge Transaction screen, you may not be sure whether a charge code is appropriate. You can view the charge guidelines first, and then if necessary, delete the charge code from that screen.
- From the main Charge Transaction screen, tap on the charge code in question. The Charge Details screen opens, and the guidelines for usage are displayed at the bottom of the screen.
- After looking at the guidelines, if you decide that the code is not appropriate, tap the Delete button at the top of the Charge Details screen. The charge code is deleted from the transaction and the main Charge Transaction screen is redisplayed.
- Tap SUBMIT to submit your changes.
Changing the Quantity or Details for a Specific Charge Code
For any charge code that is displayed on the main charge transaction screen, you can change the quantity or the value of any charge detail field that is associated with that specific charge code.- From the main Charge Transaction screen, tap on the code or description of the specific charge that you want to change. The Charge Detail screen for that one charge code are displayed.
- Select the correct quantity in the Quantity field.
- In the middle section, change the value in any charge detail field.
- Tap Back to close the Charge Detail screen.
- Tap SUBMIT to submit your changes.
Adding or Changing Modifiers for a Specific Charge Code
Modifiers provide additional information about a charge. When you enter a charge code on a transaction, you can manually enter a modifier, a GC modifier (resident/teaching physician service) may be added to the charge automatically, or you may be prompted to add a GC modifier. Regardless of whether a modifier is added or not, you can always edit a charge transaction to either add a modifier, remove one, or change one that you previously selected. For instructions on adding or changing modifiers on a charge, see Entering a Modifier for a Specific Charge Code.Editing Diagnosis Information
Depending on how your user profile is configured, when you enter a new transaction, or copy a previous transaction, the diagnoses used on the patient’s previous transaction may be copied automatically to the new transaction. Or, those diagnoses may be displayed so that you can select the ones you want to copy to the new transaction (if any). This feature speeds up the charge entry process and can be enabled or disabled per user. In general, a transaction must have one or more diagnoses to be valid. If a transaction does not have any diagnoses, you are only allowed to save it as a draft. Commure Pro recommends that you the enter diagnosis information at all times, if possible, so as to maintain complete transactions that can be submitted to billing immediately. Please note that in some organizations, your administrator may have defined certain charge codes that do not require a diagnosis. In these instances, you are not required to save the transaction as a draft, and can in fact submit it to billing without a diagnosis. To edit the details of a diagnosis, open the transaction for editing and then do one of the following.- Add a new diagnosis code using any one of several methods to find the specific code. See the following:
- Remove a diagnosis. See the following:
- Change the order in which the diagnoses are listed. See Re-Ordering the Diagnoses or Charges on a Transaction.
Removing a Diagnosis from One Charge on a Transaction
When a new diagnosis is added to a transaction, it is automatically associated with all the charges. And conversely, when a new charge is added to a transaction, all diagnoses on the transaction are automatically associated with the charge. If you do not want a particular diagnosis to be associated with all of the charges on the transaction, you must manually remove the diagnosis association.- From the main Charge Transaction screen, tap on the code or description of the specific charge for which you want to remove a diagnosis. The Charge Detail screen opens. In the Diagnoses section of the screen, all of the diagnoses included on the transaction are listed, each with a checkmark to indicate that they are associated with the current charge code.
- Tap any diagnoses that you want to remove from this specific charge, and the checkmark is removed.
- Tap Back to close the Charge Detail screen. The diagnoses are no longer associated with the charge.
- Tap SUBMIT to submit your changes.
Removing a Diagnosis from an Entire Transaction
After creating a transaction by adding a charge, you may notice that the system defaults one or more of the patient’s previous diagnoses onto the transaction for you. Similarly, if you have created a transaction by copying an existing one, the diagnoses from the original charge may be copied forward to the new charge. If appropriate, you can remove one or more of these defaulted diagnoses from all of the charges in the transaction. To remove a diagnosis from all of the charges in the transaction, follow these steps:-
From the main Charge Transaction screen, tap the Delete button to the right of the diagnosis code that you want to remove.
The diagnosis is removed from the transaction.
Some diagnosis codes may not be appropriate for use as a primary diagnosis. If deleting a diagnosis code results in a non-primary diagnosis moving up to the primary position, the following message is displayed below the diagnosis in red text: “This diagnosis is not valid as a primary diagnosis for [visit type].” You may want to enter a new primary diagnosis and/or move the non-primary one out of the first position.
- Tap SUBMIT to submit your changes.
Re-Ordering the Diagnoses or Charges on a Transaction
In many cases, the order in which the diagnoses or the charge codes are listed is important to billing. You can re-order the diagnoses or charges in a transaction to indicate which is primary, secondary, and so on.- From the main Charge Transaction screen, review the list of charges or diagnoses, and identify a charge or diagnosis that you want to move to a different position.
- Tap and hold on the charge/diagnosis that you want to move, and then drag it to the new position. Note that a Sort icon appears to the left of each charge or diagnosis when you tap and hold, indicating that it can be moved.
Some diagnosis codes may not be appropriate for use as a primary diagnosis. If you try to drag such a code into the primary position, the following message is displayed below the diagnosis in red text: “This diagnosis is not valid as a primary diagnosis for [visit type].” You may want to enter a new primary diagnosis and/or move the non-primary one out of the first position.
- Tap SUBMIT to submit your changes. Please note that you cannot change the order of the diagnosis codes for a specific charge code, such that the order of diagnoses is different for one charge code versus another.
Editing Details for the Entire Charge Transaction
If you need to change the charge transaction detail information that is associated with the entire transaction, just scroll down to the Details section and make your changes. See Entering Additional Detail Information for the Entire Charge Transaction for more information on the charge detail fields.Editing a Charge Transaction to Hold It for Review
While reviewing charge transactions for a patient on the Charges Summary, you may decide that there are outstanding issues with a particular transaction and that you would like to hold it for review now. In this case, regardless of whether the transaction was held for review at the time it was initially entered, you can edit the transaction and hold it for review now, for any hold reason that you are authorized to use.- From the main Charge Transaction screen, tap the Hold for Review field and assess the current hold status:
- Any reason in black text without a checkmark is a reason for which the charge is not yet currently held for review. You can select any of these reasons to hold the charge for that reason now.
- Any reason in light gray text with a checkmark is a reason for which the charge is already held for review. You cannot modify the status of these reasons.
- Tap Back to return to the main Charge Transaction screen.
- Tap SUBMIT to submit your changes. The charge is held for review for the reason(s) that you selected, in addition to any previously selected reasons.
Deleting an Entire Charge Transaction
If you find that an entire charge transaction was entered in error, you can delete it, as long as it meets the requirements for editing. You can delete the transaction directly from the Charges Summary screen.- From the Charges Summary, identify the visit day row that has the transaction that you want to edit.
- Tap on the visit day row to select it. When the action buttons appear at the top of the Charges Summary screen, select the Delete button .
If the Delete button is not available, it means that the transaction cannot be edited or deleted because it does not meet the criteria for allowing edits/deletions.
- Select Yes to delete the transaction. The transaction is permanently deleted.